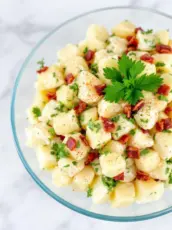
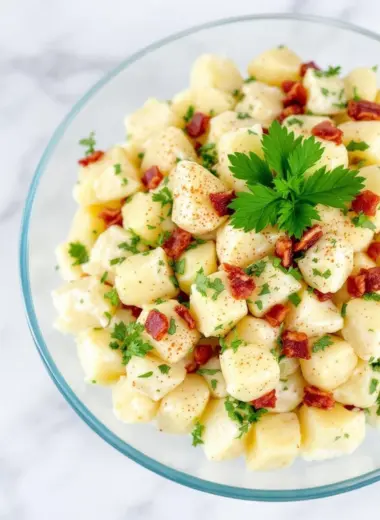
Blog

  • Cheese Ball Recipe

    When I first started making cheese balls, I was all about the quick fix. But over time, I realized it’s the tactile process—the feel of the cream cheese, the smell of toasted nuts—that makes it special. It’s not just about the ingredients, but how they come together in your hands, in your kitchen.

    This recipe isn’t fancy or complicated, but it’s honest. It’s about the mess, the trial, the tiny tweaks that turn a simple mixture into something you want to keep reaching for. It’s a comfort I come back to, especially when I need something reliable but with a little personal touch.

    A cheese ball recipe from a cook’s perspective, focusing on the tactile and sensory details that make the process honest and accessible.

    Why this cheese ball is my go-to comfort food

    • I love how tactile the process is, shaping the cheese with my hands.
    • There’s a quiet joy in rolling the coating onto the ball, feeling it stick.
    • Every time I make it, I tweak the herbs or nuts—just to keep it interesting.
    • It’s a recipe I’ve passed down, but always make it my own.

    The story behind my favorite cheese ball

    • I once made a cheese ball for a chaotic family gathering. It was the only thing everyone kept reaching for.
    • The smell of toasted nuts and herbs wafting through the kitchen always brings back those messy, happy days.
    • It’s not fancy, but it’s honest—something I can throw together quickly and still feel proud of.

    Cheese ball origin and fun facts

    • The cheese ball has roots in mid-20th-century American party cuisine.
    • Originally, nuts and herbs were used to disguise lower-quality cheeses.
    • It gained popularity as a festive appetizer in the 1950s and 60s.
    • Different regions add their own twists—spicy, smoky, or sweet coatings.
    • Today, it’s a nostalgic comfort, often made for holiday buffets or casual gatherings.

    Ingredient insights and tweaks

    • Cream cheese: I love how creamy and tangy it is, but sour cream can be a tangy substitute.
    • Sharp cheddar: Adds a punch of flavor. Use smoked gouda for a smoky twist.
    • Herbs: Fresh parsley or chives brighten the mix, but dried herbs work in a pinch.
    • Nuts: Toasted walnuts or pecans add crunch. Skip for nut allergies.
    • Spices: Smoked paprika gives a subtle smoky depth, but cayenne adds heat.

    Highlighting key ingredients

    Cream cheese:

    • The base’s silky texture depends on it. Use full-fat for richness.
    • Feel it soften, and it’ll blend smoothly, avoiding lumps.

    Sharp cheddar:

    • Its bright, pungent flavor cuts through richness. Shred finely for even melting.
    • Watch it melt into the mixture, creating a cohesive, gooey texture.

    Substitutions for different diets and tastes

    • Dairy-Free: Use vegan cream cheese; flavor stays creamy but less tangy.
    • Nut-Free: Skip nuts, use chopped olives or crispy bacon bits.
    • Herbs: Frozen chopped herbs are fine when fresh aren’t available.
    • Spices: Smoked paprika can be replaced with a dash of liquid smoke for smoky flavor.
    • Cheese: Gruyère adds a nutty note, but mozzarella keeps it mild.

    Equipment & Tools

    • Medium mixing bowl: Combine ingredients evenly.
    • Spatula: Fold ingredients gently and shape the ball.
    • Small plate: Roll the coated cheese ball.
    • Knife or scoop: Help shape the cheese mixture.

    Step-by-step guide to making a cheese ball

    1. Gather your ingredients and equipment. Use a medium bowl, a spatula, and a small plate for rolling.
    2. Soften the cream cheese at room temperature, about 30 minutes. This makes mixing easier.
    3. Mix the cream cheese, shredded cheese, herbs, and spices until just combined. Fold gently to keep it fluffy.
    4. Chill the mixture in the fridge for at least 30 minutes, covered.
    5. Shape the chilled mixture into a ball, about 8 cm (3 inches) in diameter, using your hands.
    6. Roll the ball in chopped nuts or herbs, pressing gently to adhere.
    7. Chill again for 15 minutes to set the coating.
    8. Serve at room temperature, with crackers or sliced bread.
    9. For leftovers, wrap tightly and store in the fridge for up to 3 days. Reheat briefly if desired.

    Rest the cheese ball in the fridge to firm up before serving, about 15-30 minutes.

    How to Know It’s Done

    • The cheese ball should feel firm but not hard.
    • The coating should stick nicely without falling off.
    • The cheese mixture should smell fresh, with hints of herbs and toasted nuts.

    Homemade Cheese Ball

    This cheese ball combines softened cream cheese with shredded cheese, herbs, and spices to create a creamy, tangy mixture that is shaped into a ball and coated with toasted nuts or herbs. Its final texture is smooth and firm, with a crunchy exterior that makes it perfect for spreading or serving with crackers and bread. The process emphasizes tactile mixing, shaping, and coating, resulting in a cozy, homemade appetizer.
    Prep Time 15 minutes
    Cook Time 15 minutes
    Total Time 30 minutes
    Servings: 8
    Course: Main Course
    Cuisine: American
    Calories: 180

    Ingredients
      

    • 8 oz cream cheese softened at room temperature
    • 1 cup shredded sharp cheddar cheese finely shredded
    • 2 tbsp chopped fresh herbs parsley or chives
    • 1/2 tsp smoked paprika
    • 1 cup chopped toasted nuts walnuts or pecans

    Equipment

    • Medium mixing bowl
    • Spatula
    • Small plate
    • Knife or scoop

    Method
     

    1. Gather all your ingredients and tools. Make sure the cream cheese is softened to room temperature for easy mixing.
    2. Add the softened cream cheese to your medium mixing bowl. Use a spatula to gently soften and loosen it if needed.
    3. Fold in the shredded sharp cheddar cheese, mixing until the mixture is smooth and evenly combined. You should see a creamy, slightly fluffy texture.
    4. Add chopped fresh herbs and sprinkle smoked paprika into the mixture. Gently fold everything together, letting the herbs release their aroma and the paprika add a subtle smoky hue.
    5. Cover the bowl with plastic wrap and refrigerate the mixture for at least 30 minutes to firm up, making it easier to shape.
    6. Once chilled, scoop out the cheese mixture with a spoon or scoop and use your hands to gently shape it into a ball about 8 centimeters in diameter.
    7. Place the shaped cheese ball onto your small plate. Press chopped toasted nuts into the surface, rolling the ball gently to ensure the coating sticks evenly.
    8. Refrigerate the coated cheese ball for an additional 15 minutes to set the coating and firm up the shape.
    9. Remove the cheese ball from the fridge and let it sit at room temperature for about 10-15 minutes. This enhances flavor and makes it easier to spread if desired.
    10. Serve your cheese ball with crackers, sliced bread, or fresh vegetables. Enjoy the creamy texture with the crunchy coating in every bite.

    Notes

    For extra flavor, add a dash of hot sauce or a pinch of cayenne pepper to the mixture before chilling. Feel free to experiment with different coatings like chopped herbs or spicy paprika for variety.

    Tips and tricks for a perfect cheese ball

    • Soften cream cheese at room temp for easier mixing.
    • Fold ingredients gently to keep the mixture light.
    • Chill the mixture before shaping to prevent sticking.
    • Use fresh herbs for vibrant flavor.
    • Toast nuts until fragrant, but don’t burn.

    Common mistakes and how to fix them

    • FORGOT TO chill the mixture? Pop it back in the fridge for 30 minutes.
    • DUMPED too much herbs? Use a damp cloth to gently brush off excess.
    • OVER-TORCHED coating? Reduce heat and quickly toss nuts or herbs in a dry pan.
    • MISSHAPEN ball? Wet your hands slightly to help shape smoothly.

    Fast fixes when things go awry

    • When mixture is too soft, chill longer or add shredded cheese.
    • Splash a little milk if coating feels dry or crumbly.
    • Patch cracks by pressing coating back onto the ball.
    • Shield from drying out by covering with plastic wrap.
    • When in doubt, refrigerate for 15 more minutes to firm up.

    Make-ahead tips and storage advice

    • Prep the mixture up to 24 hours in advance; keep it chilled and covered.
    • The coated cheese ball can be refrigerated for up to 3 days, but best enjoyed fresh.
    • Flavors deepen after a day or two, especially if herbs sit and meld.
    • Reheat briefly at room temperature or serve straight from the fridge, feeling the coolness.

    10 Practical Q&As for Making the Perfect Cheese Ball

    1. What cheese should I start with?

    Use cream cheese as your base, then fold in shredded sharp cheddar, chopped herbs, and a pinch of smoked paprika for depth.

    2. How long should I chill the cheese mixture?

    Chill the mixture for at least 30 minutes so it firms up enough to shape without sticking.

    3. How do I get a nice coating on the cheese ball?

    Wrap the shaped cheese ball in chopped nuts or herbs, pressing gently to adhere.

    4. What should I serve it with?

    Serve with crisp crackers or sliced baguette, ideally at room temperature for maximum flavor.

    5. Can I prepare it ahead?

    Make ahead: Wrap tightly and refrigerate up to 3 days. Freeze for up to a month, then thaw overnight.

    6. How do I shape it neatly?

    Use a small spatula or spoon to keep your hands clean when shaping. Wet your hands to prevent sticking.

    7. How do I keep it light and fluffy?

    Watch out for overmixing; it can make the cheese dense. Fold gently for a fluffy texture.

    8. It’s too soft to shape, what now?

    If the mixture is too soft, chill it longer or add a little more shredded cheese.

    9. How do I know if it’s seasoned right?

    Adjust seasonings by tasting the mixture before shaping. Feel free to add more herbs or spice.

    10. Does the cheese quality matter?

    Use a good quality cheese; it makes all the difference in flavor and meltability.

    This cheese ball feels like a little project you can get your hands into. It’s perfect for casual gatherings or just when you want to snack without fuss.

    The best part? It’s flexible. Add more herbs, swap out the nuts, or make it spicy. Whatever you do, it’s about that satisfying moment of shaping and sharing something you made yourself.

  • Sesame Apricot Tofu Bowl Recipe

    Ever notice how certain flavors instantly transport you back? That sweet, nutty aroma of toasted sesame combined with the fruity tang of apricot can take me right to my grandmother’s kitchen.

    This recipe isn’t about perfection but about embracing those familiar smells and textures—crisp tofu, sticky grains, and a bright, zingy dressing—that make a meal feel like a warm hug from the past.

    It’s a bowl that celebrates the everyday magic of simple ingredients, turned special by a handful of thoughtful touches and a dash of nostalgia.

    Cooking with a sensory memory of childhood: the smell of apricots and sesame oil mingling in a cozy kitchen.

    Why this recipe matters to me

    • I love how this dish feels like a quick hug after a long day.
    • It’s a reminder that simple ingredients can be turned into something special.
    • Cooking this bowl transports me back to summer mornings in my grandma’s garden.
    • I get proud when I see that perfect caramelized tofu, crispy and fragrant.
    • This meal has become my go-to comfort food, especially when I crave something sweet and savory.

    The story behind the Sesame Apricot Tofu Bowl

    • A chance encounter with a jar of apricot preserves sparked the idea.
    • Cooking with childhood memories of sweet mornings and sesame seed snacks.
    • Inspired by the vibrant markets where fresh produce and condiments beckon.

    Cultural and culinary roots of the Sesame Apricot Tofu Bowl

    • The use of apricot in Asian-inspired dishes dates back centuries, often in jams or sauces.
    • Sesame seeds have been cultivated for over 3,000 years, prized for their nutty flavor.
    • Tofu, originally from China, became popular worldwide as a versatile protein source.
    • The combination of sweet and savory in this bowl echoes traditional Chinese and Japanese flavor profiles.
    • Apricot preserves are a modern shortcut, but fresh apricots can be a delightful seasonal upgrade.

    Ingredient insights and tweaks

    • Tofu: I prefer firm tofu, pressed to squeeze out moisture, making it crispy and juicy inside. Swap with tempeh for a nutty twist.
    • Apricot jam: Bright, sticky, with a sweet hint of tartness. Use peach preserves if apricot isn’t available, though flavor shifts slightly.
    • Sesame seeds: Toasted until fragrant, they add crunch and nuttiness. Unsalted seeds are best for flavor control.
    • Grains: Fluffy rice or quinoa serve as a neutral base. Brown rice adds chewiness but takes longer to cook.
    • Fresh vegetables: Crisp cucumbers and carrots add fresh contrast. Pickled veggies could add a tangy punch.

    Spotlight on Apricots and Sesame Seeds

    Sesame Seeds: When toasted, they release a nutty aroma that fills the kitchen. They crackle and turn golden, adding texture.:

    • Apricots: Their bright, honeyed aroma intensifies when cooked, turning jammy and slightly caramelized.
    • They soften beautifully, releasing a sweet, tangy juice that balances the savory tofu.

    Apricot preserves: Thick, glossy, with a vivid fruity scent. They melt into the sauce, adding sticky sweetness.:

    • They’re best fresh but store well in an airtight container for a week.
    • Their aroma deepens when toasted, and they become more fragrant and flavorful.

    Substitution tips for ingredients

    • Dairy-Free: Use coconut aminos instead of soy, for a sweeter, richer umami.
    • Gluten-Free: Ensure your grains and soy sauce are certified GF.
    • Nut-Free: Skip sesame seeds or use toasted sunflower seeds for crunch.
    • Vegan: Confirm that the apricot preserves contain no added gelatin or animal products.
    • Low-Sugar: Use a sugar-free jam or reduce the amount in the marinade.

    Equipment & Tools

    • Large skillet: To fry and crisp the tofu.
    • Small bowl: To mix the marinade.
    • Toaster or dry skillet for seeds: To toast sesame seeds.
    • Measuring spoons and cups: For accurate ingredient amounts.
    • Knife and cutting board: To chop vegetables and tofu.

    Step-by-step guide to the Sesame Apricot Tofu Bowl

    1. Press the tofu for 15 minutes to remove excess water, then cut into 1-inch cubes.
    2. In a small bowl, whisk together soy sauce, sesame oil, apricot jam, and a splash of rice vinegar.
    3. Marinate the tofu in this mixture for at least 20 minutes, turning occasionally.
    4. While tofu marinates, toast sesame seeds in a dry skillet over medium heat until golden and fragrant, about 2-3 minutes.
    5. Cook your chosen grains (rice or quinoa) in vegetable broth for extra flavor, about 15 minutes.
    6. Heat a large non-stick skillet over medium-high heat. Add tofu with marinade, cook until crispy and caramelized, about 8-10 minutes.
    7. While tofu cooks, prepare your vegetables—slice cucumbers, carrots, or whatever you like for crunch.
    8. Assemble the bowls: start with grains, add tofu, fresh veggies, and a drizzle of the remaining marinade.
    9. Finish with chopped scallions, toasted sesame oil, and a sprinkle of toasted sesame seeds.
    10. Check for doneness: tofu should be crispy; grains tender; and the dressing glossy and flavorful.

    Let the assembled bowls sit for a minute to allow flavors to meld before serving.

    How to Know It’s Done

    • Tofu is golden and crispy on the outside.
    • Grains are fluffy and cooked through.
    • Dressing is bright, slightly sticky, with a balanced sweet and tangy flavor.

    Sesame Apricot Tofu Bowl

    This vibrant bowl features crispy tofu coated in a savory-sweet marinade, paired with sticky grains and fresh vegetables. The dish is finished with a bright, zingy dressing that balances nutty sesame and fruity apricot flavors, creating a comforting yet lively meal with appealing textures and colors.
    Prep Time 20 minutes
    Cook Time 25 minutes
    Total Time 45 minutes
    Servings: 4
    Course: Main Course
    Cuisine: Asian-inspired
    Calories: 420

    Ingredients
      

    • 14 oz firm tofu pressed to remove excess moisture
    • 3 tbsp soy sauce
    • 1 tsp sesame oil
    • 2 tbsp apricot jam or apricot preserves
    • 1 tsp rice vinegar optional
    • 3 tbsp sesame seeds toasted
    • 2 cups cooked grains rice or quinoa
    • 1 cucumber cucumber sliced
    • 2 carrots carrots julienned
    • 2 scallions scallions chopped, optional
    • to taste toasted sesame oil for drizzling

    Equipment

    • Large skillet
    • Small bowl
    • Toaster or dry skillet for seeds
    • Measuring spoons and cups
    • Knife and cutting board

    Method
     

    1. Wrap the tofu block in a clean towel and press with a heavy object for about 15 minutes to remove excess moisture, then cut into 1-inch cubes.
    2. In a small bowl, whisk together soy sauce, sesame oil, apricot jam, and rice vinegar until smooth and combined.
    3. Place the tofu cubes in the marinade and toss gently to coat. Let marinate for at least 20 minutes, flipping occasionally to absorb flavors.
    4. While the tofu marinates, toast sesame seeds in a dry skillet over medium heat until golden and fragrant, about 2-3 minutes, shaking the pan frequently.
    5. Cook your grains—rice or quinoa—in vegetable broth or water according to package instructions until fluffy, about 15 minutes.
    6. Heat a large skillet over medium-high heat. Add the marinated tofu cubes, reserving any extra marinade, and cook for 8-10 minutes until crispy and caramelized, turning occasionally to ensure even browning.
    7. While the tofu cooks, prepare fresh vegetables: thinly slice cucumbers and julienne carrots for a crunchy contrast.
    8. Assemble each bowl by layering a bed of grains, then topping with crispy tofu, sliced cucumbers, and carrots.
    9. Drizzle the remaining marinade over the bowls for extra flavor, then finish with chopped scallions and a sprinkle of toasted sesame seeds. Add a light drizzle of toasted sesame oil for aroma and shine.
    10. Serve immediately, allowing the flavors to meld and the tofu to stay crispy for the best experience.

    Tips and tricks for perfect results

    • Press tofu thoroughly to get the crispiest texture.
    • Toast sesame seeds until golden to boost flavor.
    • Use a non-stick skillet for easy flipping and less oil.
    • Marinate tofu in a shallow dish for even flavor absorption.
    • Add a splash of water or broth to loosen stuck grains or tofu.

    Common pitfalls and how to fix them

    • FORGOT to press the tofu? Wrap it in a towel and weigh it down for 10 more minutes.
    • DUMPED too much marinade? Pat the tofu dry before frying to avoid splatters.
    • OVER-TORCHED sesame seeds? Lower the heat and watch closely, stirring constantly.
    • UNDERCOOKED grains? Add a splash of hot water and steam for 2 more minutes.

    Fast fixes for common kitchen hiccups

    • If the tofu isn’t crispy, broil it for 2 minutes to re-crisp.
    • When grains are too sticky, rinse with hot water and reheat with a splash of broth.
    • Splash hot water on the skillet if tofu sticks; it will loosen and sizzle.
    • Patch over slightly burnt sesame seeds with fresh ones, if needed.
    • Shield delicate toppings with a paper towel if they’re getting soggy from the dressing.

    Prep and store tips for this dish

    • Marinate the tofu ahead of time; it keeps well in the fridge for up to 24 hours.
    • Cook grains in advance; store in an airtight container for up to 3 days.
    • Toast sesame seeds just before serving for maximum flavor and crunch.
    • Refrigerate leftovers in an airtight container for up to 2 days, but tofu may lose crispiness.

    10 Practical Q&As about the Sesame Apricot Tofu Bowl

    1. Can I use other types of tofu?

    Use firm tofu, pressed to remove excess water, so it gets crispy on the outside.

    2. How long should I marinate the tofu?

    Marinate the tofu with soy, sesame oil, and a splash of apricot jam for at least 20 minutes.

    3. How do I toast sesame seeds without burning them?

    Toast sesame seeds until golden and fragrant, about 2-3 minutes in a dry skillet.

    4. Can I cook the grains ahead of time?

    Cook the grains (like rice or quinoa) in vegetable broth for extra flavor.

    5. Can I substitute fresh apricots for preserves?

    Use ripe apricots or apricot preserves for the sweetest, most vibrant flavor.

    6. How do I adjust the acidity in the dressing?

    Balance the sweetness with a splash of rice vinegar or lime juice in the dressing.

    7. Can I add other toppings like nuts or pickled vegetables?

    Finish the bowl with chopped scallions and a drizzle of toasted sesame oil.

    8. How long is the dish good in the fridge?

    Serve immediately for the crispiest tofu and freshest flavors.

    9. Can I reheat the tofu without losing its crispiness?

    Reheat the grains and tofu separately if needed, then assemble just before eating.

    10. How do I make it spicier?

    Adjust chili flakes or hot sauce for more spice, if desired.

    Assembling this bowl is quick, and it’s a reminder that a good meal can come together in less than 30 minutes, yet feel deeply satisfying.

    Sometimes, it’s the simplest dishes that bring the most comfort, especially when they’re layered with personal memories and a splash of your favorite flavors.

  • Vegan Broccoli Cheddar Soup Recipe

    This vegan broccoli cheddar soup isn’t just about the taste, it’s about the experience. I remember late nights chopping broccoli, the smell of garlic filling my tiny kitchen, and that moment when I finally tasted something creamy and cheesy without any dairy. It’s messy, imperfect, but honest — just like cooking should be.

    When I first made this, I was after comfort, but I also wanted something quick and satisfying. No fancy ingredients, just everyday stuff, turned into something warm and nourishing. It’s a soup I make when I need a little bit of home in a bowl, no fuss, no pretenses.

    A practical, honest guide from a home cook who’s been through kitchen mishaps and loves sharing real tips.

    Why This Soup Matters to Me

    • I love how simple ingredients come together in this soup.
    • It reminds me of cozy weekends with friends and lots of laughter.
    • Getting the right cheesy flavor with no dairy is a small victory every time.

    My personal story with this soup

    • I stumbled upon this recipe during a winter when I craved comfort without dairy. It’s become a go-to because it’s honest and forgiving.
    • It’s a reminder that you don’t need fancy ingredients for a satisfying meal.
    • The process is almost meditative, chopping and blending, tasting and adjusting.
    • Plus, it’s a way to sneak in greens and nutrients without anyone noticing.

    The story behind the soup

    • This recipe evolved from traditional cheese and broccoli soups in American comfort food.
    • Nutritional yeast is a staple for vegan cheese flavor, originally used by brewers and bakers.
    • Broccoli became popular in the US during the 20th century, thanks to a health craze in the 1920s.
    • Vegan cheese alternatives have surged in popularity over the past decade, making recipes like this more accessible.

    Understanding key ingredients

    • Broccoli: First-time I used frozen, but fresh makes a brighter, crisper flavor.
    • Plant-based cheese: A mix melts better and adds depth. Try different brands for variety.
    • Nutritional yeast: It’s the magic umami that makes this soup cheesy. Don’t skip it!
    • Garlic and onion: Building a flavor base. Use fresh for the best aroma and taste.
    • Plant milk: Adds creaminess. Unsweetened keeps it from tasting chalky or overpowering.

    The stars of the show: Broccoli and Nutritional Yeast

    Broccoli:

    • Its vibrant green color and crisp texture make this soup lively. Keep it bright and fresh.
    • It cooks quickly, so don’t overdo it. A slight crunch adds contrast.

    Nutritional Yeast:

    • It’s the cheesy backbone, adding umami and depth. Keep in a jar in your pantry.
    • It shimmers with a golden hue when heated and smells nutty and savory.

    Substitutions to customize your soup

    • Dairy-Free: Use vegan cheese shreds for similar meltiness, but expect a slightly different flavor.
    • Thickener: Replace some of the plant milk with coconut cream for extra richness.
    • Broccoli: Cauliflower can be a neutral swap but will change the flavor.
    • Vegan butter: Olive oil can sub in for sautéing, adding a fruity note.
    • Herbs: Fresh thyme or sage can elevate the flavor with a different herbal note.
    • Salt: Soy sauce or miso paste can add saltiness and umami.

    Equipment & Tools

    • Large pot: Cook and simmer ingredients
    • Immersion blender or regular blender: Puree the soup
    • Measuring spoons and cups: Accurate seasoning and ingredient measuring
    • Ladle and stirring spoon: Serving and stirring
    • Sharp knife and chopping board: Prep vegetables

    Step-by-step guide to perfect vegan broccoli cheddar soup

    1. Heat a large pot over medium. Add a tablespoon of olive oil and sauté diced onion and garlic until translucent, about 5 minutes.
    2. Add chopped broccoli and cook for another 3 minutes, stirring often. Let it turn bright green and slightly tender.
    3. Pour in vegetable broth and bring to a gentle simmer. Cook until broccoli is soft, about 10 minutes.
    4. Use an immersion blender or transfer to a blender in batches. Puree until smooth but leave some texture. Be careful with hot liquid!
    5. Return to heat, stir in plant-based cheese, nutritional yeast, and a splash of plant milk. Season with salt, pepper, and a pinch of nutmeg.
    6. Simmer gently for 5 more minutes, tasting and adjusting seasoning. The soup should be creamy, cheesy, and vibrant.
    7. Ladle into bowls, garnish with extra cheese or toasted bread, and serve hot.

    Let the soup sit for 2-3 minutes after blending, then serve immediately with your favorite toppings.

    How to Know It’s Done

    • Broccoli should be bright green and just tender.
    • The soup should be steaming and slightly thickened after blending.
    • Cheese should melt smoothly without clumping or burning.

    Vegan Broccoli Cheddar Soup

    This vegan broccoli cheddar soup combines fresh broccoli, garlic, and onion simmered in vegetable broth until tender, then pureed to a creamy consistency. Nutritional yeast and plant-based cheese create a cheesy flavor without dairy, resulting in a vibrant, thick soup with a comforting texture. It’s perfect for cozy nights when you crave something warm, nourishing, and honest in flavor.
    Prep Time 15 minutes
    Cook Time 20 minutes
    Total Time 35 minutes
    Servings: 4
    Course: Main Course
    Cuisine: American
    Calories: 220

    Ingredients
      

    • 1 tablespoon olive oil
    • 1 medium onion diced
    • 3 cloves garlic minced
    • 4 cups fresh broccoli florets
    • 4 cups vegetable broth
    • 1/4 cup nutritional yeast adds cheesy umami flavor
    • 1 cup plant-based cheese shreds melts into the soup
    • 1/2 cup plant milk unsweetened, for creaminess
    • to taste salt and pepper
    • a pinch nutmeg optional

    Equipment

    • Large pot
    • Immersion blender or regular blender
    • Measuring spoons and cups
    • Ladle and stirring spoon
    • Sharp knife and chopping board

    Method
     

    1. Heat a large pot over medium heat, then add a tablespoon of olive oil. Once shimmering, add diced onion and cook, stirring occasionally, until translucent and fragrant, about 5 minutes.
    2. Add minced garlic to the pot and cook for another minute until it becomes fragrant, filling the kitchen with a warm aroma.
    3. Stir in the broccoli florets and cook for 3 minutes, allowing them to turn bright green and slightly tender, making a satisfying crunch if tasted at this stage.
    4. Pour in the vegetable broth and bring the mixture to a gentle simmer. Cook until the broccoli is soft and easily pierced with a fork, about 10 minutes.
    5. Use an immersion blender directly in the pot, or transfer the soup in batches to a blender, and blend until smooth but still slightly textured. Be careful with the hot liquid!
    6. Return the pureed soup to gentle heat, then stir in the plant-based shredded cheese, nutritional yeast, and plant milk. Keep stirring until the cheese melts into a creamy, cheesy consistency.
    7. Season with salt, pepper, and a pinch of nutmeg, then simmer for another 5 minutes, tasting and adjusting seasoning as needed. The soup should be thick, creamy, and vibrant green.
    8. Ladle the hot, cheesy broccoli soup into bowls, garnish with extra cheese or fresh herbs if desired, and serve immediately for a cozy, nourishing meal.

    Tips and tricks for perfect soup

    • Use a wide, shallow pan to get even cooking and better sautéing.
    • Taste as you go — cheese and seasoning can vary in saltiness.
    • Add a splash of lemon or vinegar at the end for brightness.
    • Simmer gently; aggressive boiling can break down the broccoli and make the soup cloudy.
    • Stir frequently to prevent sticking and burning at the bottom.
    • Use an immersion blender for easy blending directly in the pot.
    • Don’t skip tasting—seasoning makes or breaks the flavor.

    Common mistakes and how to fix them

    • FORGOT TO blend enough? Blend in small batches and add a splash more broth.
    • DUMPED in too much cheese? Stir vigorously and add a little plant milk to loosen.
    • OVER-TORCHED the soup? Lower the heat and stir in a bit more broth or water.
    • SALT too bland? Adjust at the end, adding a pinch more, and taste again.

    Quick fixes for common issues

    • If soup is too thick, splash in hot broth to loosen.
    • When flavor is flat, add a splash of lemon juice or vinegar.
    • Patch dull taste with more nutritional yeast or salt.
    • Shield with a lid and simmer longer if flavors are dull.
    • Splash with hot water or broth if you need to rescue a too-strong flavor.

    Prepping and storing for convenience and flavor

    • Chop broccoli and onion a day ahead; store in airtight containers in the fridge.
    • Soup can be refrigerated for up to 3 days; reheat gently, stirring often.
    • Freezing is possible, but texture may change slightly. Best within 1 month.
    • Flavor deepens overnight, so it’s great to make in advance.

    10 Practical Q&As about Vegan Broccoli Cheddar Soup

    1. Can I use different cheeses?

    Use a mix of sharp and mild plant-based cheeses for depth and creaminess. Nutritional yeast adds a cheesy umami.

    2. How do I prep the broccoli?

    Blanch the broccoli until bright green and just tender, about 3-4 minutes. It keeps the texture fresh.

    3. How long to simmer?

    Simmer the soup gently, just until flavors meld. Avoid boiling vigorously to prevent breakdown of ingredients.

    4. How smooth should it be?

    Use a sturdy blender, or blend in batches. Puree until smooth, with some broccoli bits for texture.

    5. When should I season?

    Taste and adjust salt and pepper at the end. A pinch of nutmeg brightens the cheesy flavor.

    6. How do I keep it warm?

    Keep the soup warm on low heat, stirring occasionally. Serve immediately for best texture.

    7. How long does it last?

    Leftovers keep well in the fridge for 3 days. Reheat gently on the stove, stirring often.

    8. How do I fix thin soup?

    Thicken with a little more nutritional yeast or a cornstarch slurry if needed.

    9. Can I use frozen broccoli?

    Use fresh broccoli for vibrant color and texture. Frozen works in a pinch, just thaw and drain.

    10. How do I enhance the flavor?

    Add a splash of lemon juice or vinegar before serving. It brightens the cheesy, earthy flavors.

    This soup has become a staple because it hits all the right notes — fresh, cheesy, a little smoky from the nutritional yeast, and oddly nostalgic. It’s perfect for chilly days or whenever you crave something hearty but light.

    It’s one of those recipes that reminds me cooking is just about balancing flavors and textures, making do with what’s in the fridge, and tasting as you go. No matter how many times I make it, I find a new tweak, a new favorite bite.

  • Mediterranean Bean Salad Recipe

    Most people toss leftover beans into a soup or stew, but I see them as a blank canvas for a quick, fresh salad. It’s a way to reclaim what you might overlook and turn it into something lively and satisfying.

    This salad is about embracing simplicity—using what’s already in the fridge, adding a splash of lemon or a handful of herbs, and suddenly dinner feels a lot less like a chore.

    The Unusual Art of Using Leftover Beans to Create a Vibrant, Flavorful Salad

    Why This Salad Matters to Me

    • I love how this salad brings together whatever beans I have on hand.
    • It’s a lifesaver after a long day when I don’t want to cook much.
    • The smell of garlic and lemon always lifts my mood.
    • I feel proud when I turn leftovers into something fresh and vibrant.

    The Inspiration Behind the Salad

    • I once made a big batch of beans and didn’t want them to go to waste. Throwing in some tomatoes, herbs, and a squeeze of lemon turned leftovers into a bright, satisfying meal.
    • It’s a reminder that with a little creativity, everyday ingredients can shine.
    • This dish is about making the most of what you have, with no fuss and maximum flavor.

    The Roots and Quirks of Mediterranean Bean Salad

    • This salad has roots in Mediterranean countries where beans and fresh herbs are staples.
    • The combination of beans, lemon, and herbs is a common way to make a filling yet light meal.
    • Using leftover beans in this way is a modern twist on traditional peasant dishes, emphasizing simplicity.

    Ingredients in Focus

    • Beans: I prefer chickpeas for their creamy texture, but kidney beans add color and heft. Swap if you like a firmer bite.
    • Olive oil: I use good extra virgin for richness; a lighter oil works if you prefer less intense flavor.
    • Lemon: Brightens everything. Use a fresh lemon for that zesty, zingy punch.
    • Herbs: Parsley is classic, but basil or mint can bring a different vibe.
    • Garlic: Adds a punch of aroma. Roast slightly for a mellower flavor or use raw for sharpness.

    Spotlight on Beans and Lemon

    Beans:

    • They’re the hearty backbone, with a tender bite and earthy flavor that anchors the salad.
    • Lemon: The zingy bright spot that cuts through richness, making every bite lively and fresh.

    Lemon:

    • Beans: Their creamy texture soaks up dressing beautifully, making each forkful satisfying.
    • Its zest and juice wake up the palate, adding a fresh, citrusy aroma that’s unmistakable.

    Substitutions to Make It Your Own

    • Dairy-Free: Skip cheese; add avocado or a handful of toasted nuts for richness.
    • Gluten-Free: This salad is naturally gluten-free, but watch for cross-contamination in pre-mixed herbs.
    • Vegan: Use olive oil and skip any cheese, perhaps add some olives for saltiness.
    • Extra Protein: Toss in some grilled chicken or tuna for a more filling dish.
    • Herb Variations: Swap parsley for basil, mint, or cilantro depending on your mood.

    Equipment & Tools

    • Large mixing bowl: To toss and combine all ingredients.
    • Small jar or bowl: To prepare the dressing.
    • Knife and chopping board: To prep vegetables and herbs.
    • Measuring spoons and cups: To measure dressing ingredients.

    Making the Mediterranean Bean Salad

    1. Drain and rinse your beans thoroughly to remove excess salt and starch.
    2. In a large bowl, combine beans with chopped tomatoes, cucumbers, and red onion.
    3. In a small jar, shake together olive oil, lemon juice, minced garlic, salt, and pepper for the dressing.
    4. Pour the dressing over the beans and veggies, tossing gently to coat everything evenly.
    5. Sprinkle with chopped herbs, like parsley or basil, for that fresh, aromatic punch.
    6. Taste and adjust seasoning—more lemon, salt, or herbs as needed.

    Let the salad sit for 10 minutes before serving to let flavors meld. Serve at room temperature or chilled.

    How to Know It’s Done

    • Beans should be tender but not mushy, with a slight bounce when pressed.
    • Dressing should be bright and herby, not heavy or greasy.
    • Herbs should be fragrant and lively, not wilted or dull.

    Mediterranean Bean Salad

    This vibrant salad uses leftover beans as a base, combining them with fresh vegetables, herbs, lemon juice, and olive oil for a quick and satisfying dish. The ingredients are gently tossed to create a colorful, tender, and zesty salad that is perfect for a light lunch or side. Its final texture is soft yet lively, with bright flavors and aromatic herbs shining through.
    Prep Time 10 minutes
    Total Time 10 minutes
    Servings: 4
    Course: Main Course
    Cuisine: Mediterranean
    Calories: 180

    Ingredients
      

    • 1 can (15 oz) chickpeas or other cooked beans drained and rinsed
    • 1 cup diced tomatoes cherry or grape, halved if large
    • 1/2 cup diced cucumbers seeded and chopped
    • 1/4 cup finely chopped red onion
    • 3 cloves garlic minced
    • 1/4 cup extra virgin olive oil
    • Juice of 1 lemon lemon juice
    • 2 tablespoons chopped fresh herbs parsley, basil, or mint
    • to taste salt and pepper

    Equipment

    • Large mixing bowl
    • Small jar or bowl
    • Knife and chopping board
    • Measuring spoons and cups

    Method
     

    1. Start by draining and rinsing your beans thoroughly in a colander until the water runs clear, removing excess salt and starch. Transfer them to a large mixing bowl.
    2. Add the diced tomatoes, chopped cucumbers, and red onion to the bowl with the beans. Gently toss everything together with a spoon to combine the colorful vegetables evenly.
    3. In a small jar or bowl, whisk together the minced garlic, olive oil, lemon juice, salt, and pepper until the dressing is smooth and slightly fragrant. This will create a bright, herby vinaigrette.
    4. Pour the dressing over the bean and vegetable mixture, then gently fold with a spoon to coat everything evenly. The salad should look vibrant and slightly glossy.
    5. Sprinkle the chopped fresh herbs over the top, adding a burst of aroma and color. Toss again gently to distribute the herbs throughout.
    6. Taste the salad and adjust the seasoning with additional lemon juice, salt, or pepper as desired. Let it sit for about 10 minutes to allow flavors to meld.
    7. Serve the salad at room temperature or chilled, enjoying the fresh, lively flavors with each bite. It’s perfect as a light main or a vibrant side.

    Tips & Tricks for Perfect Salad

    • HERBS: Chop herbs finely to release maximum aroma.
    • DRESSING: Whisk dressing ingredients vigorously for a silky texture.
    • BEANS: Use beans at room temperature for better flavor absorption.
    • VEGETABLES: Salt and marinate cucumbers and tomatoes briefly to enhance taste.
    • LEMON: Add lemon juice gradually, tasting as you go for brightness.

    Common Mistakes and How to Fix Them

    • FORGOT TO RINSE BEANS? Rinse again to remove excess salt and starch.
    • DUMPED TOO MUCH DRESSING? Add more beans or veggies to balance flavors.
    • OVER-TORCHED THE GARLIC? Use fresh garlic in the future for a sharper aroma.
    • MISSED THE HERBS? Add them at the end for maximum freshness.

    Fast Fixes for Common Issues

    • When too bland, splash with more lemon juice or vinegar.
    • When too dry, stir in a drizzle of olive oil.
    • When beans are mushy, serve as a warm mash instead.
    • Patch over-salted beans with a squeeze of lemon and fresh herbs.
    • When herbs wilt, add fresh on top just before serving.

    Prepping and Storing the Salad

    • Prepare the salad up to 24 hours in advance. Keep the dressing separate until just before serving.
    • Store in an airtight container in the fridge. Flavors deepen over time, becoming more cohesive.
    • Add fresh herbs just before serving to keep their aroma lively.
    • Refrigerate for 1-2 days; the beans may absorb some dressing, so toss again before serving.

    10 Practical Q&As About Mediterranean Bean Salad

    1. Can I use different beans in this salad?

    Use a mix of chickpeas, kidney beans, and cannellini for a colorful, textured salad. Rinse well to remove excess salt and starch.

    2. What if I don’t have fresh herbs?

    Yes, feel free to swap or add black beans or lentils. Just keep in mind the texture and flavor differences.

    3. Can I make this ahead?

    Dried herbs work, but add them sparingly. Fresh herbs give that bright, punchy aroma that dried can’t quite match.

    4. How long does it keep in the fridge?

    Absolutely. Prepare the salad a day in advance, but add herbs and dressing just before serving to keep it lively.

    5. Should I serve it cold or at room temperature?

    Up to 2 days, stored in an airtight container. Expect flavors to mellow a bit over time.

    6. Can I add cheese or meat?

    Let it sit out for 15 minutes before serving if refrigerated. It tastes better slightly warmer, with the herbs more aromatic.

    7. Is this salad suitable for vegans?

    Yes, crumbled feta or grilled chicken work well, adding richness and a savory contrast.

    8. Any tips for making it more filling?

    Yes, just skip any cheese or animal-based ingredients. It’s naturally plant-based.

    9. What’s the best way to serve this salad?

    Add grains like bulgur or quinoa, or top with toasted nuts for extra heft and crunch.

    When the weather warms up, this salad becomes a go-to. It’s easy to make in a flash, and it hits all the right notes—bright, hearty, and just a little tangy.

    Sometimes, it’s the simplest things—like a bowl of beans dressed in olive oil and herbs—that remind me why I cook. No fuss, just flavor.

  • Peanut Butter Sauce (savory) Recipe

    Peanut butter isn’t just for sandwiches anymore. I keep a jar around because of its magic in sauces, especially when I want something that feels both earthy and lush.

    This sauce is like a little secret weapon, adding a rich, salty, slightly sweet punch to everything from roasted veggies to grilled chicken.

    Making it is honestly just dumping and whisking—no fancy techniques, just a warm kitchen, a spoon, and a taste for the unexpected.

    The savory peanut butter sauce as a secret ingredient—unveiling how it elevates simple dishes with unexpected depth.

    Why This Sauce Matters to Me

    • I love how this sauce transforms a simple stir-fry into something memorable.
    • It reminds me of childhood lunches but with a grown-up, complex flavor.
    • When I’m in a rush, this quick sauce saves dinner, turning plain into special.

    My journey with this sauce

    • A friend once brought a jar of peanut sauce to a potluck, and it blew me away. It made me realize how versatile and forgiving peanut butter can be. Since then, I’ve played with it, balancing salty, sweet, and tangy. It’s become my go-to for quick, bold flavor.
    • I like the simplicity of it—no fancy ingredients, just honest flavors. It’s a reminder that good food doesn’t need to be complicated.
    • Over the years, I’ve added my own twists, like a splash of lime or a dash of chili, to keep it exciting.

    The unexpected history of peanut butter in savory sauces

    • Peanut sauces date back centuries in Southeast Asia, but the savory twist with soy and vinegar is more modern.
    • The combination of salty, sweet, and tangy in this sauce mirrors many Asian dipping sauces, but with a distinctly American peanut butter base.
    • A good peanut butter sauce can be traced to street food vendors who needed quick, flavorful accompaniments.
    • Peanut butter’s natural oils help create a glossy, smooth sauce that clings well to food.

    Ingredient insights and tweaks

    • Natural peanut butter: I prefer creamy for smoothness, but chunky adds texture. Warm it to loosen.
    • Soy sauce: It’s salty and umami-rich. Swap with coconut aminos for a milder, sweeter profile.
    • Honey: Adds shine and balance. Use maple syrup for a vegan, more complex sweetness.
    • Rice vinegar: Brightens the sauce with tang. Lemon juice can substitute for a sharper note.
    • Garlic: Minced or grated, it boosts aroma. Skip for a milder, more delicate flavor.
    • Warm water: Adjusts consistency. Use broth for added depth.

    Spotlight on Peanut Butter and Soy Sauce

    Peanut Butter:

    • It’s the backbone, bringing richness and creaminess. Its oils help emulsify the sauce.
    • It melts into the warm mixture, creating a velvety texture with a nutty aroma.

    Soy Sauce:

    • It’s the salty backbone, anchoring the sauce’s umami depth.
    • It adds a savory, slightly fermented aroma that balances the sweetness.

    Substitutions to suit your pantry and dietary needs

    • Dairy-Free: Swap soy sauce with coconut aminos for a milder, sweeter umami flavor.
    • Vegan: Use maple syrup instead of honey, maintaining sweetness without animal products.
    • Low-Sodium: Choose low-sodium soy sauce or tamari to control salt levels.
    • Nut-Free: Use sunflower seed butter for a similar creamy, nutty base.
    • Gluten-Free: Ensure soy sauce or tamari is gluten-free.

    Equipment & Tools

    • Small saucepan: Gently warms the sauce and melds flavors.
    • Whisk: Ensures a smooth, emulsified sauce.
    • Measuring spoons and cups: Accurate measurement of ingredients.
    • Spatula: Stirring and scraping the bowl.

    Step-by-step guide to a luscious savory peanut butter sauce

    1. Measure out ½ cup natural peanut butter. Warm it slightly in the microwave or on low heat to loosen.
    2. In a bowl, whisk together 2 tablespoons soy sauce, 1 tablespoon honey, and 1 teaspoon rice vinegar.
    3. Add the warm peanut butter to the soy mixture. Whisk until smooth. If it’s too thick, stir in 1-2 tablespoons warm water.
    4. Taste and adjust: add more soy for saltiness, honey for sweetness, or vinegar for brightness.
    5. Heat gently in a saucepan over low heat for 2-3 minutes, stirring constantly, until fragrant and slightly simmering.
    6. Check the texture—should be silky and pourable. If too runny, simmer a bit longer; if too thick, stir in a splash of warm water.
    7. Remove from heat. Rest for 5 minutes to let flavors meld before serving.

    Let the sauce sit for 5 minutes off heat to deepen flavors. Serve warm or at room temperature, drizzled over your favorite dishes.

    How to Know It’s Done

    • Color should be a smooth, peanutty beige.
    • Smell should be warm, nutty, with a hint of soy and vinegar.
    • Consistency should be pourable but not runny, with a slight sheen.

    Savory Peanut Butter Sauce

    This versatile sauce combines creamy peanut butter with soy sauce, honey, and rice vinegar to create a rich, salty, and slightly sweet condiment. Whisked together and gently heated, it develops a glossy, smooth texture perfect for drizzling over roasted vegetables, grilled meats, or stir-fries, adding depth and a nutty flavor to simple dishes.
    Prep Time 5 minutes
    Cook Time 5 minutes
    Total Time 10 minutes
    Servings: 4
    Course: Main Course
    Cuisine: American
    Calories: 95

    Ingredients
      

    • ½ cup natural peanut butter creamy preferred, warm to loosen
    • 2 tablespoons soy sauce or coconut aminos
    • 1 tablespoon honey or maple syrup for vegan option
    • 1 teaspoon rice vinegar or lemon juice
    • 1-2 tablespoons warm water to adjust consistency

    Equipment

    • Small saucepan
    • Whisk
    • Measuring spoons and cups
    • Spatula

    Method
     

    1. Place the natural peanut butter in a small bowl and warm it slightly in the microwave or on low heat until it’s soft and runny, about 10-15 seconds. This helps it whisk smoothly.
    2. In the saucepan, whisk together the soy sauce, honey, and rice vinegar until well combined. Let it sit nearby for easy pouring.
    3. Add the warm peanut butter to the soy mixture, whisking constantly until the sauce turns smooth and glossy. It should be silky with a nutty aroma.
    4. If the sauce feels too thick, gradually add 1 tablespoon of warm water, whisking until it reaches a pourable, sauce-like consistency. Adjust with more water if needed.
    5. Place the saucepan over low heat and gently warm the sauce, stirring constantly, until it is fragrant and slightly bubbling, about 2-3 minutes. Be careful not to overheat or burn the peanut butter.
    6. Remove the sauce from heat and give it a final stir. Check the flavor—add more soy for saltiness, honey for sweetness, or vinegar for brightness if needed.
    7. Let the sauce sit off the heat for a couple of minutes; this allows the flavors to meld and develop richer depth.
    8. Pour the finished sauce into a small bowl or jar. It should be thick, shiny, and smooth—perfect for drizzling or dipping.
    9. Serve the sauce warm or at room temperature, drizzled over roasted vegetables, grilled chicken, or stirred into a stir-fry for an extra layer of flavor.

    Tips and tricks for a perfect sauce

    • FLAVOR: Toast your peanut butter lightly before mixing for a deeper, smoky flavor.
    • HEAT: Keep heat low during simmering to prevent burning and separation.
    • BALANCE: Taste often and adjust soy, honey, and vinegar in small increments.
    • TEXTURE: Use warm water to thin or thicken the sauce as needed.
    • TEXT: Stir constantly when heating to prevent sticking and scorching.

    Common mistakes and how to fix them

    • FORGOT TO WHISK thoroughly? Warm the peanut butter first, then whisk vigorously to smooth.
    • DUMPED too much soy? Dilute with warm water or coconut milk to balance saltiness.
    • OVER-TORCHED the sauce? Remove from heat immediately, whisk in cold water to stop cooking.
    • SEPARATION after storage? Whisk vigorously or gently warm to reincorporate the oils.

    Quick fixes for common sauce issues

    • When sauce is too thick, splash in warm water, stir until silky.
    • If sauce is too salty, add a squeeze of lime or a touch of honey.
    • For a smoother texture, blend the sauce briefly with an immersion blender.
    • If it separates, warm gently and whisk vigorously.
    • Splash some hot water to revive thick sauce without diluting flavor.

    Make ahead and storage tips

    • You can make the sauce a day ahead. Keep it in an airtight jar in the fridge.
    • It will thicken slightly overnight—stir in warm water or a splash of coconut milk to loosen.
    • Flavors deepen after resting, so it’s good to prepare in advance.
    • Reheat gently on low, stirring until smooth and fragrant.

    10 Practical Q&As About Making Savory Peanut Butter Sauce

    1. Can I use chunky peanut butter?

    Use natural peanut butter for a richer, creamier texture and better flavor. Stir well before measuring.

    2. What if my sauce is too thick?

    Yes, but blend it smoothly first or whisk vigorously to avoid clumps in the sauce.

    3. How do I balance the saltiness?

    Add a splash of warm water or broth, whisk until smooth, and adjust to desired consistency.

    4. Can I make this vegan?

    Taste the sauce after adding soy sauce or salt, then add small pinches gradually to avoid oversalting.

    5. What’s a good substitute for honey?

    Absolutely, just ensure your soy sauce or tamari is vegan-friendly, and skip honey if using.

    6. How long does it last in the fridge?

    Maple syrup or agave nectar work well as vegan sweeteners, adding a gentle sweetness.

    7. Can I freeze this sauce?

    Store in an airtight container for up to 3 days. Reheat gently, stirring to reincorporate.

    8. How do I fix a curdled sauce?

    Yes, freeze in small portions for up to a month. Thaw in fridge overnight and stir well.

    9. What should I do if the sauce is too salty?

    Whisk vigorously over low heat, or add a splash of warm water to smooth it out.

    10. How do I prevent burning the peanut butter?

    Dilute with a bit more water or coconut milk, and balance with a touch of honey or lime.

    This sauce makes me feel like I’ve cracked a code—simplicity with a punch of flavor. It’s a quick fix for weeknights and a sneaky way to make leftovers feel new.

    Plus, it’s got that nostalgic, familiar vibe but with a grown-up twist. It’s weirdly comforting, and honestly, I keep it in my fridge just in case I need a quick flavor boost.

  • Gingerbread Latte Recipe

    In the dead of winter, I crave more than just hot chocolate. I want something spicy, warm, and with a hint of nostalgia. A gingerbread latte hits that sweet spot—rich, fragrant, and impossibly cozy. It’s more than a drink; it’s a little ritual that makes the cold outside a bit more bearable.

    Making this at home means I get to tweak the spice level, add a splash of cream, and really smell the ginger and cinnamon mingling in the air. It’s a warm hug in a mug, perfect for mornings that need a little extra cheer or afternoons that feel a bit too grey.

    Focusing on the nostalgic warmth of homemade gingerbread latte, with an emphasis on fresh, real ingredients and the sensory joy of crafting a cozy drink.

    Why This Gingerbread Latte Means So Much to Me

    • I love how the fresh ginger makes my kitchen smell like a bakery.
    • Sometimes I add a dash of vanilla for a creamier touch.
    • The first sip always makes me feel warm and a little nostalgic.
    • I’ve lost count of how many times this has brightened a gloomy morning.
    • Making it from scratch feels like giving a gift to myself.

    A Personal Connection to Spiced Comfort

    • Growing up, my mom’s holiday baking always included gingerbread cookies and spiced drinks. I remember the warm, spicy smell filling the house, making everything feel cozy and safe.
    • This recipe is a tribute to those memories, with a grown-up twist that keeps it modern and simple.
    • It’s become my winter ritual—an easy way to bring a little festive spirit into everyday life.

    A Brief History of Gingerbread and Coffee

    • Gingerbread cookies date back to medieval Europe, with recipes evolving over centuries.
    • The combination of ginger, cinnamon, and cloves was historically used for medicinal purposes.
    • The latte format became popular in the US in the 1980s, blending coffee with milk and flavors.
    • Molasses in gingerbread recipes adds a deep, smoky sweetness, reminiscent of holiday baking.

    Breaking Down Key Ingredients

    • Fresh ginger: I love its fiery punch, but dried works in a pinch. Use less since dried is more concentrated.
    • Cinnamon: The aroma is intoxicating, but too much can overpower. Start small.
    • Molasses: Adds depth and a hint of smoky sweetness, but honey can substitute for a lighter flavor.
    • Espresso: Provides bitterness that balances sweetness, but strong brewed coffee works too.
    • Milk: Whole milk makes it rich and creamy, but almond or oat milk lightens it.

    Spotlight on Ginger and Cinnamon

    Ginger:

    • Its spicy, zesty aroma wakes up the senses; fresh ginger releases more juice and zing during cooking.
    • Cinnamon: The warm, sweet scent blooms when toasted briefly; avoid overtoasting to prevent bitterness.

    Cinnamon:

    • It’s essential for that cozy, holiday flavor; use high-quality sticks for best aroma.
    • Watch out for powder—freshly ground makes a brighter, more vibrant latte.

    Smart Ingredient Swaps for Different Tastes and Needs

    • Dairy-Free: Use almond, oat, or coconut milk for a creamy, nutty or tropical twist.
    • Sweetener: Swap molasses for honey or maple syrup—each adds a different depth.
    • Spice: Use pre-ground ginger and cinnamon if fresh isn’t available, but reduce quantity.
    • Coffee: Decaf works perfectly if you want less caffeine and more focus on flavor.
    • Extra spice: Add a pinch of nutmeg or allspice for a more complex profile.

    Equipment & Tools

    • Small saucepan: Heat the milk and spices gently.
    • Fine mesh sieve: Strain out ginger and spice bits.
    • Whisk: Blend ingredients smoothly.
    • Mug: Serve the latte.

    How to Make a Cozy Gingerbread Latte

    1. Gather your equipment: a small saucepan, a fine mesh sieve, a whisk, and your favorite mug.
    2. In the saucepan, combine 1 cup of milk, 1 tablespoon of freshly grated ginger, 1 teaspoon of cinnamon, and a pinch of cloves.
    3. Heat over medium-low (around 70°C/160°F) until the mixture is steaming but not boiling, about 5 minutes.
    4. Remove from heat. Strain out the ginger and spices, pressing gently to extract all flavors.
    5. Stir in 1 tablespoon of molasses or brown sugar, adjusting to taste.
    6. Brew 1 shot of espresso or ½ cup of strong coffee, and add to the spice-milk mixture.
    7. Whisk until smooth, then pour into your mug. Top with whipped cream or a cinnamon stick if desired.
    8. Serve immediately, enjoying the warm aroma and the spicy-sweet taste.

    Enjoy immediately, or give it a minute to settle for a more integrated flavor.

    How to Know It’s Done

    • The milk should be steaming but not boiling.
    • The mixture should be fragrant with ginger, cinnamon, and cloves.
    • The latte should be smooth and well blended, with no ginger bits in the final pour.

    Homemade Gingerbread Latte

    This cozy gingerbread latte combines freshly grated ginger, warm cinnamon, and rich espresso to create a fragrant, spicy beverage with a smooth, creamy texture. The process involves infusing milk with spices, straining out solids, and blending in sweet molasses or brown sugar for a comforting, holiday-inspired drink. The final appearance is a steaming mug topped with optional whipped cream or cinnamon, inviting you to enjoy its aromatic and velvety finish.
    Prep Time 5 minutes
    Cook Time 10 minutes
    Total Time 15 minutes
    Servings: 1
    Course: Main Course
    Cuisine: Holiday
    Calories: 150

    Ingredients
      

    • 1 cup milk whole, almond, or oat milk
    • 1 tablespoon freshly grated ginger or dried ginger in a pinch
    • 1 teaspoon cinnamon preferably sticks, toasted briefly
    • a pinch cloves optional
    • 1 tablespoon molasses or brown sugar adjust to taste
    • 1 shot espresso or ½ cup strong brewed coffee

    Equipment

    • Small saucepan
    • Fine Mesh Sieve
    • Whisk
    • Mug

    Method
     

    1. Place the milk, freshly grated ginger, cinnamon, and cloves (if using) into a small saucepan.
    2. Heat the mixture gently over medium-low heat, stirring occasionally, until it begins to steam and is fragrant — about 5 minutes. Avoid boiling to keep the milk creamy.
    3. Remove from heat and strain the mixture through a fine mesh sieve into a bowl or measuring cup, pressing gently to extract all the flavorful liquids.
    4. Stir in the molasses or brown sugar into the warm, spiced milk until fully dissolved and smooth.
    5. Brew a shot of espresso or prepare ½ cup of strong coffee, then pour it into the warm spice mixture.
    6. Whisk the mixture vigorously until well combined and slightly frothy.
    7. Pour the steaming latte into a mug. Top with whipped cream or a sprinkle of cinnamon if desired for extra flair.
    8. Enjoy immediately while warm, savoring the fragrant aroma and spicy-sweet flavor.

    Tips to Perfect Your Gingerbread Latte

    • GINGER: Use fresh ginger for a fiery, bright flavor that powdered can’t match.
    • SPICE: Toast cinnamon and cloves briefly in dry pan for extra aroma.
    • MILK: Whole milk gives the richest, creamiest base—use plant milks for dairy-free.
    • SWEETENING: Adjust sugar or molasses to balance the spice and bitterness.
    • HEAT: Keep temperature low to prevent milk from scorching and losing flavor.

    Common Mistakes and How to Fix Them

    • FORGOT to strain the ginger? Use a fine sieve to remove bits before serving.
    • DUMPED the milk before tasting? Reheat gently and add a little more spice or sweetener.
    • OVER-TORCHED the milk? Start fresh with cold milk, and heat more slowly next time.
    • MISSED the spice level? Add a pinch more cinnamon or ginger during reheating.

    Fast Fixes for Common Mistakes

    • When milk curdles, lower heat and whisk vigorously to smooth out.
    • Splash a little cold milk if the mixture gets too hot or thick.
    • Patch over burnt spices with fresh milk and a dash of sugar.
    • Shield the milk from direct heat to prevent scorching.
    • When spice flavors are weak, infuse longer or add a pinch more ginger.

    Prepping and Storing Your Gingerbread Latte Components

    • Prepare the spice-infused milk a day ahead; reheat gently to preserve flavor.
    • Store leftover ginger syrup in a jar in the fridge for up to a week.
    • The latte is best enjoyed fresh; reheat slowly on the stove, watching for steam and aroma.
    • You can make a big batch of spice mixture for multiple servings, keeping it in an airtight container.

    10 Practical Q&As About Making a Gingerbread Latte at Home

    1. Can I use ground ginger instead of fresh?

    Use fresh ginger and good-quality spices, not the powdered stuff from the shelf. The fresh ginger gives a zing that’s lively and bright.

    2. How do I get the ginger flavor just right?

    Absolutely. Just reduce the amount by half and simmer longer to let the flavors meld.

    3. Should I use espresso or drip coffee?

    Using real brewed coffee makes a big difference. It adds depth and bitterness that balances the sweetness.

    4. What’s the best way to heat milk for this latte?

    Warm your milk gently, don’t boil, to keep it creamy and avoid scalding.

    5. Can I skip the sweetener or use honey?

    A pinch of molasses or brown sugar adds a rich, caramel-y note that complements the spices.

    6. How spicy should the latte be?

    Adjust the spice levels to suit your taste. Start with less and add more as needed.

    7. How do I get rid of ginger bits in the latte?

    Use a fine mesh sieve to strain the ginger pieces before pouring, for a smooth drink.

    8. Can I make this ahead of time?

    Serve immediately for the best warmth and aroma. Reheat gently if needed.

    9. What’s a good topping for presentation?

    Top with whipped cream or a sprinkle of cinnamon for extra flair.

    10. What’s the best time to enjoy this latte?

    Enjoy with a cozy blanket or by the window on a chilly day. It’s all about the mood.

    Once you get the hang of it, this latte becomes a staple—something I look forward to during the long winter months. It’s simple, honest, and full of flavor that’s real and comforting.

    There’s no fancy equipment needed, just a few good ingredients and some patience. It’s a small act of kindness you can give yourself, especially when the world outside feels a bit too hectic.

  • Red Lentil Curry Recipe

    Sometimes, I just want something warm and nourishing that I can throw together without fuss. This red lentil curry is my go-to after long days—its smell alone makes my kitchen feel like a refuge. I love how it’s simple but feels like a big, satisfying hug in a bowl. It’s honest food, made with what I have, but still tastes like I took my time.

    Cooking this dish reminds me of those cozy weekends when I had all the time in the world to simmer and stir. Now, I’ll take that same comfort, but with a quicker pace. It’s proof that good, hearty food doesn’t need to be complicated or fancy—just honest ingredients and a little patience.

    Red Lentil Curry from the Perspective of a Busy Cook Who’s Tired but Needs Comfort and Nutrition

    Why This Curry Matters to Me

    • I love how this dish comes together in under 30 minutes, perfect for busy nights.
    • There’s something about the smell of spices simmering that instantly relaxes me.
    • I feel a quiet pride when I serve this—simple ingredients, big flavors.
    • It’s my comfort food, especially on cold days or when I need a quick pick-me-up.

    Personal Inspiration Behind the Recipe

    • This recipe was born out of a moment when I needed something quick, filling, and nourishing after a long day. I started experimenting with different spices, aiming for warmth and comfort without any fuss. Over time, it became my reliable go-to, a dish I can make with my eyes closed but still enjoy every time.
    • I love how versatile it is—adjusting spices, swapping coconut milk for yogurt, or adding veggies. It’s a canvas for whatever I have in the fridge, making it feel personal and spontaneous.
    • Cooking this reminds me that good food doesn’t have to be complicated—sometimes, simplicity is what makes it special.

    Origin and Trivia of Red Lentil Curry

    • Red lentils are a staple in Indian cuisine, often used in dals and soups.
    • The dish is quick-cooking, making it popular among busy households and students.
    • Curry spices like cumin and turmeric have anti-inflammatory properties, adding health benefits.
    • This recipe adapts traditional Indian flavors in a way that’s accessible for home cooks.
    • Lentils are a sustainable protein source, requiring less water and energy than meat.

    Ingredient Insights and Tips

    • Red Lentils: I love how quickly they cook and their bright color. Rinse well to remove dust, and consider slightly undercooking if you prefer a firmer texture.
    • Coconut Milk: Adds richness and a subtle sweetness, but if you want a lighter dish, skip it or replace with yogurt.
    • Spices: Toasting cumin and turmeric really wakes up their flavors. Use fresh spices for a more vibrant taste.
    • Garlic & Ginger: Essential for depth, but if you’re out, a pinch of garlic powder and ground ginger work in a pinch.
    • Lemon Juice: Brightens everything up, especially if you let the curry sit for a bit. Add at the end for the freshest flavor.

    Spotlight on Key Ingredients

    Red Lentils:

    • They cook fast and become wonderfully tender, creating a creamy texture without mashing. Watch for their bright orange hue—freshness shows.
    • Coconut Milk: Its silky texture and mild sweetness balance the spices. Shake well before opening to mix the cream and liquid.

    Cumin:

    • Toasting releases a warm, nutty aroma that fills your kitchen. Freshly ground cumin makes a big difference.
    • It’s a subtle flavor but foundational; don’t skip the toasting step for maximum aroma.

    Ingredient Substitutions for Flexibility

    • Dairy-Free: Use coconut milk or almond yogurt for creaminess—still rich, still comforting.
    • Spice Level: Swap fresh chilies for chili powder or paprika if you want milder heat.
    • Vegetarian/Vegan: Stick to vegetable broth and coconut milk—no animal products needed.
    • Make it thicker: Add a handful of chopped spinach or kale in the last 5 mins for added texture.
    • Less heat: Omit or reduce chili powder; boost with a squeeze of lemon for flavor.

    Equipment & Tools

    • Large saucepan or deep skillet: To cook the lentils and curry evenly.
    • Wooden spoon: To stir ingredients and prevent sticking.
    • Measuring cups and spoons: Accurate measurement of ingredients.

    Step-by-Step Guide to Making Red Lentil Curry

    1. Gather your equipment: a large saucepan or deep skillet, a wooden spoon, and a measuring cup.
    2. Rinse 1 cup of dried red lentils under cold water until water runs clear. Set aside.
    3. Heat 2 tablespoons of oil over medium heat (about 160°C/320°F). Add 1 chopped onion and cook until translucent, about 5 minutes.
    4. Stir in 2 minced garlic cloves and 1 teaspoon grated ginger. Cook until fragrant, about 30 seconds.
    5. Add 1 teaspoon cumin, 1 teaspoon turmeric, and 1/2 teaspoon chili powder. Toast spices for 1 minute, stirring constantly.
    6. Pour in 3 cups of vegetable broth or water and bring to a gentle simmer.
    7. Stir in the rinsed lentils. Reduce heat to low (around 90°C/194°F). Cover and simmer for 20-25 minutes, stirring occasionally.
    8. Check for doneness: lentils should be soft and slightly breaking apart; the curry should be thick and fragrant.
    9. If the curry is too thick, add a splash more broth. If too thin, simmer uncovered for a few more minutes.
    10. Stir in 1/2 cup coconut milk or a squeeze of lemon juice for brightness, then taste and adjust salt and spice.
    11. Rest for 5 minutes off heat. Serve hot over rice or with flatbread.

    Let the curry rest for 5 minutes off heat before serving to allow flavors to meld. Serve with fresh herbs or a squeeze of lemon for extra brightness.

    How to Know It’s Done

    • Lentils are soft and breaking apart.
    • Sauce is thick and coats the back of a spoon.
    • Aromas of spices and onion are fragrant and well-blended.

    Quick Red Lentil Curry

    This comforting red lentil curry is a one-pot dish that combines tender, creamy lentils simmered with spices, coconut milk, and aromatics. The dish develops a fragrant, thick sauce with a vibrant orange hue, perfect for a cozy weeknight dinner with rice or flatbread.
    Prep Time 5 minutes
    Cook Time 25 minutes
    Total Time 30 minutes
    Servings: 4
    Course: Main Course
    Cuisine: Indian
    Calories: 350

    Ingredients
      

    • 1 cup dried red lentils rinsed well
    • 2 tablespoons oil vegetable or coconut oil
    • 1 onion chopped
    • 2 cloves garlic minced
    • 1 inch ginger grated
    • 1 teaspoon cumin ground or toasted seeds
    • 1 teaspoon turmeric ground
    • 1/2 teaspoon chili powder adjust to taste
    • 3 cups vegetable broth or water for simmering
    • 1/2 cup coconut milk for richness and sweetness
    • 1 lemon lemon for juice, optional

    Equipment

    • Large saucepan or deep skillet
    • Wooden spoon
    • Measuring cups and spoons

    Method
     

    1. Start by rinsing the red lentils under cold water until the water runs clear, then set them aside.
    2. Heat the oil in a large saucepan over medium heat until it shimmers and starts to smell toasty.
    3. Add the chopped onion and cook, stirring frequently, until it becomes translucent and soft, about 5 minutes.
    4. Stir in the minced garlic and grated ginger, cooking for about 30 seconds until fragrant.
    5. Add the ground cumin, turmeric, and chili powder, stirring constantly to toast the spices and release their aroma, about 1 minute.
    6. Pour in the vegetable broth or water, bringing it to a gentle simmer.
    7. Stir in the rinsed lentils, ensuring they are submerged in the liquid.
    8. Reduce the heat to low, cover the pan, and let the lentils simmer gently for 20-25 minutes, stirring occasionally until tender and the sauce thickens.
    9. Uncover the pan, stir in the coconut milk, and cook uncovered for another 5 minutes to let the flavors meld and the sauce thicken further.
    10. Squeeze fresh lemon juice into the curry, tasting and adjusting salt and spice as needed. The curry should be fragrant, thick, and creamy, with a vibrant orange hue.
    11. Remove from heat and let it rest for a few minutes. Serve hot over rice or with flatbread, garnished with herbs if desired.

    Cooking Tips & Tricks for Perfect Lentil Curry

    • SPICES: Toast spices in oil to release their full flavor and aroma.
    • TASTE OFTEN: Adjust seasoning at the end—spices develop as it cools.
    • SLOW SIMMER: Keep the heat gentle to prevent lentils from splitting apart.
    • LID ON/OFF: Keep covered to thicken, uncover to reduce moisture.
    • LIQUID CONTROL: Add broth gradually to get the perfect sauce consistency.
    • USE FRESH GINGER: Grate just before adding for a zesty, bright flavor.
    • DON’T OVERCOOK: Lentils should be tender but not mushy, about 20-25 mins.

    Common Mistakes and How to Fix Them

    • FORGOT to rinse lentils? Rinse now to avoid dirt and dust. It’s worth the extra minute.
    • DUMPED too much water? Simmer uncovered longer to thicken. Patience is key.
    • OVER-TORCHED spices? Lower the heat immediately, add a splash of water, and stir to prevent burning.
    • SALT is too bland? Add a pinch more after tasting, or a squeeze of lemon for brightness.

    Quick Fixes for Common Curry Hiccups

    • When too watery, simmer uncovered until thickened. Smell the toasty spices.
    • If spices taste dull, add a pinch more cumin or chili, then simmer briefly.
    • Splash lemon juice or vinegar if flavors are flat or muted.
    • Patch over burnt spices with a fresh batch of toasted spices.
    • Shield from overcooking by removing from heat immediately when done.

    Make-Ahead and Storage Tips

    • Prepped ingredients: Chop onions and garlic ahead, store in airtight containers for up to 2 days.
    • Cooked lentils can be refrigerated for 3-4 days, or frozen for up to 3 months.
    • The flavors deepen after a day; reheat gently, stirring often, until steaming hot.
    • Add a splash of water or broth when reheating to loosen the sauce if it thickens.

    10 Practical Q&As About Making Red Lentil Curry at Home

    1. Should I rinse the lentils?

    Use good quality dried red lentils, they cook faster and stay vibrant. Rinse until water runs clear to remove dust.

    2. Can I cook lentils in water?

    Cook the lentils in plenty of flavorful broth, not just water, for a richer taste.

    3. How do I keep the lentils from turning to mush?

    Simmer gently, don’t boil hard, to keep the lentils intact and prevent mushiness.

    4. When should I add acid to the curry?

    Add acid like lemon juice or vinegar after cooking to brighten the flavors.

    5. Can I make it dairy-free or add cream?

    Use coconut milk for creaminess or a splash of yogurt at the end for tang.

    6. How spicy should it be?

    Adjust spice levels by tasting as you go; add more chili or cumin as needed.

    7. Should I cover the pot while simmering?

    Simmer uncovered to allow excess moisture to evaporate and thicken the curry.

    8. What should I serve it with?

    Serve with rice or flatbread for a hearty, filling meal.

    9. How long does it last?

    Store leftovers in airtight containers, they keep well for 3-4 days in the fridge.

    10. How do I reheat without overcooking?

    Reheat gently on low heat, stirring often, until hot and fragrant.

    This curry isn’t just a meal; it’s a little act of kindness you give yourself after a hectic day. It’s versatile enough to adapt to what’s in your pantry, which makes it even more appealing when time and energy are tight. Plus, the smell—spicy, smoky, with a hint of lemon—lingers and makes the whole house feel warmer.

    In the end, I find that a bowl of this lentil curry leaves me a bit more grounded. It’s a reminder that simple, honest cooking can still be deeply satisfying. When I eat it, I feel a quiet sense of accomplishment—knowing I made something nourishing and real, even in the chaos of a busy life.

  • Peanut Butter Chocolate Chip Cookies Recipe

    Baking these peanut butter chocolate chip cookies isn’t just about the taste, it’s about capturing a moment of chaos and joy in the kitchen. I love how the smell of melting chocolate mingles with toasty peanut butter—something that instantly takes me back to childhood afternoons. These cookies are forgiving, a little rough around the edges, but full of personality and such a warm, familiar scent.

    Sometimes, I just need a quick batch of cookies that don’t demand perfection. The messy spoonfuls, the slightly uneven edges—they remind me that baking is about feeling, not just precision. And honestly, nothing beats biting into a cookie that’s warm, slightly chewy, with pockets of gooey chocolate and that nutty peanut butter in every bite.

    Unusual focus on the nostalgic, imperfect moments in baking—embracing the messy, the spontaneous, and the imperfectly perfect cookies that tell a story.

    Why these cookies matter to me

    • Baking these feels like a warm hug on a hectic day.
    • I love how the smell fills the house, making everything feel calmer.
    • They remind me of baking with my grandma, messy scoops and all.

    The messy, joyful story behind these cookies

    • It started with a jar of peanut butter and a bag of chocolate chips that were about to expire. I threw everything together, and it turned into a messy, imperfect batch that I couldn’t resist.
    • A friend once told me that the best recipes are the ones you make your own, not the perfect ones from a cookbook.
    • These cookies are my way of embracing the chaos—craggy, uneven, but full of flavor and personality.

    A little cookie history to sweeten your baking

    • These cookies are inspired by classic American peanut butter cookies but with a chocolate twist.
    • Chocolate chips were first introduced in 1930 by Nestlé, changing cookie baking forever.
    • Peanut butter became popular in the U.S. during the 1910s, originally marketed as a health food.

    Ingredient insights to perfect your cookies

    • Peanut Butter: I prefer natural, oozing with nut oils—adds richness and depth. Swap with almond butter for a different nutty note.
    • Chocolate Chips: Semi-sweet chips melt beautifully, creating gooey pockets. Use dark or milk chocolate depending on your mood.
    • Butter: Adds tenderness and flavor. Use salted for extra seasoning, or unsalted if you prefer control.
    • Egg: Binds everything together and adds moisture. For vegan, try flaxseed meal mixed with water.
    • Flour: The backbone for structure. Whole wheat can add a nutty flavor but may make cookies denser.

    Spotlight on Peanut Butter and Chocolate Chips

    Peanut Butter:

    • The peanut butter’s oily texture helps cookies spread just right, creating a tender crumb.
    • Its rich, nutty aroma is a giveaway that the flavor will be deep and satisfying.

    Chocolate Chips:

    • Chocolate chips melt during baking, forming luscious puddles of chocolate that surprise with each bite.
    • Mini chips distribute more evenly and melt faster, making every bite decadent.

    Smart substitutions for different diets and tastes

    • Dairy-Free: Use almond or coconut butter instead of peanut butter for nutty, dairy-free flavor.
    • Sugar-Free: Swap regular sugar with coconut sugar for a caramel undertone.
    • Gluten-Free: Replace all-purpose flour with a blend of almond and rice flour.
    • Vegan: Use flax eggs and dairy-free chocolate chips.
    • Extra Nutty: Add chopped nuts or toasted coconut to the dough for texture and flavor.

    Equipment & Tools

    • Baking sheet: To hold the cookies during baking.
    • Silicone baking mat or parchment paper: Prevent sticking and easy cleanup.
    • Mixing bowls: Combine ingredients.
    • Wooden spoon or spatula: Mix ingredients gently.
    • Wire rack: Cool cookies evenly.

    Step-by-step guide to perfect peanut butter chocolate chip cookies

    1. Preheat your oven to 180°C (350°F). Line a baking sheet with a silicone mat or parchment paper.
    2. In a bowl, cream together ½ cup (115 g) softened butter, ¾ cup (180 g) peanut butter, and ½ cup (100 g) sugar until fluffy, about 2 minutes.
    3. Add 1 large egg and 1 teaspoon vanilla. Mix until just combined.
    4. In another bowl, whisk together 1¼ cups (150 g) all-purpose flour, ½ teaspoon baking soda, and a pinch of salt.
    5. Gradually add dry ingredients to wet, mixing on low. Don’t overmix; just until no streaks remain.
    6. Fold in ¾ cup (130 g) chocolate chips. Be generous, I like a lot!
    7. Drop spoonfuls (about 1 tablespoon each) onto the prepared baking sheet, spacing about 2 inches apart.
    8. Bake for 10-12 minutes, or until edges are golden and set. The centers might look a little soft but will firm up.
    9. Remove from oven. Let cookies rest on the baking sheet for 5 minutes—they’ll be fragile right out of the oven.
    10. Transfer to a wire rack to cool completely or enjoy warm, the chocolate still gooey.

    Allow cookies to cool on the wire rack for at least 5 minutes before serving. This helps set the centers and enhances flavor.

    How to Know It’s Done

    • Edges golden and slightly crisp.
    • Center looks soft but not raw.
    • Chocolate is melted and glossy, pockets visible.

    Peanut Butter Chocolate Chip Cookies

    These cookies are a forgiving and nostalgic treat, featuring a tender, slightly chewy texture with pockets of melted chocolate and rich peanut butter. The recipe emphasizes spontaneous, imperfect baking with simple ingredients, resulting in craggy, flavorful cookies that evoke warmth and joy. Perfect for quick baking moments that celebrate personality over perfection.
    Prep Time 15 minutes
    Cook Time 12 minutes
    Total Time 27 minutes
    Servings: 12
    Course: Main Course
    Cuisine: American
    Calories: 220

    Ingredients
      

    • ½ cup unsalted butter softened
    • ¾ cup peanut butter natural, smooth
    • ½ cup granulated sugar
    • 1 large egg
    • 1 tsp vanilla extract
    • 1 ¼ cups all-purpose flour
    • ½ tsp baking soda
    • ½ cup chocolate chips semi-sweet preferred

    Equipment

    • Baking sheet
    • Silicone baking mat or parchment paper
    • Mixing bowls
    • Wooden spoon or spatula
    • Wire rack

    Method
     

    1. Preheat your oven to 180°C (350°F) and line a baking sheet with a silicone mat or parchment paper to prevent sticking.
    2. In a large bowl, cream together the softened butter, peanut butter, and granulated sugar using a wooden spoon or spatula. Mix until the mixture is smooth, fluffy, and fragrant, about 2 minutes—your spoon should make a gentle squeaking sound as it moves through the creamy mixture.
    3. Add the egg and vanilla extract to the bowl. Mix well until fully incorporated, and the mixture becomes slightly thicker and glossy.
    4. In a separate bowl, whisk together the flour, baking soda, and a pinch of salt if desired. Gradually add the dry ingredients to the wet mixture, stirring gently on low speed or with your spoon, just until no streaks of flour remain. The dough will be soft and slightly sticky but manageable.
    5. Gently fold in the chocolate chips, distributing them evenly throughout the dough. The mixture should now be chunky with pockets of chocolate hiding inside.
    6. Using a spoon or cookie scoop, drop spoonfuls (about 1 tablespoon each) onto your prepared baking sheet, spacing them about 2 inches apart. The dough will spread slightly, creating rustic, craggy cookies.
    7. Bake for 10-12 minutes, until the edges are golden brown and set, while the centers remain soft and slightly gooey. The irresistible aroma of melting chocolate and toasty peanut butter will fill your kitchen as they bake.
    8. Remove the baking sheet from the oven and let the cookies rest for about 5 minutes. They will be fragile straight out of the oven but will firm up as they cool.
    9. Transfer the cookies to a wire rack to cool completely, or indulge while still warm for that gooey chocolate experience. Enjoy the imperfect, personality-packed cookies that tell a delicious story.

    Tips for baking better peanut butter chocolate chip cookies

    • Room temp ingredients → ensure butter and eggs are soft for better mixing.
    • Don’t overmix → mix just until ingredients are combined to keep cookies tender.
    • Use a cookie scoop → for evenly sized cookies that bake uniformly.
    • Slightly underbake → for soft, gooey centers that stay moist.
    • Cool cookies on wire racks → to prevent sogginess and preserve crunch.

    Common baking mishaps and how to fix them

    • FORGOT TO CHILL THE DOUGH? Just pop it in the freezer for 10 minutes before baking.
    • DUMPED TOO MUCH CHOCOLATE? Mix in a few more flour spoonfuls to balance the moisture.
    • OVERBAKED? Pull them out when edges are golden and centers still look slightly soft.
    • BAKE AT WRONG TEMP? Use an oven thermometer, and adjust baking time accordingly.

    Fast fixes for cookie baking woes

    • When dough is too sticky, chill for 15 minutes or dust with flour.
    • Splash a little milk if cookies turn out dry or crumbly.
    • Patch cracks in dough with a tiny bit of water and knead gently.
    • Shield chocolate chips from over-browning by tenting with foil.
    • When cookies spread too much, refrigerate dough for 30 minutes before baking.

    Prep and store tips for fresh, warm cookies

    • Dough can be made a day ahead, wrapped in plastic, refrigerated for up to 24 hours.
    • Cookies are best enjoyed within 3 days, stored in an airtight container at room temperature.
    • Refrigerate for longer storage but expect the cookies to soften slightly.
    • Reheat briefly in a 150°C (300°F) oven for 2-3 minutes to revive the gooey center.

    10 Practical Q&As About Peanut Butter Chocolate Chip Cookies

    1. Can I use crunchy peanut butter?

    Use natural peanut butter for a richer, more complex flavor, but regular creamy works fine.

    2. Should I chill the cookie dough?

    Chill the dough for at least 30 minutes to prevent spreading and improve flavor.

    3. What oven temperature is best?

    Bake at 180°C (350°F) for 10-12 minutes until edges are golden.

    4. How long do cookies stay fresh?

    Store cookies in an airtight container for up to 3 days, or freeze for longer storage.

    5. Can I add salt on top?

    Add a pinch of sea salt on top before baking for a sweet-salty contrast.

    6. Should I use mini or regular chocolate chips?

    Use mini chocolate chips for evenly distributed pockets of melty chocolate.

    7. How do I avoid tough cookies?

    Mix the dough until just combined; overmixing can make cookies tough.

    8. Can I use parchment paper instead?

    Use a silicone baking mat for even baking and easy cleanup.

    9. Why cool on a wire rack?

    Let the cookies cool on a wire rack for 5 minutes before transferring.

    10. Will the chocolate stay whole?

    Chocolate chips may melt slightly during baking, creating gooey pockets of chocolate.

    These cookies are perfect for when you want something sweet without fuss. They’re a little messy, a little spontaneous, but always satisfying. Just like some of the best moments in life, they’re imperfect but deeply memorable.

    In the end, it’s the small, honest imperfections that make these cookies special. They’re a reminder that sometimes, the best recipes are the ones that don’t follow the rules perfectly, but still bring happiness in every crumb.

  • Turmeric Lentil Vegetable Soup Recipe

    This soup isn’t just about the ingredients; it’s about the ritual of making something that restores your energy. The turmeric’s warm glow, the earthy lentils, and the sweet carrots all come together in a pot that feels like a small act of kindness. It’s a reminder that even when you’re tired, a simple bowl can reset your day.

    I like to think of this as my go-to when mental fog is thick and I need a jolt of clarity. It’s straightforward, no fuss, but layered in flavor—like a quiet conversation with a good friend. The aroma alone, the simmering turmeric and garlic, can lift the heaviness and spark some joy in the kitchen.

    Focusing on how this humble soup can be a soothing, vibrant antidote to mental fog and fatigue, especially when you’re feeling run-down but want something nourishing and bright. It’s about reclaiming comfort with a splash of color and spice that lifts the mood and clears the mind.

    Why This Soup Matters to Me

    • I love how the turmeric makes the house smell warm and spicy.
    • This soup reminds me of childhood winters, simple but so satisfying.
    • I feel a quiet pride every time I make it—it’s easy but feels special.
    • Cooking it feels like a small act of self-care I can do on busy days.
    • The moment I add lemon, everything brightens up—like a little burst of sunshine.

    My Inspiration

    • I started making this when I needed something quick yet comforting after long days.
    • The turmeric and lentils are pantry staples, so I can whip it up anytime.
    • It’s become a small ritual—chopping, simmering, smelling the spices—that grounds me.

    Soup’s Roots and Quirky Facts

    • Turmeric has been used in Indian cuisine for over 4,000 years, valued for its color and health benefits.
    • Lentils are one of the world’s oldest cultivated legumes, dating back to ancient Mesopotamia.
    • This soup combines traditional Indian spices with Western vegetable staples for a nourishing fusion.
    • Turmeric’s bright yellow color was historically used as a natural dye for textiles and food.

    Ingredient Insights

    • Lentils: Rinse well—starch can make the soup gloopy if forgotten. They soften to a creamy consistency.
    • Turmeric: Bright, earthy, slightly bitter; toasting releases a warm aroma, boosting flavor.
    • Carrots: Sweet and crunchy when fresh; cook until tender and slightly caramelized for depth.
    • Spinach: Wilts quickly, adding a fresh, grassy note—don’t overcook or lose color.
    • Lemon: Brightens every spoonful; add last to keep the citrus sharp and fresh.

    Star Ingredients Spotlight

    Turmeric:

    • Its vibrant yellow hue is unmistakable; it can stain surfaces but adds a smoky, peppery note.
    • Make sure to toast it briefly in oil to awaken its warm, medicinal aroma.

    Lentils:

    • They cook fast and break down into a silky, hearty base. Keep an eye to avoid mushy textures.
    • Rinse thoroughly to remove any grit, and look for evenly sized, unbroken beans.

    Substitute Smartly

    • Dairy-Free: Use coconut milk instead of cream for a richer, slightly sweet flavor.
    • Vegan: Skip any animal-based broths, opt for vegetable broth and olive oil.
    • Gluten-Free: Ensure broth and spices are gluten-free; most are naturally so.
    • Extra Protein: Add cooked chickpeas or shredded chicken for more heartiness.
    • Flavor Boost: Use smoked paprika if you want a smoky undertone instead of plain paprika.

    Equipment & Tools

    • Large heavy-bottomed pot: Even heat and prevent scorching.
    • Wooden spoon: Stir ingredients gently.
    • Measuring spoons and cups: Accurate seasoning and liquid measures.
    • Sharp knife and cutting board: Prep vegetables.
    • Ladle: Serve the soup.

    How to Make Turmeric Lentil Vegetable Soup

    1. Gather all ingredients: lentils, vegetables, spices, broth, olive oil, lemon, garlic, turmeric.
    2. Rinse lentils thoroughly under cold water; set aside.
    3. Heat a large heavy-bottomed pot over medium heat (about 150°C/300°F). Add 2 tbsp olive oil.
    4. Sauté chopped garlic and turmeric for 1-2 minutes until fragrant and slightly golden.
    5. Add chopped carrots and celery; cook for 5-7 minutes until they start to soften and smell sweet.
    6. Pour in vegetable broth (4 cups) and bring to a gentle simmer. Add lentils.
    7. Simmer uncovered on low heat (around 80°C/175°F) for 25-30 minutes until lentils are tender and slightly breaking down.
    8. Stir occasionally. If the soup thickens too much, add a splash more broth or water.
    9. Add chopped spinach in the last 5 minutes; cook just until wilted and vibrant green.
    10. Taste and adjust salt, then squeeze in lemon juice and drizzle a little olive oil.
    11. Ladle into bowls, garnish with a swirl of olive oil or fresh herbs if desired.

    Let the soup sit for 5 minutes off heat to meld flavors before serving. Garnish with a drizzle of olive oil or fresh herbs if desired.

    How to Know It’s Done

    • Lentils should be soft and breaking apart, not grainy.
    • Vegetables tender but not mushy, with a bright, fresh color.
    • A fragrant aroma of turmeric, garlic, and simmered vegetables fills the air.

    Turmeric Lentil Vegetable Soup

    This nourishing soup combines earthy lentils, sweet carrots, and fragrant turmeric in a comforting bowl that’s smooth and hearty. The cooking process involves sautéing spices and vegetables, then simmering until everything is tender and melded, resulting in a vibrant, velvety texture with a bright aroma.
    Prep Time 10 minutes
    Cook Time 30 minutes
    Total Time 40 minutes
    Servings: 4
    Course: Main Course
    Cuisine: Fusion
    Calories: 200

    Ingredients
      

    • 1 cup red or yellow lentils rinsed thoroughly
    • 2 medium carrots chopped
    • 2 stalks celery chopped
    • 3 cloves garlic minced
    • 1 teaspoon ground turmeric preferably fresh or toasted briefly
    • 4 cups vegetable broth
    • 2 cups fresh spinach roughly chopped, added at the end
    • 1 tablespoon olive oil
    • 1 lemon lemon for juice
    • to taste salt
    • to taste pepper

    Equipment

    • Large heavy-bottomed pot
    • Wooden spoon

    Method
     

    1. Start by rinsing the lentils under cold water until the water runs clear, then set aside.
    2. Heat a large heavy-bottomed pot over medium heat, then add the olive oil, allowing it to warm up until it shimmers.
    3. Add the minced garlic and ground turmeric to the oil, stirring constantly for about 1-2 minutes until fragrant and slightly golden, filling the kitchen with warm, spicy aroma.
    4. Next, stir in the chopped carrots and celery, cooking for about 5-7 minutes until they start to soften and release their natural sweetness, and the vegetables look slightly glazed.
    5. Pour in the vegetable broth and add the rinsed lentils, stirring gently to combine everything evenly.
    6. Bring the mixture to a gentle simmer, then reduce the heat to low and let it cook uncovered for about 25-30 minutes, stirring occasionally, until the lentils are tender and beginning to break down, creating a creamy texture.
    7. About five minutes before the end of cooking, stir in the chopped spinach and cook just until wilted and vibrant in color, which should only take a few minutes.
    8. Turn off the heat and squeeze fresh lemon juice into the soup, stirring to brighten the flavors. Taste and season with salt and pepper as needed.
    9. Ladle the hot soup into bowls, optionally garnishing with a drizzle of olive oil or fresh herbs if desired, and serve immediately to enjoy its comforting warmth and vibrant aroma.

    Tips & Tricks for Perfect Soup

    • FLAVOR: Toast spices briefly in oil to enhance aroma before adding liquids.
    • TEXTURE CONTROL: Simmer uncovered to thicken or add water for a runnier soup.
    • SENSORY CHECK: The garlic should be fragrant but not burnt; smell it turning golden.
    • COLOR: Vegetables should turn vibrant and slightly caramelized at edges.
    • BALANCE: Taste and adjust lemon and salt at the end for perfect brightness.

    Common Pitfalls and How to Fix Them

    • FORGOT TO RINSE LENTILS: Rinse thoroughly to prevent cloudiness and grit.
    • DUMPED TOO MUCH SALT: Add a splash of water or lemon to balance excess salt.
    • OVER-TORCHED SPICES: Lower heat and add a splash of broth to revive flavor.
    • SKIPPED THE LEMON: Add just before serving for bright contrast.

    Fast Fixes for the Unexpected

    • When too thick, splash in hot water or broth and stir well.
    • If bland, add a pinch of salt or a squeeze of lemon.
    • Splash a bit more turmeric or garlic if flavor is dull.
    • Patch flavor with a dash of soy sauce or fish sauce for depth.
    • If vegetables are undercooked, simmer a few extra minutes.

    Prep and Storage Tips

    • Chop vegetables and rinse lentils ahead; store in airtight containers for up to 24 hours.
    • Cooked soup keeps in the fridge for 3-4 days; reheat slowly to preserve texture.
    • Freeze in portions for up to 2 months; defrost overnight in the fridge.
    • Flavor deepens over time, becoming richer, especially if stored for a day or two.

    10 Practical Q&As for Turmeric Lentil Vegetable Soup

    1. Which type of lentils is best for this soup?

    Use red or yellow lentils; they cook quickly and break down into a creamy texture. Rinse well before cooking.

    2. Can I substitute fresh turmeric with powder?

    Fresh turmeric root has a brighter, more pungent flavor; use powdered turmeric if fresh isn’t available.

    3. What’s the ideal cooking temperature and time?

    Simmer the soup on gentle heat, around medium-low (about 80°C/175°F), for 25-30 minutes until the lentils are tender.

    4. What vegetables should I include?

    Add vegetables like carrots, celery, and spinach in stages; carrots and celery first, leafy greens last.

    5. How do I finish and flavor the soup?

    Finish with a squeeze of lemon juice and a drizzle of good olive oil to brighten flavors.

    6. How long can I keep the soup?

    Store leftovers in an airtight container in the fridge for up to 4 days or freeze for 2 months.

    7. How do I reheat without losing flavor or texture?

    Reheat gently on the stove, stirring occasionally, until steaming hot; check for even warmth.

    8. What equipment is best for making this soup?

    Use a heavy-bottomed pot to prevent scorching and ensure even cooking.

    9. Any tips for stirring during cooking?

    Stir often during simmering to prevent sticking and ensure flavor melds evenly.

    10. How do I know when the seasoning is right?

    Taste as you go, adjusting salt and lemon to balance the earthy turmeric and hearty lentils.

    This soup’s a quiet hero in my weekly routine, a warm hug in a bowl that always seems to hit the spot. It’s flexible, forgiving, and perfect for cozy nights or busy mornings. I like to keep a batch in the fridge, knowing a quick reheat will always bring a little moment of calm.

    Sometimes, it’s the simplest dishes that remind us to pause and appreciate the small comforts. A spoonful of this, with its slight earthiness and bright lemon finish, feels like a tiny victory—an easy way to nourish body and mind at once.

  • Chocolate Peanut Butter Truffles Recipe

    Making chocolates isn’t just about mixing ingredients, it’s about engaging all your senses—smell, touch, sight. These truffles are a perfect example of that. Their rich aroma of roasted peanuts mingling with sweet, melting chocolate always feels like a small celebration.

    I love how the process slows down just enough to enjoy the small joys—scooping sticky peanut butter, watching the chocolate shimmer as it coats each ball. It’s a simple act, but it reconnects me to the comfort of homemade treats, especially when I need a quick boost of happiness.

    A focus on the sensory experience of making and eating these truffles, highlighting texture, aroma, and flavor balance.

    Why These Truffles Matter to Me

    • I love how the smell of melting chocolate fills my kitchen.
    • There’s a certain satisfaction in rolling perfect little spheres.
    • This recipe always reminds me of childhood weekends in the kitchen.
    • Sharing these truffles feels like giving a small, sweet hug.

    A Personal Story of Simplicity and Joy

    • This recipe started as a way to use up leftover peanut butter and chocolate chips, but it turned into a weekly ritual.
    • The process of making these is calming, almost meditative, especially when the chocolate shimmers in the light.
    • They’re a reminder that simple ingredients can come together to create something truly delightful.

    Chocolate and Peanut Butter: A Classic Duo with a Rich History

    • Chocolate and peanut butter have been paired since the early 20th century, becoming a classic combo.
    • The process of tempering chocolate was originally developed to give chocolates a glossy finish and snap.
    • Peanut butter was invented in the 1890s and gained popularity as a health food before becoming a candy ingredient.
    • Truffles originally referred to fungi, but the term was adopted for these rich chocolate confections in the 1920s.

    Ingredient Insights and Tweaks

    • Dark chocolate: I prefer a 70% cacao bar for depth; swap with callets for smoother melting.
    • Peanut butter: Natural, slightly oily peanut butter adds richness. Use processed for less oiliness.
    • Powdered sugar: Adds sweetness without graininess; replace with honey for a softer, stickier texture.
    • Sea salt: Just a pinch on top amplifies flavors, enhances sweetness.
    • Vanilla extract: Optional, but adds a warm aroma—use a splash for extra depth.

    Spotlight on Chocolate and Peanut Butter

    Dark chocolate:

    • The chocolate: It shimmers as it melts, smooth and fragrant, with a bittersweet kick.
    • It hardens with a satisfying snap, sealing in flavor and creating that glossy finish.
    • It can seize if over-heated, so gentle melting is key.

    Peanut butter:

    • Creamy, oozy, with a roasted aroma that fills the kitchen.
    • Natural oils can make the mixture sticky; a bit more powdered sugar helps.
    • Smoky or sweet? Choose based on your flavor preference, but natural gives depth.

    Substitutions to Suit Your Pantry and Preferences

    • Dairy-Free: Use coconut oil or coconut milk instead of butter for a dairy-free version.
    • Sweetener: Maple syrup or honey can replace powdered sugar, but expect a softer texture.
    • Nut Variations: Almond or cashew butter offers a different nutty flavor.
    • Chocolate: Use milk or white chocolate if you prefer a milder, sweeter coating.
    • Add-ins: Dried cranberries or sea salt flakes give interesting flavor contrasts.

    Equipment & Tools

    • Microwave-safe bowl: Melting chocolate evenly
    • Spoon or small scoop: Portioning and shaping
    • Baking sheet with parchment paper: Prevent sticking and easy cleanup
    • Refrigerator: Setting the truffles

    Step-by-Step Guide to Perfect Chocolate Peanut Butter Truffles

    1. Gather your equipment: a microwave-safe bowl, a spoon, a baking sheet, and parchment paper.
    2. Melt the chocolate: microwave in 30-second bursts, stirring each time, until smooth. About 1-2 minutes.
    3. Mix the peanut butter with powdered sugar: stir until you get a thick, moldable paste.
    4. Scoop out small amounts, about 1 teaspoon each, and roll into balls. Refrigerate for 30 minutes.
    5. Dip each ball into the melted chocolate, using a fork to coat evenly.
    6. Place the coated truffles on parchment, then chill for 15 minutes to set.
    7. Optional: sprinkle crushed peanuts or sea salt on top before the chocolate hardens.
    8. Serve at room temperature, or keep chilled in an airtight container.

    Chill in the fridge for 15-20 minutes after coating. Let sit at room temp for 5 minutes before serving to bring out full flavor.

    How to Know It’s Done

    • Chocolate coating is shiny and firm to the touch.
    • Truffles don’t crack when dipped; they hold their shape.
    • The inside is creamy, not greasy or grainy, when bitten into.

    Chocolate Peanut Butter Truffles

    These rich, creamy truffles combine smooth peanut butter with glossy melted chocolate, resulting in bite-sized treats with a melt-in-your-mouth texture and an irresistible aroma. The process involves melting chocolate, forming peanut butter balls, and coating them in chocolate for a shiny, decadent finish, perfect for a quick homemade indulgence.
    Prep Time 20 minutes
    Cook Time 10 minutes
    Total Time 30 minutes
    Servings: 12
    Course: Main Course
    Cuisine: American
    Calories: 150

    Ingredients
      

    • 200 grams dark chocolate (70% cacao) chopped or in callets
    • 1/2 cup creamy peanut butter natural or processed
    • 1/4 cup powdered sugar for sweetness and firmness
    • 1/4 teaspoon sea salt optional, for topping
    • 1 teaspoon vanilla extract optional, for added aroma

    Equipment

    • Microwave-safe bowl
    • Spoon or small scoop
    • Baking sheet with parchment paper
    • Refrigerator

    Method
     

    1. Place the chopped chocolate in a microwave-safe bowl and microwave in 30-second bursts, stirring well each time, until smooth and shiny. This gentle melting process should take about 1-2 minutes.
    2. In a mixing bowl, combine the peanut butter with powdered sugar and vanilla extract, stirring until the mixture is thick, smooth, and easy to mold.
    3. Scoop out about a teaspoon of the peanut butter mixture, then roll it between your palms to form a small, round ball. Place each ball on a parchment-lined baking sheet. Repeat until the mixture is used up and chill in the refrigerator for 30 minutes to firm up.
    4. Once chilled, use a fork to dip each peanut butter ball into the melted chocolate, turning to coat completely. Tap gently to remove excess chocolate, then place back on the parchment paper.
    5. Sprinkle a tiny pinch of sea salt or crushed peanuts on top of each coated truffle, if desired, before the chocolate sets.
    6. Refrigerate the coated truffles for another 15 minutes until the chocolate is firm and glossy. Once set, serve at room temperature or store in an airtight container in the fridge.

    Notes

    Chilling the mixture helps with easier shaping. For a shinier finish, consider tempering the chocolate. Feel free to customize toppings or flavors for variety.

    Expert Tips for Perfect Truffles

    • Melting Chocolate: Use low heat or microwave in short bursts to prevent burning.
    • Handling Sticky Mixture: Keep your hands damp to prevent sticking.
    • Uniform Size: Use a small scoop for consistent truffle size.
    • Achieving Shine: Temper or simply cool quickly to set a glossy surface.
    • Flavour Boost: Add a pinch of sea salt or vanilla extract to enhance richness.

    Common Mistakes and How to Fix Them

    • FORGOT TO CHILL THE FILLING: Chill longer or add more powdered sugar to firm up.
    • DUMPED TOO MUCH CHOCOLATE: Use a fork to drain excess, then chill again.
    • OVER-TORCHED CHOCOLATE: Use a double boiler or low microwave power, stir often.
    • MISTAKES IN SHAPE: Keep hands damp when rolling to prevent sticking.

    Fast Fixes for Common Truffle Troubles

    • When chocolate seizes, add a teaspoon of vegetable oil and stir gently.
    • Splash cold water on a too-warm chocolate to stabilize it.
    • Patch cracked chocolate with a tiny drop of warm chocolate and smooth it out.
    • Shield over-dipped truffles with a light dusting of cocoa powder.
    • When in doubt, refrigerate longer to set the coating properly.

    Smart Make-Ahead and Storage Tips

    • Prep the truffles ahead by shaping and chilling the balls, up to 24 hours in advance.
    • Store in an airtight container in the fridge for up to a week, or freeze for 1 month.
    • Chocolate may develop a white coating if stored too long; re-melt and re-dip if needed.
    • Reheat the chocolate gently in the microwave if it thickens during dipping.

    10 Practical Q&As about Chocolate Peanut Butter Truffles

    1. Can I use milk chocolate instead of dark?

    Use good quality dark chocolate for a rich, slightly bitter base that balances the sweetness.

    2. Why does my mixture feel too soft to roll?

    Chill the truffle mixture until firm, about 30 minutes, to make rolling easier and neater.

    3. My truffles are too sticky to shape, what do I do?

    Peanut butter with natural oils can make the mixture sticky; refrigerate longer or add a bit more powdered sugar.

    4. How do I get a glossy chocolate coating?

    For a shiny coating, temper the chocolate or simply melt and dip, then let set at room temp.

    5. How long can I keep these before they go bad?

    Store in an airtight container in the fridge for up to a week, or freeze for longer.

    6. Can I add other toppings or flavors?

    Add a pinch of sea salt on top for contrast, or sprinkle crushed peanuts for texture.

    7. Does the type of peanut butter matter?

    If using crunchy peanut butter, expect more texture in the filling.

    8. How do I make all my truffles the same size?

    Use a small cookie scoop for uniform-sized truffles that look tidy.

    9. How do I know when the chocolate coating is set?

    Chill the dipped truffles until the chocolate is set, about 15 minutes.

    10. Should I serve these at room temperature or cold?

    Let the truffles sit at room temperature for a few minutes before serving for the best flavor.

    Once these truffles are done, they’re more than just a sweet snack—they’re a little moment of calm, a reminder of how satisfying simple pleasures can be. They travel well, making them great for a quick gift or a personal treat that feels special.

    A few minutes in the fridge and a careful coating, and you’ve got something that feels indulgent without fuss. It’s these small, tangible joys that keep the kitchen interesting, especially when you want something familiar but with a fresh twist.