Blog

  • Vegan Stuffed Peppers Recipe

    Sometimes, the best dinners are the ones that feel like a little hug on a plate. These vegan stuffed peppers aren’t just colorful—they’re a cozy, satisfying way to pack a lot of flavor into one bite. The smell alone, roasted peppers mingling with garlic and herbs, makes the kitchen feel like a little sanctuary.

    What I love about this recipe is how forgiving it is. You can toss in leftover grains, a handful of greens, or even a dash of hot sauce to switch things up. It’s a dish that’s rooted in simplicity but blooms with personality, a true testament to what a humble vegetable can become.

    The Unspoken Comfort of a Fully Loaded Veggie Dinner

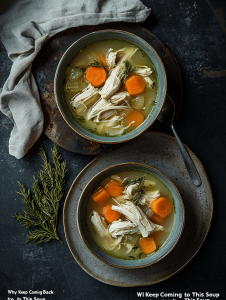
    Why I Keep Coming Back to This Recipe

    • I love how colorful and inviting these look on the plate.
    • There’s a quiet satisfaction in stuffing each pepper just right.
    • Sometimes, I toss in a handful of chopped nuts for texture, and it’s a game-changer.
    • I feel proud when I serve these to friends who aren’t expecting a vegan dish—surprise and delight.

    My story with stuffed peppers

    • It started as a way to use up leftover grains and veggies, but it became a weekly staple. The smell of roasting peppers, garlic, and herbs always pulls me into the kitchen. It’s honest, approachable, and endlessly adaptable.
    • • The filling’s flexibility means I can swap ingredients based on what’s in the fridge.
    • • The peppers’ natural sweetness balances the savory filling beautifully.
    • • The crispy edges after roasting bring a delightful textural contrast.

    The background of vegan stuffed peppers

    • Inspired by Mediterranean stuffed vegetables, but adapted for vegan ingredients.
    • Traditionally, stuffed peppers are filled with meat and rice, but this veggie version is just as hearty.
    • Peppers are a symbol of hospitality in many cultures, often used in festive dishes.
    • Using leftover grains or roasted vegetables makes this a zero-waste dish.

    Ingredient insights and tweaks

    • Bell peppers: First I pick firm, shiny peppers—crisp and bright. You want them sturdy enough to hold the filling.
    • Lemon juice: I love a squeeze of lemon for brightness. If you skip it, the dish feels dull and flat.
    • Herbs: Fresh herbs like parsley or cilantro add freshness. Dried herbs can work but lose some vibrancy.
    • Grains: Cooked quinoa or rice work well. Under-cooked grains make the filling gluey, so cook them just right.
    • Olive oil: For roasting and binding flavors. Use good-quality oil for that subtle fruitiness.

    Spotlight on bell peppers and herbs

    Bell peppers:

    • Their sweet, smoky aroma intensifies as they roast, becoming almost caramel-like.
    • They soften beautifully, holding their shape but yielding easily when cut.
    • Look for peppers with smooth, firm skin and vivid color for best results.

    Fresh herbs:

    • Herbs: Fresh parsley or cilantro brighten the filling, adding a grassy freshness that cuts through richness.
    • They release a fragrant aroma when chopped, making the kitchen smell alive.
    • Add herbs at the end to preserve their vibrant flavor.

    Smart substitutions for a flexible dish

    • Dairy-Free: Use coconut yogurt or tahini instead of dairy-based toppings for creaminess.
    • Grains: Swap quinoa with bulgur or millet for different textures and flavors.
    • Vegan Cheese: Nutritional yeast adds cheesy notes, but you can skip it or try vegan cheeses for richer flavor.
    • Herbs: Basil or mint can replace parsley or cilantro, bringing unique aromas.
    • Peppers: Use poblano or banana peppers if you want a different heat level or flavor profile.

    Equipment & Tools

    • Baking dish: To hold the peppers securely for roasting.
    • Sharp knife: To cut the tops off and prepare the peppers.
    • Mixing bowl: To combine the filling ingredients.
    • Spoon or scoop: To stuff the peppers.
    • Aluminum foil: To cover the dish and trap moisture.

    Step-by-step guide to perfect vegan stuffed peppers

    1. Preheat your oven to 180°C (350°F).
    2. Slice the tops off the peppers, remove seeds and membranes, and set aside.
    3. In a bowl, mix cooked grains, chopped veggies, herbs, salt, pepper, and a splash of olive oil.
    4. Stuff the peppers generously with the filling, pressing down slightly.
    5. Place peppers in a baking dish, standing upright. Cover with foil.
    6. Bake for 25-30 minutes, until peppers are soft and slightly blistered.
    7. Remove foil, sprinkle with a little more herbs or seeds, and bake uncovered for 5 more minutes.
    8. Let sit for 5 minutes after baking to settle flavors.
    9. Serve warm, with optional lemon or tahini drizzle.

    Let the stuffed peppers rest for 5 minutes before serving to allow flavors to meld.

    How to Know It’s Done

    • Peppers are tender but hold their shape.
    • Filling is hot and slightly caramelized on top.
    • Peppers are blistered and fragrant.

    Vegan Stuffed Peppers

    These colorful vegan stuffed peppers are roasted until tender and bursting with a savory filling made from grains, vegetables, and herbs. The dish features soft, caramelized peppers with a hearty, flavorful interior, perfect for a cozy and visually appealing dinner. The process involves roasting, stuffing, and baking to achieve a slightly blistered, golden finish.
    Prep Time 15 minutes
    Cook Time 35 minutes
    Total Time 50 minutes
    Servings: 4
    Course: Main Course
    Cuisine: Mediterranean
    Calories: 250

    Ingredients
      

    • 4 large bell peppers firm, shiny, and colorful
    • 1 cup cooked grains (quinoa or rice) just cooked and cooled slightly
    • 1 cup chopped vegetables (zucchini, cherry tomatoes, or spinach) optional, for extra flavor and texture
    • 2 tablespoons fresh herbs (parsley or cilantro) chopped finely
    • 2 cloves garlic minced
    • 2 tablespoons olive oil plus extra for drizzling
    • to taste salt and pepper adjust to preference
    • 1 tablespoon lemon juice for brightness

    Equipment

    • Baking dish
    • Sharp knife
    • Mixing bowl
    • Spoon or scoop
    • Aluminum foil

    Method
     

    1. Preheat your oven to 180°C (350°F). Place the whole peppers on a baking sheet and roast for about 15 minutes, turning occasionally until their skins are slightly blistered and softened. Remove from the oven and set aside to cool slightly.
    2. While the peppers cool, prepare the filling by mixing cooked grains, chopped vegetables, herbs, minced garlic, and olive oil in a bowl. Season with salt, pepper, and a squeeze of lemon juice, then stir until well combined.
    3. Carefully slice off the tops of the roasted peppers and remove their seeds and membranes with a spoon or your fingers, being gentle to keep their shape intact.
    4. Stuff each pepper generously with the prepared grain mixture, pressing down slightly to pack the filling in evenly.
    5. Arrange the stuffed peppers upright in a baking dish, then cover loosely with aluminum foil to trap moisture and help them cook evenly.
    6. Bake the peppers for 25 to 30 minutes, until they are tender and slightly blistered around the edges. The filling should be heated through and fragrant.
    7. Uncover the dish and bake for an additional 5 minutes to allow the tops to brown lightly and develop a slight crisp.
    8. Remove from the oven and let the peppers rest for 5 minutes, allowing the flavors to meld and making them easier to handle.
    9. Serve the stuffed peppers warm, drizzled with a little extra olive oil or lemon juice if desired, and enjoy their vibrant colors and cozy flavors.

    Tips & tricks for perfect stuffed peppers

    • THE HERBS: Fresh herbs release more fragrance when chopped finely.
    • SEAR VEGGIES: Sauté chopped veggies until slightly caramelized for depth.
    • TOSS GRAINS: Toast grains lightly before mixing for a nuttier flavor.
    • USE A HOT OVEN: Ensure even roasting with a preheated oven at 180°C.
    • DON’T OVERFILL: Keep filling just below the rim for neat, even baking.
    • PARALLEL PREP: Chop veggies while grains cook for efficiency.
    • LAYER FLAVOR: Season filling in stages for a more layered taste.

    Common mistakes and how to fix them

    • FORGOT TO POKE HOLES: Peppers may burst. Fix: Pierce with a fork before baking.
    • DUMPED TOO MUCH OIL: Filling feels greasy. Fix: Use sparingly, or dry toast grains first.
    • OVER-TORCHED PEPPERS: Blackened edges. Fix: Cover with foil early if browning too fast.
    • FILLING IS DRY: Tastes bland. Fix: Add a splash of veggie broth or lemon juice before baking.

    Fast fixes for common issues

    • When peppers are too tough, bake longer or slice thinner.
    • Splash a bit of water or broth if filling looks dry during baking.
    • Patch holes in peppers with bits of foil if they leak.
    • Shield peppers with foil if edges darken too quickly.
    • Shimmering oil on top? Brush with a little more before roasting for shine.

    Prepping and storing for busy days

    • Assemble the peppers a day ahead, then bake just before serving.
    • Filling leftovers can be refrigerated for 2-3 days; reheat thoroughly.
    • Frozen stuffed peppers keep well for up to a month, perfect for batch cooking.
    • Reheat in the oven at 160°C (320°F) for 10-15 mins, until fragrant and hot.

    10 Practical Q&As about Vegan Stuffed Peppers

    1. What kind of peppers work best?

    Use bell peppers that are firm, with crisp skin, and no soft spots for the best hold and texture.

    2. How do I know the filling is ready?

    Cook the filling until the grains are tender and the veggies are slightly caramelized for flavor depth.

    3. What’s the right oven temperature?

    Bake at 180°C (350°F) until the peppers are soft and slightly blistered, about 25-30 minutes.

    4. Why rest the peppers?

    Let the peppers rest for 5 minutes after baking to settle the flavors and make handling easier.

    5. How can I enhance the flavor before serving?

    Serve with a squeeze of lemon or a drizzle of tahini for added brightness and creaminess.

    6. How to cut the peppers neatly?

    Use a sharp knife to cut the peppers for easy serving and to avoid squishing the filling.

    7. What if the filling is too dry?

    If the filling seems dry, sprinkle a little vegetable broth or olive oil before baking.

    8. Can I prepare these in advance?

    To make ahead, assemble the peppers and store in the fridge for up to 24 hours before baking.

    9. How do I reheat without drying out?

    Reheat in the oven at 160°C (320°F) for about 10 minutes, until heated through and fragrant.

    10. How do I know when they are done?

    Check for doneness by probing with a fork; the peppers should be tender, and the filling hot and slightly crisp on top.

    Once out of the oven, the peppers should be a little blistered and smoky around the edges, the filling bubbling and fragrant. Rest them for a few minutes — it’s tempting to dig right in, but patience lets everything settle into a perfect harmony.

    These are not just a weeknight dinner; they’re a reminder that good, nourishing food doesn’t have to be complicated. They’re versatile, forgiving, and packed with flavor, perfect for when you need something hearty but wholesome.

  • Sweet Potato Carrot Soup Recipe

    This soup is my go-to on cold, grey days when I want something nourishing but with a slight kick of freshness. The unexpected splash of citrus at the end keeps it from feeling too heavy, even when the weather outside feels relentless.

    I started making this after a trip to a market where I found the sweetest orange carrots and plump sweet potatoes. I realized that roasting them before blending adds a smoky depth I didn’t expect, making the whole bowl feel richer.

    From a cook who loves transforming humble root vegetables into something soul-warming but with a twist of brightness and depth.

    Why this soup is my winter staple

    • I love how roasting caramelizes the natural sugars, making the soup inherently sweet.
    • Sometimes I add a dash of cumin or coriander for a subtle spice—it’s a small tweak that makes a big difference.
    • Having this soup simmer on the stove fills my kitchen with a warm, sweet aroma that feels like a hug.
    • Sharing this dish with friends always sparks conversations about childhood favorites and simple pleasures.

    Personal story behind the recipe

    • I was experimenting with roasting vegetables for a different kind of soup when I stumbled upon this combo. The natural sweetness of the carrots and sweet potatoes, paired with the smoky roasted notes, just clicked.
    • It’s become a comfort food for me, especially when I want something hearty but not heavy. Plus, it’s endlessly customizable—spice it up or keep it mellow.
    • The moment I add the citrus at the end, I feel like I’ve lifted the whole dish into a fresh, lively space. It’s a simple trick that brightens everything.

    The roots and history of sweet potato and carrot cooking

    • This soup is inspired by the earthy sweetness of root vegetables common in many winter cuisines.
    • Sweet potatoes were originally cultivated in Central and South America, treasured for their versatility.
    • Carrots, once purple or white, have been bred into the orange variety we love today, a nod to Dutch innovation.
    • The practice of roasting vegetables to deepen flavor dates back centuries, especially in rustic European cooking.

    Ingredient insights and tweaks

    • Sweet Potato: I love its creamy texture and natural sweetness, but yams work well too if you prefer a drier finish.
    • Carrots: They add bright, earthy sweetness; use heirloom or organic for best flavor and color.
    • Onion & Garlic: Foundations of flavor—skip or reduce for a milder soup, but they’re essential for depth.
    • Vegetable Broth: I prefer homemade or low-sodium store-bought; it keeps the focus on the vegetables.
    • Citrus: Brightens the whole bowl; a little zest or juice transforms the flavor—don’t skip this.

    Spotlight on sweet potatoes and carrots

    Sweet Potatoes:

    • When roasting, they become sweet and tender, with caramelized edges that intensify flavor.
    • Carrots: They release a fragrant sweetness and slightly earthy aroma, especially when roasted.

    Carrots:

    • Sweet potatoes turn velvety when pureed, adding richness to every spoonful.
    • Their natural sugar caramelizes beautifully in the oven, creating a smoky accent.

    Ingredient swap notes

    • Dairy-Free: Use coconut cream or yogurt instead of dairy for a creamy, tangy twist.
    • Vegan: Swap chicken broth with veggie broth, and skip the yogurt topping.
    • Extra Spicy: Add a pinch of cayenne or chili flakes to boost heat.
    • Low-Sugar: Use less or no added citrus if you want a milder, earthier flavor.
    • Gluten-Free: Naturally gluten-free, just ensure your broth or any added toppings are safe.

    Equipment & Tools

    • Large roasting tray: To roast vegetables evenly.
    • Heavy-bottomed pot: For simmering and blending.
    • Immersion blender or regular blender: To puree the soup smoothly.
    • Knife and chopping board: To prepare vegetables and aromatics.
    • Ladle and serving bowls: To serve the soup elegantly.

    Step-by-step guide to your sweet potato carrot soup

    1. Preheat your oven to 200°C (390°F). Peel and chop 2 large sweet potatoes and 3 carrots into chunks.
    2. Toss the vegetables with olive oil, salt, and a pinch of smoked paprika. Roast for 25-30 minutes until caramelized.
    3. In a large pot, sauté 1 diced onion and 2 minced garlic cloves in a tablespoon of oil until translucent, about 5 minutes.
    4. Add the roasted vegetables to the pot. Pour in 4 cups of vegetable broth and bring to a simmer.
    5. Cook gently for 15 minutes, until the flavors meld and vegetables are very tender.
    6. Use an immersion blender or transfer to a blender to puree until smooth. Return to the pot.
    7. Stir in a splash of orange juice or lemon zest, then season with salt, pepper, and a pinch of cayenne.
    8. Let the soup rest off the heat for 10 minutes to develop flavor.
    9. Serve hot, drizzled with olive oil or a dollop of yogurt, and a sprinkle of fresh herbs.

    Allow the soup to rest for 10 minutes after blending, uncovered, to let flavors settle. Finish with a drizzle of olive oil or a dollop of yogurt before serving.

    How to Know It’s Done

    • Check for a deep amber color on roasted vegetables.
    • Smell should be sweet, smoky, with a hint of citrus.
    • Vegetables should be soft and easily pierced with a fork.

    Roasted Sweet Potato and Carrot Soup with Citrus Finish

    This vibrant soup features roasted sweet potatoes and carrots blended into a creamy, velvety base, enhanced by a smoky depth from caramelization. Finished with a splash of citrus, it offers a bright, comforting bowl perfect for chilly days, with a smooth texture and subtle smoky sweetness.
    Prep Time 15 minutes
    Cook Time 45 minutes
    Total Time 1 hour
    Servings: 4
    Course: Main Course
    Cuisine: Healthy, Winter
    Calories: 180

    Ingredients
      

    • 2 large sweet potatoes peeled and chopped
    • 3 medium carrots peeled and chopped
    • 1 medium onion diced
    • 2 cloves garlic minced
    • 4 cups vegetable broth preferably homemade or low-sodium
    • 1 tablespoon olive oil for roasting and sautéing
    • 1 pinch smoked paprika optional, for roasting
    • 1 orange orange for juice or zest
    • to taste salt and pepper for seasoning

    Equipment

    • Large roasting tray
    • Heavy-bottomed pot
    • Immersion blender or regular blender
    • Knife and chopping board
    • Ladle and serving bowls

    Method
     

    1. Preheat your oven to 200°C (390°F). Peel and chop the sweet potatoes and carrots into even-sized chunks, about 1-2 inches.
    2. Toss the chopped vegetables with olive oil, a pinch of smoked paprika, salt, and pepper. Spread them evenly on a large roasting tray.
    3. Roast the vegetables in the oven for 25-30 minutes, until they are caramelized and tender, filling your kitchen with a sweet, smoky aroma.
    4. Meanwhile, dice the onion and mince the garlic. In a large pot, heat a tablespoon of olive oil over medium heat. Sauté the onion and garlic until translucent and fragrant, about 5 minutes.
    5. Add the roasted vegetables to the pot. Pour in the vegetable broth and bring to a gentle simmer.
    6. Let the mixture simmer for about 15 minutes, allowing the flavors to meld and the vegetables to soften fully.
    7. Use an immersion blender or transfer the soup in batches to a blender. Puree until smooth and velvety, then return it to the pot.
    8. Juice the orange or grate some zest, then stir it into the soup. Season with additional salt, pepper, and adjust the citrus to taste.
    9. Let the soup rest off the heat for about 10 minutes to allow the flavors to deepen. Taste and adjust seasoning if needed.
    10. Serve the hot soup in bowls, garnished with a drizzle of olive oil, a dollop of yogurt if desired, or fresh herbs for a bright finish.

    Notes

    For extra depth, add a pinch of cumin or coriander before blending. The citrus brightens the soup, so don’t skip it! This soup keeps well refrigerated for up to 3 days and tastes even better the next day.

    Tips and tricks for perfect soup

    • Roast vegetables for richer flavor. Don’t skip this step for depth.
    • Use immersion blender for quick, smooth results. Avoid over-blending to keep some body.
    • Add citrus at the end for brightness. It balances sweetness beautifully.
    • Taste and adjust seasoning after resting. Flavors meld and evolve.
    • Incorporate a splash of good quality olive oil before serving for richness.

    Common mistakes and how to fix them

    • FORGOT to season early? Add salt and pepper during simmering for layered flavor.
    • DUMPED in all the broth at once? Add gradually, tasting as you go to avoid thinning the soup too much.
    • OVER-TORCHED the garlic? Start over with fresh garlic; burnt flavors are bitter.
    • Lacked smoothness? Pass the soup through a fine sieve or strain for an ultra-silky texture.

    Fast fixes for common hiccups

    • When too thick, splash in hot broth and blend briefly to loosen.
    • If too bland, add a squeeze of lemon or a dash of vinegar to brighten.
    • Splash a little coconut milk or cream for extra creaminess and flavor.
    • Patch over-salted soup with a peeled, raw potato for quick salt absorption.
    • When missing a garnish, sprinkle with toasted seeds or chopped herbs for texture and flavor.

    Prep ahead, store, and reheat tips

    • Roast vegetables the day before, then refrigerate in an airtight container for up to 2 days.
    • The soup can be made entirely a day ahead; reheat gently on the stove, stirring occasionally.
    • Flavor deepens after a night in the fridge, so it tastes even better the next day.
    • Reheat in a pot over medium heat until steaming and hot, about 5-7 minutes, adjusting with a splash of broth if needed.

    10 practical Q&As about Sweet Potato Carrot Soup

    1. What’s the best pot to cook this soup in?

    Use a large, heavy-bottomed pot to ensure even heat and prevent scorching.

    2. Should I roast the vegetables before blending?

    Roast the sweet potatoes and carrots first for a deeper, smoky flavor.

    3. How can I make the soup more vibrant in flavor?

    Add a splash of orange juice or lemon zest at the end for brightness.

    4. How do I know when the vegetables are tender enough?

    Simmer until the vegetables are soft and easily pierced with a fork.

    5. Is it better to blend the soup fully or leave some texture?

    Puree the soup until smooth, then strain if you want extra silkiness.

    6. How do I balance the sweetness and spice?

    Adjust seasoning with salt, pepper, and a pinch of cayenne for a gentle kick.

    7. Should I serve immediately or let it sit?

    Let the soup rest for 10 minutes after blending to let flavors meld.

    8. Can I substitute fresh ginger with ground ginger?

    Use fresh ginger for a zing, or ground ginger for convenience.

    9. What are nice finishing touches?

    Top with a drizzle of good olive oil or a dollop of yogurt.

    10. How long does the soup keep?

    Store leftovers in airtight containers for up to 3 days in the fridge.

    A bowl of this soup isn’t just about comfort; it’s about giving those simple ingredients a moment to shine. It’s easy to make, quick to finish, and somehow always feels like a little celebration of the season.

    In the end, it reminds me that the best dishes often come from just a few humble ingredients, treated well and with enough love.

  • Cranberry Brie Bites Recipe

    Cranberry Brie Bites are my go-to for any party, especially when I want to surprise people with something familiar yet new. The way the tart cranberries pop against the creamy, mild Brie in a flaky pastry is just so satisfying. It’s a simple combo, but I love how it feels like a tiny celebration with every bite.

    These bites are also my answer to the chaos of holiday prep—small, quick, and packed with flavor. I often make a batch early in the day, then just pop them in the oven when guests arrive. The smell alone—baked pastry, melting cheese, and cranberries—sets a warm, festive tone that’s hard to beat.

    The Unusual Art of Balancing Sweet and Savory Flavors in Tiny Bites

    Why These Tiny Bites Matter to Me

    • I love how quick these come together, especially when I’m short on time.
    • They remind me of holiday mornings, the smell of pastry baking filling the house.
    • Making them always feels like a small act of celebration—even on a regular Tuesday.
    • I get a little proud watching guests take that first bite—such a simple pleasure.

    A Personal Story of Inspiration

    • This recipe came about one busy holiday season when I wanted something festive yet manageable. I played around with the cranberry and Brie combo, trying to balance tartness and creaminess.
    • It’s become a favorite because they’re so adaptable—swap the cranberries for apple chutney, or the Brie for goat cheese. Each tweak feels like a new little adventure.
    • I love how these bites can be assembled ahead, baked just before serving, and still taste fresh and vibrant. They’re my tiny, delicious way to bring a bit of joy to any gathering.

    A Little History and Quirky Trivia About Cranberry Brie Bites

    • Inspired by traditional cheese and cranberry pairings, but reimagined as a portable bite.
    • Originally, these were Christmas party staples in my family, evolving from a simple cheese platter.
    • The puff pastry base is a nod to French pâtisserie, adding a flaky crunch.
    • Cranberries are native to North America and have been used in seasonal dishes for centuries.
    • The idea of mini bites dates back to canapé culture in 19th-century France.

    Ingredient Insights & Tweak Tips

    • Puff Pastry: I prefer store-bought for ease, but homemade is flaky and buttery. Swap with filo for a lighter crunch.
    • Cranberries: Fresh cranberries give that tart punch; frozen are a solid substitute, just thaw and drain.
    • Brie: Creamy Brie melts beautifully, but Camembert works too—both oozy and rich.
    • Sugar or Honey: Adds a touch of sweetness to balance tart cranberries; maple syrup can be a subtle swap.
    • Herbs: Thyme adds earthiness, but rosemary or a pinch of sage can add a different aromatic note.

    Spotlight on Cranberries and Brie

    Brie: Its velvety richness and mild flavor make it the perfect melty partner.:

    • Cranberries: They burst with a tart, slightly spicy flavor that brightens each bite.
    • They soften and sweeten as they cook, releasing a deep ruby juice that shimmers.
    • Fresh cranberries hold their shape better, but frozen berries are convenient and just as flavorful.

    Puff Pastry: Flaky, buttery layers that puff up during baking—crisp on the edges, tender inside.:

    • Brie transforms from firm to oozy quickly, so slice thin for even melting.
    • Look for a Brie with a natural rind; it adds flavor and helps in even melting.
    • The cheese’s buttery aroma intensifies as it bakes, filling your kitchen with warmth.

    Substitutions for Different Tastes and Needs

    • Dairy-Free: Use almond or cashew cheese—less creamy but still flavorful.
    • Gluten-Free: Swap with rice paper or gluten-free pastry—watch baking times closely.
    • Sweetener: Maple syrup or agave can replace sugar for a subtle flavor change.
    • Cranberry Alternative: Chutney or fig jam for a sweeter, less tart variation.
    • Herbs: Basil or mint for a fresh twist, especially if serving in summer.

    Equipment & Tools

    • Mini muffin tin: Shape and contain the bites during baking
    • Round cookie cutter: Cut out pastry circles
    • Baking sheet and parchment paper: Ease removal and prevent sticking
    • Sharp knife or cheese slicer: Slice the Brie evenly
    • Cooling rack: Allow the bites to cool evenly

    Step-by-Step Guide to Perfect Cranberry Brie Bites

    1. Preheat your oven to 200°C (390°F).
    2. Unfold the puff pastry sheet on a lightly floured surface. Using a round cutter, cut out 24 circles about 3 inches in diameter.
    3. Place the pastry circles into a greased mini muffin tin, pressing gently to fit snugly.
    4. Slice the Brie into 24 thin pieces, about 1/8 inch thick.
    5. In each pastry cup, place a small piece of Brie, a teaspoon of cranberry sauce or whole cranberries, and a little sprinkle of sugar or honey if desired.
    6. Bake in the oven for about 15 minutes, or until the pastry is golden brown and the cheese is bubbly.
    7. Check the bites: the pastry should be crisp, cheese melted, and cranberries softened and shiny.
    8. Remove from oven and let sit for 5 minutes. The cheese will firm up slightly as it cools.
    9. Garnish with a tiny sprig of thyme or a sprinkle of flaky sea salt if you like.
    10. Serve warm or at room temperature, ideally within 2 hours of baking.

    Let the bites rest for 5 minutes after baking to allow the cheese to set slightly before serving.

    How to Know It’s Done

    • Pastry edges golden and crisp.
    • Cheese melted and slightly bubbly.
    • Cranberries softened but not disintegrated.

    Cranberry Brie Bites

    Cranberry Brie Bites are small, flaky pastry cups filled with creamy Brie cheese and tart cranberries, baked until golden and bubbling. They showcase a delightful balance of sweet and savory flavors, with textures ranging from crisp pastry to soft, melted cheese. Perfect as a festive appetizer, they come together quickly and look stunning on any party platter.
    Prep Time 15 minutes
    Cook Time 15 minutes
    Total Time 30 minutes
    Servings: 24
    Course: Main Course
    Cuisine: American
    Calories: 120

    Ingredients
      

    • 1 sheet store-bought puff pastry thawed but cold
    • 8 oz Brie cheese slice thinly
    • 1/2 cup cranberry sauce or whole cranberries
    • 1 tbsp sugar or honey optional for sweetness
    • 1 tsp fresh thyme for garnish, optional

    Equipment

    • Mini muffin tin
    • Round cookie cutter
    • Baking sheet
    • Parchment paper
    • Sharp knife
    • Cooling rack

    Method
     

    1. Preheat your oven to 200°C (390°F), and line a baking sheet with parchment paper.
    2. Unfold the puff pastry onto a lightly floured surface. Using a round cookie cutter, cut out 24 circles about 3 inches in diameter.
    3. Gently press each pastry circle into the cups of a greased mini muffin tin, ensuring they fit snugly and hold their shape.
    4. Slice the Brie cheese into thin pieces, about 1/8 inch thick, to make melting easier and more even.
    5. Place a small piece of Brie into each pastry cup, followed by a teaspoon of cranberry sauce or a few whole cranberries. Sprinkle with a tiny bit of sugar or honey if you like extra sweetness.
    6. Bake in the preheated oven for about 15 minutes, until the pastry edges are golden brown, and the cheese is bubbling and soft.
    7. Remove from the oven and let the bites cool for 5 minutes on a cooling rack — this helps the cheese set slightly and makes handling easier.
    8. Garnish with a tiny sprig of thyme for a fresh herbal touch, if desired. Serve warm or at room temperature for the best melty cheese and vibrant cranberries.

    Notes

    For extra flavor, drizzle honey or balsamic glaze over the bites before serving. These can be assembled ahead and baked just before your event for maximum freshness.

    Tips & Tricks for Perfect Cranberry Brie Bites

    • Pastry Handling: Keep pastry cold to prevent sticking and tearing.
    • Cheese Slicing: Slice Brie thin for quick melting and even distribution.
    • Cranberry Choice: Use fresh cranberries for tartness, frozen works in a pinch.
    • Baking Time: Watch for golden edges; overbaking makes pastry tough.
    • Flavor Boost: Add a drizzle of honey or balsamic glaze after baking.
    • Pastry Placement: Press pastry gently into the muffin tin for a snug fit.
    • Cranberry Prep: Drain excess juice to avoid soggy bites.

    Common Mistakes and How to Fix Them

    • FORGOT to chill the pastry? Briefly freeze it for 10 minutes to firm up.
    • DUMPED too much cranberry? Use a slotted spoon to remove excess juice and berries.
    • OVER-TORCHED the edges? Cover with foil and lower the oven temp to salvage.
    • MISSED the salt? Sprinkle a tiny pinch on top before baking for enhanced flavor.

    Quick Fixes for Common Baking Woes

    • If the pastry is soggy, bake a few extra minutes until crisp.
    • When cheese isn’t melting, increase oven temp slightly or extend baking time.
    • Splash a little extra cranberry sauce if flavor is muted.
    • Patch over burnt edges with a tiny piece of fresh pastry, then bake briefly.
    • Shield over-browned pastry with foil; crisp up again in a hot oven.

    Make-Ahead and Storage Tips

    • Assemble the bites a few hours ahead, keep refrigerated covered in plastic wrap.
    • Bake just before serving for the best flaky texture and melty cheese.
    • Reheat in a 180°C (350°F) oven for 5-7 minutes until warm and crispy.
    • Store leftovers in an airtight container in the fridge for up to 24 hours; reheat as above.

    10 Practical Q&As About Cranberry Brie Bites

    1. Can I use homemade pastry?

    Use a good quality puff pastry, thawed but still cold, to get that flaky, tender bite.

    2. Can I substitute dried cranberries?

    Fresh cranberries are best for their tartness, but frozen can work if thawed and drained well.

    3. How thin should the brie slices be?

    Brie should be sliced thin; too thick and it won’t melt properly, too thin and it risks burning.

    4. What’s the perfect bake time?

    Bake at 200°C (390°F) for about 15 minutes until the pastry is golden and bubbly.

    5. Should I serve hot or cold?

    Serve these warm for melty cheese and vibrant cranberry flavor, but they’re still delicious at room temp.

    6. Can I add herbs?

    Add a sprinkle of fresh thyme or rosemary for an herbal note that complements the tart cranberries.

    7. What tools are essential?

    Use a mini muffin tin for uniform bites; parchment paper helps with easy removal.

    8. How far in advance can I prepare?

    These bites can be made a few hours ahead; keep refrigerated and reheat briefly before serving.

    9. What does perfect color look like?

    Watch the pastry edges; they should be crisp and golden, not burnt or pale.

    10. Why is my cheese spilling over?

    If the cheese overflows, gently push it back in as it melts; don’t overfill the cups.

    Sometimes, I think about how these tiny bites manage to be both elegant and playful at the same time. They remind me that good food doesn’t have to be complicated or fancy to bring a smile. It’s all about the small details—the flaky crust, the burst of cranberry, the gooey Brie—that make them special.

    In the end, these Cranberry Brie Bites are about more than just flavor—they’re about creating little moments of joy, one crispy, cheesy, tart bite at a time. They’re perfect for sharing and making even the simplest gathering feel a bit more memorable.

  • Easy Vegan Potato Soup Recipe

    When I make this vegan potato soup, I think about how simple ingredients can transform into something warm and satisfying. It’s not fancy, but the smell of simmering potatoes and onions fills the kitchen with a promise of comfort.

    There’s a kind of magic in blending part of the soup, turning it velvety without losing the hearty chunks—like a hug in a bowl. It’s the kind of dish that makes you slow down, savor each spoonful, and feel grateful for everyday ingredients.

    Focusing on the comforting, homely aspect of potato soup, but with a twist — emphasizing the sensory experience of blending and texture, making it a cozy yet engaging dish to prepare on a quiet weekend.

    Why this recipe matters to me

    • I love how this soup feels like a warm blanket on a cold day.
    • Sometimes I get carried away blending too much—remember to leave some texture.
    • I find that a splash of lemon makes all the flavors pop—don’t skip it.
    • This dish reminds me of quiet weekend mornings, simple and satisfying.

    The story behind my favorite potato soup

    • A few years ago, I was craving something warm and easy after a long day. I had potatoes, onions, and a desire for comfort.
    • That night, I threw everything into a pot, blended part of it, and ended up with a soup that felt like a hug.
    • It’s become a go-to when I need a quick, nourishing meal that’s flexible and forgiving.

    Origin and trivia of potato soup

    • Potato soup has roots in peasant cuisine across Europe, where humble ingredients were turned into hearty meals.
    • The use of blended potatoes to create a creamy texture predates commercial cream, relying instead on natural starches.
    • Yukon Gold potatoes were developed in Canada in the 1980s, prized for their buttery flavor and smooth texture, perfect for soups.
    • Adding lemon juice at the end brightens the dish, balancing the earthiness of potatoes and onions.

    Ingredient breakdown insights

    • Potatoes: First-person, I love Yukon Gold for their buttery flavor and smooth texture. Swap with sweet potatoes for sweetness or cauliflower for a lighter version.
    • Onion: Adds sweetness and depth. Use shallots for milder flavor, or leeks for a subtle onion note.
    • Garlic: Brings warmth and aroma. Roast garlic beforehand for a smoky twist.
    • Vegetable broth: The flavor base. Use homemade for richness or water plus miso for a quick fix.
    • Lemon juice: Brightens everything. Lime can add a different citrus note.

    Spotlight on potatoes and onions

    Potatoes:

    • Yukon Gold potatoes: Creamy, buttery, and hold shape well. Watch for them turning mushy if overcooked.
    • Onions: Caramelize slightly for sweetness, but keep an eye on the heat to avoid burning.

    Onions:

    • When sautéed until translucent, they release a sweet aroma that fills the kitchen.
    • Onion slices should become soft and slightly golden, indicating they’re sweet and ready.
    • Onions are the backbone of flavor—don’t rush the sauté.

    Ingredient substitutions to customize your soup

    • Broth: Use water with a pinch of nutritional yeast or miso to mimic depth.
    • Potatoes: Sweet potatoes give a different sweetness and vibrant color.
    • Onions: Leeks can substitute for a milder, more delicate flavor.
    • Garlic: Shallots or garlic powder for a subtler or more convenient option.
    • Lemon juice: Lime or vinegar for a different bright note.

    Equipment & Tools

    • Large pot: Cook and simmer ingredients.
    • Immersion blender or regular blender: Puree part of the soup for texture.
    • Knife and chopping board: Prep vegetables.
    • Measuring spoons and cups: Accurately measure ingredients.
    • Ladle: Serve the soup.

    Step-by-step guide to making vegan potato soup

    1. Gather your tools: a large pot, an immersion blender or regular blender, and a spoon.
    2. Peel and dice about 4 large potatoes into 2 cm cubes. Set aside.
    3. Dice one large onion and mince 2 cloves of garlic.
    4. In the pot, heat 1 tbsp olive oil over medium. Add onion and garlic. Cook until fragrant, about 5 mins, stirring frequently.
    5. Add diced potatoes and 4 cups vegetable broth. Bring to a boil, then lower to simmer. Cook until potatoes are very tender, about 15-20 mins.
    6. Check for doneness: potatoes should be easily pierced and the broth slightly reduced.
    7. Use an immersion blender directly in the pot to blend about half of the soup until smooth, leaving some chunks. Or, transfer half to a regular blender, blend, then return to the pot.
    8. Taste and adjust seasoning with salt, pepper, and a squeeze of lemon juice. Simmer for another 2 mins.
    9. Serve hot, topped with herbs or nutritional yeast.
    10. Rest for 5 mins before serving to allow flavors to meld.

    Let the soup rest for 5 minutes after blending to allow flavors to meld. Serve warm, garnished as desired.

    How to Know It’s Done

    • Potatoes are tender and easily pierced.
    • Soup achieves a velvety, slightly chunky texture.
    • Flavor is balanced with seasoning and acidity.

    Vegan Potato Soup

    This vegan potato soup combines simple ingredients like Yukon Gold potatoes and onions, simmered until tender and then blended to create a velvety texture with hearty chunks remaining. The process involves sautéing, simmering, and blending, resulting in a warm, comforting bowl with a smooth yet chunky appearance. Finished with a splash of lemon for brightness, it’s a cozy dish perfect for quiet weekends or chilly days.
    Prep Time 10 minutes
    Cook Time 30 minutes
    Total Time 40 minutes
    Servings: 4
    Course: Main Course
    Cuisine: Comfort Food
    Calories: 250

    Ingredients
      

    • 4 large Yukon Gold potatoes peeled and diced into 2 cm cubes
    • 1 large onion diced
    • 2 cloves garlic minced
    • 4 cups vegetable broth preferably homemade or good quality store-bought
    • 1 tablespoon olive oil for sautéing
    • to taste salt and pepper adjust at the end of cooking
    • 1 tablespoon lemon juice brightens the flavor, add at the end

    Equipment

    • Large pot
    • Immersion blender or regular blender
    • Knife and chopping board
    • Measuring spoons and cups
    • Ladle

    Method
     

    1. Start by heating a large pot over medium heat and add a tablespoon of olive oil. Once shimmering, add the diced onion and cook until translucent and fragrant, about 5 minutes, stirring occasionally.
    2. Add the minced garlic to the pot and cook for another minute until fragrant, being careful not to burn it. The kitchen will fill with a warm, savory aroma.
    3. Stir in the diced potatoes, coating them with the onion and garlic mixture. Cook for 2-3 minutes as the potatoes start to absorb the flavors.
    4. Pour in the vegetable broth and bring the mixture to a gentle boil. Once bubbling, reduce the heat to low, cover, and let simmer until the potatoes are very tender, about 15-20 minutes.
    5. Check that the potatoes are soft by piercing a few with a fork; they should yield easily. Remove the pot from heat.
    6. Use an immersion blender directly in the pot to blend about half of the soup until smooth, leaving some chunks for texture, or transfer half to a regular blender, blend, then return to the pot.
    7. Season the soup with salt and pepper to taste, then add a tablespoon of lemon juice to brighten the flavors. Stir well and let simmer for another 2 minutes.
    8. Taste and adjust seasoning if needed, adding more salt, pepper, or lemon juice as desired. The soup should be velvety with some hearty chunks remaining.
    9. Ladle the hot soup into bowls and serve immediately, garnished with herbs or nutritional yeast if you like. Enjoy its comforting warmth and creamy-chunky texture!

    Notes

    Remember to leave some of the potatoes unblended for texture, and don’t skip the splash of lemon to brighten the dish.

    Cooking tips and tricks

    • Use starchy potatoes for natural thickening—no need for extra thickeners.
    • Sauté onions and garlic until fragrant but not browned, for a sweeter flavor.
    • Blend part of the soup for creaminess, but leave some chunks for texture.
    • Add lemon or vinegar at the end to brighten flavors.
    • Keep the heat moderate during blending to prevent splatters.

    Common mistakes and how to fix them

    • FORGOT to salt the water? Add salt during simmering to enhance flavor.
    • DUMPED all the broth in one go? Add gradually, tasting as you go, for balanced seasoning.
    • OVER-TOASTED the garlic? Quickly add a splash of water or broth to stop burning.
    • SCOURED the soup? Scrape the bottom, add a little water, and keep stirring.

    Quick kitchen fixes

    • When soup is too thick, splash in hot broth and stir until smooth.
    • If bland, add a splash of soy sauce or miso for umami.
    • Splash some lemon juice if flavors are dull or flat.
    • Patch over a burnt bottom by transferring unburned soup to a new pot.
    • Shield over-salted soup with a raw potato for 10 mins, then remove.

    Make-ahead and storage tips

    • Peel and dice potatoes ahead of time, store in water in the fridge for 24 hours.
    • Soup keeps well in the fridge for up to 4 days; reheat gently on the stove, stirring.
    • For longer storage, freeze in airtight containers for up to 3 months.
    • Reheat until steaming and adjust seasoning as needed, adding a splash of water or broth to loosen.

    10 Practical Q&As about Easy Vegan Potato Soup

    1. What kind of potatoes work best?

    Use starchy potatoes like Russets or Yukon Gold for creaminess and smooth texture.

    2. How do I know when the potatoes are done?

    Cook until potatoes are very tender, easily pierced with a fork, about 15-20 minutes.

    3. Should I blend all or some of the soup?

    Blend part of the soup for a thicker texture, leaving some chunks for contrast.

    4. How can I enhance the flavor?

    Adjust salt and pepper to taste after blending, and add a splash of lemon juice for brightness.

    5. Can I use store-bought broth?

    Use a good vegetable broth for depth; homemade is ideal if you have time.

    6. How should I reheat the soup?

    Leftovers keep well in the fridge for 3-4 days, reheat gently on the stove.

    7. How do I make it creamier when reheating?

    Add a splash of plant-based milk or a drizzle of olive oil before serving for richness.

    8. What if the soup thickens too much?

    If the soup is too thick after cooling, thin with a bit more broth or water.

    9. What are good toppings?

    Top with chopped green onions, fresh herbs, or a sprinkle of nutritional yeast for extra flavor.

    10. Is this soup gluten or soy free?

    This soup is naturally gluten-free and can be made soy-free by choosing appropriate broth and seasonings.

    This soup is one of those recipes that feels like a little act of kindness. It’s easy to throw together, especially on a chilly day when you need something nourishing and straightforward.

    Plus, it’s flexible—add your favorite herbs or a dash of spice to make it your own. Sometimes, it’s the simplest dishes that stick with us longest, warming us from the inside out.

  • No-bake Peanut Butter Bars Recipe

    Sometimes the best recipes come from unexpected moments — like a sudden craving or a forgotten pantry. These no-bake peanut butter bars were born from just that: a handful of ingredients, a quiet afternoon, and a desire for something sweet but straightforward.

    No oven, no fuss, just good ingredients coming together in a way that feels almost meditative. I like to think of it as a little act of making do, turning simple staples into something satisfying and a bit indulgent.

    The Unusual Art of Making No-Bake Peanut Butter Bars Using Only Pantry Staples and Mindful Timing

    Why These Bars Matter to Me

    • I love how these come together so quickly — no oven, just a bit of patience.
    • Nothing beats that first bite of cold, chocolatey crunch.
    • I’ve made these for friends, and they always disappear faster than I expect.
    • They remind me of childhood afternoons—simple, sweet, and totally satisfying.

    The Inspiration Behind the Bars

    • This recipe was born out of a busy weekend when I needed something sweet, fast, and satisfying. I didn’t want to turn on the oven or spend hours in the kitchen, so I threw together what I had—peanut butter, oats, chocolate—and the result was perfect.
    • It’s become my go-to when I want a treat that feels homemade but requires minimal effort. Plus, they’re so adaptable — I can toss in some chopped nuts or a sprinkle of sea salt for extra flair.
    • It’s a little reminder that sometimes, simple ingredients and a bit of patience can create something truly delightful.

    The Quirky Roots and Fun Facts Behind These Bars

    • Inspired by childhood treats, but simplified for grown-up kitchens.
    • Originally a way to use up leftover ingredients and satisfy a sweet tooth.
    • Peanut butter bars date back to the early 20th century, with variations worldwide.
    • No-bake recipes surged in popularity during the 1970s health food movements.
    • Chocolate topping is a modern addition, though some prefer just a dusting of cocoa.

    Ingredient Insights and Tweaks

    • Peanut Butter: I prefer natural, oily types for depth — second-person: try crunchy for added texture.
    • Honey: Adds sweetness and helps everything stick — swap with maple syrup for a different flavor note.
    • Oats: The backbone of the bars, providing chewiness — use gluten-free oats if needed.
    • Chocolate: The finishing touch, rich and glossy — dark chocolate gives a deeper flavor, milk is sweeter.
    • Vanilla extract: Enhances sweetness and aroma — skip if you prefer a more intense peanut flavor.

    Spotlight on Peanut Butter and Chocolate

    Peanut Butter:

    • Creamy or chunky, it’s the star—look for natural varieties with minimal additives.
    • It’s gooey when warm, but firms up as it cools, giving texture and richness.

    Chocolate:

    • Melts into a shiny, smooth layer—choose good-quality chocolate for the best flavor.
    • It crackles gently as it sets, a satisfying sign that it’s hardening beautifully.

    Smart Substitutions for Different Diets and Tastes

    • Dairy-Free: Use coconut oil or dairy-free chocolate for vegan, dairy-free bars.
    • Sweetener: Maple syrup or agave can replace honey, changing the flavor slightly.
    • Nut Varieties: Almond or cashew butter can stand in for peanut butter, each adding unique flavor.
    • Oats: Use crushed graham crackers or crushed cookies for a different texture.
    • Chocolate: White chocolate or carob chips can be alternatives, giving different sweetness.

    Equipment & Tools

    • 20cm (8-inch) square pan: To shape and set the bars
    • Microwave-safe bowl: For melting peanut butter mixture and chocolate
    • Spatula: For mixing and spreading
    • Sharp knife: To slice the bars
    • Parchment paper: To prevent sticking and for easy lifting

    Step-by-step Guide to No-Bake Peanut Butter Bars

    1. Line a 20cm (8-inch) square pan with parchment paper, leaving some overhang for easy lifting.
    2. In a microwave-safe bowl, combine peanut butter, honey, and vanilla. Microwave for 30 seconds, then stir until smooth and gooey.
    3. Add the oats and salt to the peanut butter mixture. Mix well — it should be thick and sticky.
    4. Press the mixture evenly into the prepared pan. Use the back of a spoon or spatula to smooth the top.
    5. Chop the chocolate into small pieces. Melt in a bowl over a double boiler or in short bursts in the microwave, stirring until shiny and smooth.
    6. Pour the melted chocolate over the peanut butter layer. Use a spatula to spread it evenly.
    7. Refrigerate for at least 2 hours, or until the chocolate is firm and the bars are set.
    8. Lift the bars out using the parchment overhang. Slice into 12 pieces with a sharp knife.
    9. Serve immediately or store in an airtight container in the fridge. Let sit at room temp for 10 minutes before eating if chilled.

    Refrigerate until fully set, about 2 hours. For cleaner slices, chill longer. Serve straight from fridge or at room temp for a softer bite.

    How to Know It’s Done

    • Chocolate layer is shiny and smooth.
    • Bars hold their shape when sliced.
    • Peanut butter mixture is firm but pliable before pressing into pan.

    No-Bake Peanut Butter Bars

    These no-bake peanut butter bars are simple, refrigerator-set treats made with pantry staples like peanut butter, oats, honey, and chocolate. They come together quickly without an oven, featuring a chewy peanut butter oat base topped with a glossy layer of melted chocolate, resulting in a satisfying, bite-sized dessert with a crunchy and smooth texture.
    Prep Time 10 minutes
    Cook Time 2 hours
    Total Time 2 hours 10 minutes
    Servings: 12
    Course: Main Course
    Cuisine: American
    Calories: 180

    Ingredients
      

    • 1/2 cup natural peanut butter creamy or chunky
    • 1/4 cup honey or maple syrup
    • 1 teaspoon vanilla extract
    • 1 1/2 cups old-fashioned oats gluten-free if needed
    • Pinch salt
    • 1/2 cup chocolate chips or chopped chocolate good quality for best flavor
    • 1 teaspoon coconut oil optional, for melting chocolate

    Equipment

    • 20cm (8-inch) square pan
    • Microwave-safe bowl
    • Spatula
    • Sharp knife
    • Parchment paper

    Method
     

    1. Line your square pan with parchment paper, leaving some overhang for easy removal.
    2. In a microwave-safe bowl, combine the peanut butter, honey, and vanilla. Microwave in 30-second bursts, stirring in between, until the mixture is smooth, gooey, and fragrant—about 1 minute total.
    3. Add the oats and a pinch of salt to the melted mixture. Mix thoroughly with a spatula until everything is evenly combined and sticky.
    4. Press the oat mixture evenly into the prepared pan, using the back of a spatula or your fingers to smooth the surface—this helps create a compact, chewy base.
    5. Chop the chocolate into small pieces if using bars. Melt the chocolate chips or chopped chocolate with the coconut oil in short bursts in the microwave, stirring until smooth and shiny—about 30 seconds each time.
    6. Pour the melted chocolate over the pressed peanut butter oat layer, spreading it evenly with a spatula to cover all surfaces completely.
    7. Refrigerate the pan for at least 2 hours, or until the chocolate is firm and the entire layer is set. The bars will firm up and be ready to cut.
    8. Once chilled, lift the bars out of the pan using the parchment overhang. Slice into 12 equal pieces with a sharp knife, pressing down firmly but gently to keep clean edges.
    9. Serve immediately or store in an airtight container in the fridge. For a softer bite, let the bars sit at room temperature for 10 minutes before eating.

    Tips & Tricks for Perfect Bars

    • MIXING: Ensure the peanut butter mixture is thoroughly combined for even flavor.
    • CHOCOLATE: Melt chocolate slowly to prevent burning and achieve a glossy finish.
    • PRESSING: Use the back of a spatula or a flat-bottomed glass to press down firmly.
    • CHILLING: Allow enough time for bars to set completely, or they’ll be too soft to slice.
    • VARIATION: Mix in chopped nuts or dried fruit for added texture and flavor.

    Common Mistakes and How to Fix Them

    • FORGOT TO CHILL? — Pop the bars back in the fridge for 30 minutes to firm up.
    • DUMPED TOO MUCH SALT? — Rinse the mixture with a splash of water, then re-mix.
    • OVERTORCHED CHOCOLATE? — Add a small spoonful of coconut oil for shine and looseness.
    • MISSED A SPOT? — Use a spatula or the back of a spoon to even out the chocolate layer.

    Quick Fixes for Common Issues

    • When chocolate is thick, add a teaspoon of coconut oil to loosen it.
    • Splash a little hot water into melted chocolate if it’s too stiff.
    • Patch sticky mixture with a few more oats to firm it up.
    • Shield bars from humidity by storing in an airtight container.
    • When bars crack, re-melt chocolate and re-coat for a smooth finish.

    Make-Ahead and Storage Tips

    • Prepare and press the mixture into the pan ahead of time. Cover and refrigerate overnight for flavors to meld.
    • Store bars in an airtight container in the fridge for up to a week. They stay chewy and chocolatey.
    • Refrigeration enhances flavor depth. Flavors mellow and the chocolate firms up.
    • Reheat slightly by letting sit at room temp for 10 minutes or warming briefly in the microwave for a softer bite.

    10 Practical Q&As About No-Bake Peanut Butter Bars

    1. Can I use natural peanut butter?

    Use natural peanut butter for a richer, more complex flavor. If you only have processed, it’ll still work, but it might be a tad sweeter and less nutty.

    2. Can I make these with crunchy peanut butter?

    Yes, just warm it slightly to make it easier to mix with the other ingredients. It helps everything come together smoothly.

    3. Is crunchy peanut butter okay?

    Absolutely. It adds a nice texture contrast—crunchy bits in the smooth, creamy base.

    4. How long do I need to chill them?

    Chill the bars for at least 2 hours; overnight is even better. This helps them set firm and slice cleanly.

    5. How do I store these?

    Store in an airtight container in the fridge for up to a week. They stay chewy and flavorful, just a bit colder.

    6. My bars are too soft, what’s wrong?

    If they get too soft, pop them in the fridge for 30 minutes before slicing. It firms them up.

    7. Can I use chocolate chips instead of a bar?

    Use good-quality chocolate and melt it gently over low heat or in short bursts in the microwave.

    8. Can I use a different type of chocolate?

    Yes, just melt them carefully—microwave in 20-second bursts, stirring in between—until smooth.

    9. Should I add salt on top?

    Add a pinch of sea salt on top before chilling for a salty-sweet contrast that makes everything pop.

    10. Can I leave these out on the counter?

    Yes, they’re best when kept in a cool, dry place; avoid leaving in a hot car or sunny windows.

    These bars aren’t just a quick fix—they’re a reminder that sometimes, simplicity is the real magic. They’re perfect for when you need a sweet hit without the hassle.

    And honestly, they’re a treat that’s easy to customize. Add a sprinkle of sea salt, toss in some chopped nuts, or drizzle extra chocolate—whatever makes your kitchen feel a little more like yours.

  • Crispy Baked Tofu Nuggets Recipe

    When I first started making tofu nuggets, I was obsessed with getting that perfect crunch without frying. It’s a balancing act—moisture out, coating on, heat just right. The smell of toasted breadcrumbs and the sizzle when you flip them is oddly satisfying. This recipe isn’t just about the crunch; it’s about making something plant-based feel indulgent and real.

    I love how simple ingredients—firm tofu, breadcrumbs, a splash of soy—can transform into something so crave-worthy. It’s the kind of dish I turn to when I want comfort but also want to keep it healthy. Plus, it’s versatile—serve them as a snack, a main, or part of a salad.

    A cook’s notes perspective—focusing on the honest, tactile experience of making crispy baked tofu nuggets.

    Why I keep coming back to these nuggets during busy nights

    • I love how the smell of toasted breadcrumbs fills my kitchen.
    • Nothing beats that first crispy bite—firm, crunchy, and satisfying.
    • I’ve messed up this recipe more times than I can count—each time I learn something new.
    • Sharing these with friends always sparks a good debate about the best dipping sauce.

    My accidental discovery that turned into a favorite lunch

    • This recipe was born out of a lazy Sunday craving for something crispy and satisfying. I wanted to avoid frying but still get that addictive crunch. The key was finding the right balance of moisture and coating, and a hot oven to do the work.
    • I experimented with different coatings—cornflakes, panko, even crushed pretzels—until I found this perfect crispy combo. It’s become my go-to for a quick, flavorful bite that feels indulgent without the guilt.
    • Sometimes I toss in a little nutritional yeast for a cheesy boost or add chili flakes for heat. It’s flexible, forgiving, and always turns out delicious.

    A little history and fun facts about tofu and baking

    • Tofu has been a staple in Asian cuisines for centuries, especially in China and Japan.
    • The term ‘tofu’ comes from the Japanese pronunciation of the Chinese word ‘doufu.’
    • Baking instead of frying reduces oil use, making it a healthier choice.
    • Panko breadcrumbs originated in Japan and are lighter and crunchier than regular breadcrumbs.
    • This method mimics the texture of fried nuggets without the mess or excess oil.

    Ingredient insights: what makes these nuggets work

    • Extra firm tofu: I prefer pressing out moisture thoroughly for that dense bite. Swap with pre-pressed if you’re in a rush, but expect less crispness.
    • Breadcrumbs: Panko makes the crunch light and airy. Substitute with crushed rice crackers for a different texture and flavor.
    • Soy sauce: Adds umami and helps the coating stick. Coconut aminos work if you want soy-free, but the flavor will mellow.
    • Garlic powder: For a savory punch, but skip if you’re sensitive to garlic. Use smoked paprika for a smoky depth.
    • Cooking spray: A light mist helps with even browning. Use a brush for more control or skip for less oil.

    Spotlight on the key ingredients

    Soy sauce: It’s the umami bomb that ties everything together. Watch for a salty punch—so adjust accordingly.:

    • Extra firm tofu: It’s the backbone—dense, holds shape, and soaks up marinade like a sponge. Squeezing out water is crucial.
    • Panko breadcrumbs: Light, airy, and crisp—these are what give the nuggets their signature crunch. Toast lightly for extra flavor.

    Tofu marinade: It’s simple but transforms bland tofu into a savory, juicy bite. Keep it short—marinate for at least 10 minutes.:

    • Smoked paprika: Adds a subtle smoky aroma that amplifies the baked toastiness. Use a pinch, or double if you love smoky flavor.
    • Cooking spray: It helps the coating crisp up evenly. Don’t drown the nuggets—just a light mist.

    Substitutions to customize your crispy tofu nuggets

    • Dairy-Free: Use almond or soy milk in the marinade—keeps it plant-based and adds subtle flavor.
    • Gluten-Free: Replace panko with gluten-free breadcrumbs or crushed rice crackers.
    • Low-Sodium: Opt for reduced soy sauce or coconut aminos for less salt.
    • Spicy: Add cayenne or chili flakes to breadcrumbs for heat.
    • Flavor Boost: Mix nutritional yeast into breadcrumbs for a cheesy flavor while keeping it vegan.

    Equipment & Tools

    • Baking sheet with parchment paper: Prevents sticking and makes cleanup easier.
    • Press or weights to remove tofu moisture: Ensures crispiness.
    • Mixing bowls: For marinade and coating.
    • Spatula or tongs: Handling delicate tofu pieces.
    • Oven or toaster oven: Baking at precise temperature.

    Step-by-step guide to crispy baked tofu nuggets

    1. Preheat your oven to 200°C (392°F). Line a baking sheet with parchment paper.
    2. Drain the tofu and press out excess moisture for at least 15 minutes. Cut into bite-sized cubes.
    3. In a small bowl, mix soy sauce, garlic powder, and a splash of water. Marinate tofu for 10 minutes.
    4. In another bowl, combine panko breadcrumbs, a pinch of salt, and smoked paprika.
    5. Dip each tofu piece into the marinade, then roll in the breadcrumb mixture, pressing gently to coat.
    6. Arrange the coated tofu on the prepared baking sheet, leaving space between pieces.
    7. Bake for 15 minutes, then flip each nugget. Bake for another 10-15 minutes until golden and crisp.
    8. Check for doneness: golden color, crackly coating, and a firm exterior. If not crispy enough, broil for 1-2 minutes.
    9. Remove from oven, let rest for 5 minutes to firm up. Serve hot with dipping sauce.

    Let the nuggets rest for 5 minutes after baking to let the coating set. Serve immediately to enjoy maximum crunch.

    How to Know It’s Done

    • Golden brown and crispy exterior.
    • A slight crackle when you bite into them.
    • Center should be hot and firm, not soggy.

    Crispy Baked Tofu Nuggets

    These tofu nuggets are baked until golden and crunchy, offering a satisfying plant-based alternative to fried snacks. Made with firm tofu coated in toasted panko breadcrumbs and flavored with soy sauce and spices, they develop a crisp exterior and tender interior. Perfect as a snack, main, or salad addition, they deliver indulgence with a healthy twist.
    Prep Time 20 minutes
    Cook Time 30 minutes
    Total Time 50 minutes
    Servings: 4
    Course: Main Course
    Cuisine: Vegetarian
    Calories: 150

    Ingredients
      

    • 14 oz extra firm tofu pressed to remove excess moisture
    • 3 tablespoons soy sauce for marinade
    • 1 teaspoon garlic powder adds savory flavor
    • 1 cup panko breadcrumbs to achieve light crunch
    • 1 teaspoon smoked paprika for smoky depth
    • cooking spray cooking spray for crisping

    Equipment

    • Baking sheet with parchment paper
    • Press or weights to remove tofu moisture
    • Mixing bowls
    • Spatula or tongs
    • Oven or toaster oven

    Method
     

    1. Preheat your oven to 200°C (392°F) and line a baking sheet with parchment paper.
    2. Drain the tofu and press out excess moisture using a tofu press or by placing it between paper towels with a weight on top. Let it sit for at least 15 minutes until firm.
    3. Cut the pressed tofu into bite-sized cubes, about 1-inch in size, and place them in a mixing bowl.
    4. In a small bowl, whisk together soy sauce and garlic powder. Pour this marinade over the tofu cubes and toss gently to coat. Let sit for 10 minutes to absorb the flavors.
    5. In another bowl, combine panko breadcrumbs and smoked paprika, stirring to distribute the spices evenly.
    6. Using tongs or a spatula, remove each tofu cube from the marinade, letting excess drip off, then roll them in the breadcrumb mixture, pressing gently to ensure an even coating.
    7. Arrange the coated tofu pieces on the prepared baking sheet, leaving space between each to promote even crisping. Lightly spray the tops with cooking spray.
    8. Bake in the oven for 15 minutes, then flip each nugget carefully with tongs or a spatula to ensure even cooking. Return to the oven and bake for another 10-15 minutes, or until golden brown and crispy.
    9. Keep an eye on the nuggets in the last few minutes; broil for 1-2 minutes if you want extra crispiness, but watch closely to prevent burning.
    10. Remove the tofu nuggets from the oven and let them rest for 5 minutes. This helps the coating set and enhances crunch.
    11. Serve the crispy tofu nuggets warm with your favorite dipping sauce, and enjoy that satisfying crunch with every bite!

    Tips and tricks for perfect baked tofu nuggets

    • COATING: Gently press the breadcrumb mixture onto each piece for even coverage.
    • CRISPIEST NUGGETS: Use a convection fan or broil at the end for extra crunch.
    • SEASONING BOOST: Mix spices into breadcrumbs for layered flavor.
    • OIL SPRAY: Lightly spray the coated tofu before baking to enhance crispiness.
    • COOLING: Let the nuggets rest 5 minutes after baking—this helps set the crust.

    Common pitfalls and how to fix them

    • FORGOT TO PRESS THE TOFU? DRAIN AND WEIGHT AGAIN, OR THE COATING WON’T STICK.
    • DUMPED TOO MUCH COATING? Gently shake off excess before baking for even crunch.
    • OVER-TORCHED THE EDGES? Reduce oven temperature slightly or cover with foil.
    • OIL SPATTERS? Use parchment paper and a light spray of oil for a healthier crunch.

    Fast fixes for common baking hiccups

    • If they’re not crispy, broil for 1–2 minutes. Watch closely to prevent burning.
    • When the coating feels too loose, press it onto the tofu again gently.
    • Splash a little vinegar into the marinade if too bland.
    • Patch uneven coating with a sprinkle of extra breadcrumbs before baking.
    • Shield burnt bits with foil if edges start to blacken.

    Preparing and storing ahead for quick meals

    • Press and marinate the tofu the night before. Keeps flavors deep and ready.
    • The coated nuggets can be assembled and stored in the fridge for up to 24 hours.
    • Bake directly from fridge; expect a slightly longer baking time.
    • Reheat in a hot oven or air fryer for 8–10 minutes for maximum crispness, smelling toasty.

    10 Practical Q&As About Crispy Baked Tofu Nuggets

    1. Can I use softer tofu?

    Use extra firm tofu to get that dense, meaty bite. Press out as much moisture as possible.

    2. Should I marinate the tofu?

    Marinate the tofu briefly in soy or tamari for a deeper umami flavor before baking.

    3. What breadcrumbs work best?

    Use panko breadcrumbs for crunch or crushed cornflakes for an extra crispy coat.

    4. How long do I bake the nuggets?

    Bake at 200°C (392°F) for about 25-30 minutes, flipping halfway for even crispiness.

    5. How do I get an even coating?

    Make sure the tofu is evenly coated for the best crunch. Pat the coating onto each piece.

    6. What dipping sauce works well?

    Serve with sweet chili sauce or a spicy mayo for contrast and added flavor.

    7. Can I skip the parchment paper?

    Use parchment paper to prevent sticking and make cleanup easier.

    8. How do I add extra crispiness?

    If nuggets aren’t crispy enough, broil for a minute or two, watching carefully.

    9. How long do leftovers last?

    Store leftovers in an airtight container in the fridge for up to 3 days.

    10. How do I reheat without losing crunch?

    Reheat in a hot oven or air fryer to restore crispness, about 10 minutes at 180°C (356°F).

    These nuggets are a little messier than fried, but that’s part of the charm. The crispy edges, the tender insides—each bite is a little tug-of-war of textures. They’re perfect for a quick weeknight dinner or a casual hangout, especially when you need something satisfying but straightforward.

    And honestly, once you get the hang of baking them just right, you’ll start craving that snap and chew. It’s a small joy—something to look forward to amid the rush. Plus, no oil splatters, just good honest baking that makes you feel a little more in control.

  • Vegan Lentil Soup Recipe

    On some days, I crave more than just a meal—I need a bowl that feels like a warm conversation. This vegan lentil soup is my go-to, especially when the kitchen feels too busy for anything fancy. It’s straightforward, filling, and the kind of dish that tastes like a hug in a bowl amidst the chaos.

    What I love about this soup is how forgiving it is. You can toss in whatever vegetables are lingering in the fridge, and it still turns out hearty. The smell of simmering lentils with garlic and cumin? That’s the kind of thing that pulls you into your own kitchen, promising comfort and nourishment.

    The unpolished, honest cook’s notes on making a hearty, soulful vegan lentil soup.

    Why this vegan lentil soup matters to me

    • This soup reminds me of my grandmother’s kitchen, where the smell of cumin and garlic filled the air.
    • I love how versatile this dish is—perfect for a quick lunch or a hearty dinner after a long day.
    • There’s a quiet pride in making something from scratch, especially when it’s as nourishing as this.

    My journey with this humble, hearty soup

    • I started making this soup during a hectic week when I needed something comforting yet simple. It became my go-to because it’s forgiving—if I forget to soak the lentils or run out of fresh herbs, I improvise.
    • The key was always the slow simmer, which turned humble ingredients into something soulful. I love how the flavors deepen overnight, making leftovers even better.
    • Cooking this soup is a small act of self-care, a reminder that good, honest food doesn’t need to be complicated.

    Historical and cultural notes on lentil soup

    • Lentils have been a staple in human diets for over 9,000 years, dating back to ancient Mesopotamia.
    • This recipe draws inspiration from Middle Eastern and Mediterranean traditions, where lentils are a common comfort food.
    • Green and brown lentils are preferred for their ability to hold shape, but red lentils cook faster and become creamier.

    Ingredient insights and tweaks

    • Lentils: I prefer green or brown—they hold shape and have a hearty bite. Swap with red lentils for a softer, mushier soup.
    • Onions: They build the base flavor—sauté until golden for sweetness. Skip if in a hurry, but you’ll miss that depth.
    • Carrots: Add sweetness and color. Use parsnips for a more earthy, subtle sweetness.
    • Garlic: It’s the aroma that pulls it all together. Use fresh for punch, or garlic powder in a pinch.
    • Cumin: Toast briefly to unlock smoky, warm notes. A dash of smoked paprika can add a subtle ember-like flavor.

    Spotlight on Lentils and Garlic

    Lentils:

    • They absorb flavors beautifully and become tender yet hold their shape. Rinse well to remove any grit.
    • Garlic: It releases a warm, pungent aroma when sautéed, and mellows into a sweet, nutty flavor as it cooks.

    Garlic:

    • Lentils: They cook faster than beans, making this soup quick to throw together. Keep an eye on them to prevent mush.
    • Lentils: Their earthy scent intensifies as they cook, filling the kitchen with a comforting aroma.

    Smart ingredient swaps for your pantry and fridge

    • Broth: Use water with added herbs and spices for a lighter, more neutral base.
    • Vegetables: Add sweet potatoes or squash for a seasonal twist.
    • Herbs: Use dried thyme or oregano if fresh isn’t available.
    • Spices: A pinch of cinnamon or turmeric can add warmth and depth.
    • Oil: Swap olive oil for coconut or sesame oil for a different flavor profile.

    Equipment & Tools

    • Large pot: Cook the lentils and simmer the soup
    • Ladle: Serve the soup
    • Knife and cutting board: Chop vegetables and herbs
    • Measuring cups and spoons: Measure liquids and spices

    Step-by-step guide to making vegan lentil soup

    1. Rinse lentils thoroughly under cold water, removing any debris. Set aside.
    2. Heat a large pot over medium heat. Add a splash of oil, then diced onion and carrot. Cook until soft, about 5 minutes.
    3. Add minced garlic and a teaspoon of cumin. Cook until fragrant, about 30 seconds.
    4. Pour in 1.5 liters (6 cups) of vegetable broth. Bring to a boil.
    5. Add lentils, reduce heat to a simmer (about 85°C/185°F). Cook uncovered for 30-40 minutes, until lentils are tender.
    6. Stir occasionally. If the soup gets too thick, add a splash more broth or water.
    7. Taste and adjust salt and pepper. If you want a creamier texture, mash some lentils with the back of a spoon.
    8. Finish with a squeeze of lemon juice and chopped herbs. Serve warm.

    Let the soup sit for 5 minutes after cooking. Garnish with fresh herbs and a drizzle of olive oil before serving.

    How to Know It’s Done

    • Lentils are tender but not mushy.
    • Soup has a rich, earthy aroma with hints of cumin and garlic.
    • The broth is slightly thickened, and lentils break apart easily when pressed.

    Vegan Lentil Soup

    This hearty vegan lentil soup combines tender lentils simmered with garlic, cumin, and a medley of vegetables, resulting in a comforting, thick broth with soft, bite-sized lentils. The dish is versatile and forgiving, perfect for a quick, nourishing meal that feels like a warm hug in a bowl. The final texture is rich and slightly chunky, with a fragrant aroma that invites you to dig in.
    Prep Time 10 minutes
    Cook Time 40 minutes
    Total Time 50 minutes
    Servings: 4
    Course: Main Course
    Cuisine: Mediterranean, Middle Eastern
    Calories: 250

    Ingredients
      

    • 1 cup green or brown lentils rinsed
    • 1 medium onion diced
    • 2 carrots carrots diced
    • 3 cloves garlic minced
    • 1 teaspoon ground cumin toasting enhances flavor
    • 6 cups vegetable broth or water with herbs
    • 2 tablespoons olive oil for sautéing
    • to taste salt and pepper adjust at the end
    • 1 lemon lemon for juice at the end
    • fresh herbs parsley or cilantro chopped, for garnish

    Equipment

    • Large pot
    • Ladle
    • Knife and cutting board
    • Measuring cups and spoons

    Method
     

    1. Rinse the lentils thoroughly under cold water until the water runs clear. Set aside.
    2. Heat the large pot over medium heat and add the olive oil. Once shimmering, toss in the diced onion and carrots. Cook, stirring occasionally, until the vegetables are soft and fragrant, about 5 minutes, and the onions are translucent.
    3. Add the minced garlic and a teaspoon of ground cumin to the pot. Cook for about 30 seconds until the garlic is fragrant, stirring constantly to avoid burning.
    4. Pour in the vegetable broth, and bring the mixture to a gentle boil. This will fill your kitchen with a warm, earthy aroma.
    5. Stir in the rinsed lentils, reduce the heat to maintain a gentle simmer, and cook uncovered for 30 to 40 minutes. The lentils will become tender and start to break down slightly, thickening the soup naturally.
    6. Occasionally stir the soup to prevent sticking. If it thickens too much before the lentils are cooked, add a splash more broth or water to keep it saucy.
    7. Once the lentils are tender and the soup has thickened to your liking, taste and season with salt and pepper. For a creamier texture, mash some of the lentils with the back of a spoon.
    8. Finish by squeezing fresh lemon juice into the soup and stirring in chopped herbs for brightness and freshness. Give it a final taste and adjust seasonings as needed.
    9. Ladle the hot soup into bowls and garnish with extra herbs if desired. Serve immediately and enjoy the comforting aroma and hearty texture.

    Cooking tips & tricks for a perfect vegan lentil soup

    • TEMP CONTROL: Keep simmering gentle—too high, and lentils break apart; too low, and they take longer.
    • SPICE TEST: Toast cumin briefly to release aroma before adding liquids.
    • TEXTURE: Mash some lentils for a creamier consistency or leave whole for texture.
    • FLAVOR: Use a good quality vegetable broth for depth—homemade if possible.
    • GARNISH: Finish with fresh herbs and lemon for brightness that cuts through the earthiness.

    Common mistakes and how to fix them

    • FORGOT TO RINSE LENTILS: Rinse them thoroughly to remove dust and improve digestibility.
    • DUMPED TOO MUCH WATER: Keep an eye on the liquid level—add more broth if it gets too thick.
    • OVER-TOASTED GARLIC: If garlic turns bitter, add a splash of water to deglaze and mellow the flavor.
    • SALT TOO EARLY: Add salt toward the end to keep lentils tender and flavors balanced.

    Quick fixes for common kitchen surprises

    • When too salty, add a peeled potato to absorb excess salt.
    • Splash in a bit of vinegar or lemon juice to brighten dull flavors.
    • Patch over a too-thick soup with hot water or broth, then simmer briefly.
    • Shield burnt bits by transferring the soup to a new pot, avoiding the scorched layer.
    • When herbs are past their prime, add fresh at the end for a burst of brightness.

    Preparing ahead and storing for maximum comfort

    • Chop vegetables and store in an airtight container in the fridge for up to 2 days.
    • Cooked lentils can be stored in the fridge for 3-4 days or frozen for up to a month.
    • Flavor improves with a day in the fridge—more melded and layered.
    • Reheat on the stove over medium-low heat, stirring gently, until steaming hot. Add a splash of water if it thickens too much.

    10 Practical Q&As About Vegan Lentil Soup

    1. Can I use different lentils?

    Use brown or green lentils for a softer, more traditional texture. Rinse well before cooking.

    2. How long do I cook the lentils?

    Simmer the soup gently—about 30-40 minutes—until lentils are tender but not mushy.

    3. When should I add salt?

    Add salt at the end to keep the lentils from becoming tough. Start with a teaspoon.

    4. Should I add acid during cooking?

    A splash of lemon juice brightens the flavors right before serving.

    5. Can I blend part of the soup?

    Keep the soup slightly chunky or mash some lentils for a creamier texture.

    6. When do I add herbs?

    Stir in fresh herbs like parsley or cilantro just before serving for a fresh flavor burst.

    7. How long does it last?

    This soup is best enjoyed warm but can be stored in the fridge for 3 days.

    8. How do I reheat leftovers?

    Reheat on the stove over medium-low heat, stirring occasionally until hot.

    9. Can I substitute broth?

    Use vegetable broth for depth or water for a lighter, quicker version.

    10. How can I customize the flavor?

    Adjust spices according to taste—more cumin or a pinch of smoked paprika adds depth.

    This soup has become a small ritual in my weekly routine—something grounding about its simple ingredients and slow simmer. It’s perfect for those evenings when I want something honest and warm, no frills, just good food.

    And honestly, it’s the kind of dish that tastes even better the next day. Leftovers develop a richer flavor, and the lentils soak up all those spices beautifully. A pot of this on the stove can turn any day into a quiet, satisfying moment.

  • chicken and rice soup recipe

    chicken and rice soup recipe

    This chicken and rice soup is a story of humble ingredients turning into something unexpectedly satisfying. I love that it’s adaptable—use what’s in your fridge, and it still comes out comforting. It’s a meal that feels like a warm hug on a cool day, with just enough brightness to lift the spirits.

    Why I keep coming back to this soup

    It’s a simple reminder that comfort can be found in the everyday, in a bowl that’s quick to make but feels special. The bright notes cut through the richness, making each spoonful lively. Plus, it’s forgiving—improvise with what’s left in the fridge, and it still turns out great.

    Breaking down the ingredients

    • Chicken breast or thighs: Tender, lean protein that browns beautifully and stays moist in the broth.
    • Carrots: Add sweetness and texture, their bright orange color pops against the broth.
    • Celery: Offers a fresh, slightly bitter crunch that balances richness.
    • Onion: Creates a sweet, aromatic base that forms the soup’s backbone.
    • Rice: Long-grain or jasmine, cooked to absorb the flavors and add heartiness.
    • Lemon juice: Brightens everything with a zesty, citrusy punch—don’t skip it.
    • Fresh herbs: Parsley or dill, chopped finely, add a whisper of green freshness.

    Tools and equipment for a smooth cook

    • Large pot: To cook the soup evenly and hold all ingredients comfortably.
    • Chopping board and knives: To prep vegetables and chicken quickly and safely.
    • Ladle: To serve and check the soup’s consistency.
    • Measuring cups and spoons: To keep ingredients balanced and flavorful.

    Steps to a Hearty, Bright Chicken and Rice Soup

    Step 1: Start by prepping your ingredients. Chop carrots, celery, and onion into small, even pieces. Rinse 1 cup of rice until the water runs clear and set aside.

    Step 2: In a large pot, heat a tablespoon of oil over medium heat. Add chopped onions, carrots, and celery. Cook until fragrant and slightly softened, about 5 minutes.

    Step 3: Push the veggies to the side, then add diced chicken. Brown the chicken for about 7 minutes, stirring occasionally. It should turn a light golden.

    Step 4: Pour in 8 cups of chicken broth, then add the rice. Bring everything to a boil, then lower to a simmer. Cook until rice is tender, about 20 minutes.

    Step 5: Taste and adjust the salt and pepper. Add a squeeze of lemon juice and chopped herbs like parsley or dill for brightness.

    Step 6: Let the soup rest for 5 minutes off heat before serving. Ladle into bowls, maybe sprinkle some more herbs on top.

    Cooking checkpoints and tips to keep in mind

    • Vegetables should be fragrant and slightly softened but not mushy.
    • Chicken should be browned but not overcooked, maintaining moisture.
    • Rice should be tender but not falling apart, with a slight chew.
    • Soup should have a clear, flavorful broth with a bright lemon finish.

    Common mistakes and how to fix them

    • Cooking rice too long or at too high heat.? If the rice is undercooked, simmer a few more minutes uncovered.
    • Rice sticking to the bottom.? Add a splash of water or broth, then simmer gently to prevent sticking.
    • Over-salting.? Too much salt? Dilute with a little more broth or water.
    • Chicken not browning.? If chicken isn’t browning, increase heat slightly and cook without stirring for a few minutes.

    Hearty Chicken and Rice Soup

    This chicken and rice soup combines tender chicken, flavorful vegetables, and aromatic rice simmered in a savory broth. Brightened with lemon juice and fresh herbs, it has a comforting yet lively final texture with a clear, fragrant broth. Perfect for a cozy day, it’s adaptable and quick to prepare, making every spoonful feel like a warm hug.
    Prep Time 10 minutes
    Cook Time 30 minutes
    Total Time 40 minutes
    Servings: 4
    Course: Main Course
    Cuisine: Comfort
    Calories: 250

    Ingredients
      

    • 1 lb chicken breast or thighs diced
    • 2 large carrots peeled and chopped
    • 2 stalks celery chopped
    • 1 medium onion diced
    • 1 cup rice long-grain or jasmine
    • 8 cups chicken broth
    • 1 tablespoon oil olive or vegetable
    • 1 lemon lemon juice freshly squeezed
    • a handful fresh parsley or dill chopped
    • to taste salt and pepper

    Equipment

    • Large pot
    • Chopping board and knives
    • Ladle
    • Measuring cups and spoons

    Method
     

    1. Chop carrots, celery, and onion into small, even pieces on your chopping board. Rinse the rice under cold water until the water runs clear and set aside.
    2. Heat a large pot over medium heat and add a tablespoon of oil. Once shimmering, add the diced onion, carrots, and celery. Cook, stirring occasionally, until fragrant and slightly softened, about 5 minutes.
    3. Push the vegetables to the side of the pot, then add the diced chicken to the cleared space. Brown the chicken until golden, about 7 minutes, stirring occasionally to prevent sticking.
    4. Pour in the chicken broth and add the rinsed rice. Bring the mixture to a boil over high heat, then reduce the heat to low and cover the pot. Let it simmer gently for about 20 minutes, or until the rice is tender and the chicken is cooked through.
    5. Uncover the pot and taste the broth, adding salt and pepper as needed. Stir in the freshly squeezed lemon juice to brighten the flavors.
    6. Chop the fresh parsley or dill and sprinkle over the soup, giving it a gentle stir to distribute the herbs evenly.
    7. Let the soup rest off the heat for 5 minutes, allowing flavors to meld. Then, ladle into bowls, garnish with more herbs if desired, and serve hot.
    This soup is a patchwork of simple flavors that somehow come alive with a splash of lemon and fresh herbs. It’s perfect for those days when you want comfort but also a little zing. Feel free to toss in whatever greens or leftover bits you have—this dish loves improvisation. Enjoy every spoonful, knowing it’s made from honest, humble ingredients that come together in the best way.

  • instant pot chicken soup recipe

    instant pot chicken soup recipe

    There’s a certain magic in making chicken soup in the Instant Pot — it’s a shortcut that doesn’t skimp on soul. I love how it turns out thick, comforting, with flavors that deepen faster than you’d expect. It’s the kind of dish that makes the kitchen smell like home, even on the busiest days.

    Why I Keep Coming Back to This Soup

    It’s the kind of dish that makes me feel grounded, especially after a hectic day. The aroma alone calms a racing mind, and the taste is pure, simple nourishment. Plus, it’s endlessly adaptable — I can throw in whatever veggies I have, and it still tastes like home.

    Breaking Down the Ingredients

    • Chicken breasts: I prefer them boneless for quick cooking, lean, and tender.: They cook fast and shred easily, adding richness to every spoonful. Swap for thighs if you want more flavor.
    • Carrots: Fresh, crunchy carrots add sweetness and color. Use baby carrots for convenience.: Their natural sugar balances the savory broth. Frozen carrots work if fresh aren’t available.
    • Celery: Adds a subtle bitterness and crunch. Don’t skip it; it’s the backbone of flavor.: Chop small to let it soften and release its aroma. For a softer texture, cook longer in the initial sauté.
    • Garlic: Pungent and aromatic, it’s the soul of this broth.: Minced finely so it disperses evenly. Roasted garlic gives a sweeter, mellow note if you prefer.
    • Chicken broth: Use homemade or store-bought, but opt for low sodium.: It forms the savory base. For a smoky twist, try adding a chipotle pepper.
    • Herbs and seasonings: Bay leaves, thyme, salt, pepper.: Layered flavors that deepen as it cooks. Fresh herbs added at the end brighten the dish.
    • Lemon: Brightens the broth and cuts through richness.: A squeeze at the end lifts the flavors. Lime works well for a different vibe.

    Tools of the Trade for Instant Pot Chicken Soup

    • Instant Pot or similar electric pressure cooker: Main cooking vessel, quick and easy pressure control.
    • Chopping board and sharp knife: Prep ingredients efficiently.
    • Measuring cups and spoons: Keep seasonings balanced.
    • Wooden spoon or spatula: Stir ingredients without scratching.
    • Ladle: Serve the soup.

    Step-by-Step Guide to Your Cozy Chicken Soup

    Step 1: Start by prepping your ingredients: peel and chop carrots, dice celery, and mince garlic.

    Step 2: Set the Instant Pot to sauté mode. Add a splash of oil, then cook the garlic and onion until fragrant, about 2 minutes.

    Step 3: Add the chicken breasts, carrots, celery, bay leaves, and seasonings. Pour in chicken broth.

    Step 4: Seal the lid and set to high pressure for 10 minutes. Once done, do a quick release.

    Step 5: Remove the chicken, shred it, and return to the pot. Turn to sauté mode and simmer for 10 minutes to meld flavors.

    Cooking Checks to Keep You on Track

    • On sauté, onions should be translucent and fragrant, not browned.
    • When adding broth, ensure it covers the ingredients for even cooking.
    • During pressure cooking, listen for the gentle hissing and crackling, not loud banging.
    • After releasing pressure, chicken should shred easily and vegetables tender but not mushy.

    Avoid These Common Chicken Soup Mishaps

    • Rapid pressure release caused broth splatter.? Use a gentle release to prevent splattering. If steam puffs out suddenly, pause and wait a moment.
    • Oversalted broth.? Add too much salt? Dilute with a splash of water or broth to balance flavors.
    • Under-cooked chicken.? If chicken is tough, add a few more minutes under pressure.
    • Burnt flavor at the bottom.? Burnt bits sticking to the bottom? Use deglazing to lift flavor and avoid scorching.

    Instant Pot Chicken Soup

    This hearty chicken soup is made quickly in the Instant Pot, using tender chicken breasts, fresh vegetables, and aromatic herbs to create a thick, comforting broth. The dish features shredded chicken and tender vegetables, resulting in a nourishing, homey final appearance perfect for cozy days. It’s a simple, flavorful soup that comes together with minimal fuss and deep, rich flavors.
    Prep Time 15 minutes
    Cook Time 20 minutes
    Total Time 35 minutes
    Servings: 4
    Course: Main Course
    Cuisine: Comfort Food
    Calories: 250

    Ingredients
      

    • 2 pounds boneless chicken breasts preferably skinless
    • 3 large carrots peeled and chopped
    • 2 stalks celery chopped
    • 4 cloves garlic minced
    • 4 cups chicken broth low sodium preferred
    • 2 bay leaves bay leaves
    • 1 teaspoon dried thyme
    • to taste salt and pepper adjust as needed
    • 1 lemon lemon for juice at the end

    Equipment

    • Instant Pot or similar electric pressure cooker
    • Chopping board and sharp knife
    • Measuring cups and spoons
    • Wooden spoon or spatula
    • Ladle

    Method
     

    1. Peel and chop the carrots, dice the celery, and mince the garlic. Set these aside.
    2. Set your Instant Pot to sauté mode. Add a splash of oil, then cook the minced garlic until fragrant—about 2 minutes—until it releases a warm aroma and becomes slightly golden.
    3. Add the chicken breasts to the pot and cook for 3-4 minutes, turning occasionally, until lightly browned on the outside.
    4. Pour in the chicken broth, then add the chopped carrots, celery, bay leaves, thyme, salt, and pepper. Stir gently to combine all ingredients.
    5. Secure the lid and set the Instant Pot to high pressure for 10 minutes. Make sure the vent is sealed.
    6. Once cooking is complete, carefully do a quick release of pressure. Open the lid once the steam has subsided.
    7. Remove the chicken breasts and shred them with two forks. Return the shredded chicken to the pot and stir to combine.
    8. Turn on sauté mode again and let the soup simmer for 10 minutes, allowing flavors to meld and vegetables to soften further.
    9. Squeeze fresh lemon juice into the soup, stirring gently to brighten the flavors.
    10. Taste and adjust seasoning with additional salt and pepper if needed. Remove bay leaves before serving.
    11. Ladle the hot soup into bowls and enjoy this cozy, nourishing meal that’s perfect for chilly days or when you need some comfort.
    This soup isn’t just about filling bowls; it’s about the quiet joy of turning simple ingredients into something warming and nourishing. A squeeze of lemon brightens the broth, and a sprinkle of fresh herbs finishes it off. Feel free to tweak the veggies or add a dash of hot sauce for a personal kick.

  • easy chicken soup recipe

    easy chicken soup recipe

    Chicken soup has been a staple in my kitchen for years, but I’ve found that slow-cooking it transforms it. This method extracts deep flavors and creates a broth that’s rich without loads of salt or additives. I love how the process turns a simple dish into something much more layered and personal.

    Why I Keep Coming Back to This Soup

    It’s simple, forgiving, and endlessly customizable. The slow simmer unlocks deep flavors I can’t replicate quickly. Plus, it’s my go-to when I want something nurturing that can be made ahead and enjoyed throughout the week.

    Breaking Down the Key Players

    • Bone-in chicken thighs: Their rich marrow and collagen make for a deeply flavorful broth. Swap with drumsticks if thighs aren’t available.
    • Onions, carrots, celery: Base aromatics that add sweetness and depth. Use parsnips or leeks for a different twist.
    • Fresh herbs (parsley, thyme): Brighten the soup with herbal notes. Dried herbs work if fresh aren’t on hand.
    • Salt and pepper: Season gradually; the broth develops flavor as it simmers.
    • Lemon or vinegar (optional): A splash adds brightness and cuts richness—use lemon zest or a dash of vinegar.
    • Garlic (optional): Adds aromatic depth—use fresh or roasted for variation.
    • Broth base (water or homemade stock): A good base is essential—use homemade stock if possible for extra richness.

    Tools & Equipment for a Perfect Chicken Soup

    • Large heavy-bottomed pot: To evenly simmer the broth without scorching.
    • Fine mesh sieve: To strain the broth for clarity.
    • Sharp knife: For chopping vegetables and shredding chicken.
    • Cutting board: A stable surface for prep.
    • Ladle: For serving and tasting.

    How to Make It Step-by-Step

    Step 1: Start by gathering your ingredients and prepping all your tools—it makes the process smoother.

    Step 2: In a large pot, gently sauté chopped onions, carrots, and celery until they release a sweet, fragrant aroma, about 5 minutes.

    Step 3: Add chicken pieces—preferably bone-in thighs—for richer flavor—and cover with cold water.

    Step 4: Bring to a gentle simmer over medium heat (around 85°C/185°F), skimming any foam that rises to keep the broth clear.

    Step 5: Reduce heat to low, cover partially, and let it simmer for at least 1.5 hours, until the chicken is tender and falling off the bone.

    Step 6: Remove the chicken, let it cool slightly, then shred it, discarding bones and skin.

    Step 7: Strain the broth through a fine sieve back into the pot, and taste for seasoning—add salt and pepper as needed.

    Step 8: Return the shredded chicken to the broth, toss in chopped fresh herbs, and serve hot.

    Cooking Checkpoints & Tips for Success

    • Broth should be clear, not cloudy, indicating gentle simmering.
    • Chicken is tender and falls apart easily when fully cooked.
    • Vegetables should be soft but not mushy, adding texture and flavor.
    • Adjust seasoning at the end—soup tastes better after a quick rest.

    Common Mistakes & How to Fix Them

    • Simmering too vigorously.? If broth turns cloudy, lower the heat and skim foam more diligently.
    • Cooking at too high a heat.? If chicken is tough, check water temperature—should stay around 85°C/185°F, no higher.
    • Adding all ingredients at once.? If vegetables are overcooked, add them later or cook separately for texture.
    • Under-seasoning.? If the soup is bland, boost salt at the end and add fresh herbs.

    Slow-Cooked Chicken Soup

    This chicken soup is crafted by slow-simmering bone-in chicken thighs with aromatic vegetables and herbs, resulting in a clear, flavorful broth with tender shredded chicken. The process emphasizes gentle heat to extract deep flavors, creating a comforting dish with a rich yet light texture. Finished with fresh herbs and a splash of lemon or vinegar, it’s a nourishing classic that improves with time.
    Prep Time 15 minutes
    Cook Time 1 hour 30 minutes
    Total Time 1 hour 45 minutes
    Servings: 6
    Course: Main Course
    Cuisine: American
    Calories: 250

    Ingredients
      

    • 4 pieces bone-in chicken thighs preferably skinless or skin-on
    • 2 medium onions chopped
    • 3 large carrots chopped
    • 2 stalks celery chopped
    • 3 cloves garlic optional, minced
    • 1 bunch fresh parsley chopped
    • 2 sprigs thyme fresh
    • to taste salt and pepper season gradually
    • 1 tablespoon lemon juice or vinegar optional, for brightness
    • 6 cups water or homemade stock enough to cover ingredients

    Equipment

    • Large heavy-bottomed pot
    • Fine Mesh Sieve
    • Sharp knife
    • Cutting board
    • Ladle

    Method
     

    1. Chop all the vegetables and herbs, and prepare your tools, so everything is within reach for a smooth cooking process.
    2. Place the large pot on the stove over medium heat, then add the chopped onions, carrots, and celery. Cook gently, stirring occasionally, until the vegetables soften and release a sweet aroma, about 5 minutes.
    3. Add the bone-in chicken thighs to the pot, then pour in enough water or stock to fully cover the ingredients. Bring the mixture to a gentle simmer, just below boiling point, and skim off any foam that rises to keep the broth clear.
    4. Reduce the heat to low, partially cover the pot, and let everything simmer slowly for at least 1.5 hours. During this time, the chicken becomes tender, and the broth deepens in flavor.
    5. Remove the chicken thighs from the broth and set them aside to cool slightly. Once cool enough to handle, shred the meat, discarding bones and skin.
    6. Strain the broth through a fine mesh sieve back into the pot to remove solids, then taste and season with salt and pepper. Add a splash of lemon juice or vinegar if you like a bright finish.
    7. Return the shredded chicken to the clear broth, then stir in chopped fresh parsley and thyme. Warm everything through for a few minutes, allowing flavors to meld.
    8. Serve the soup hot, garnished with additional herbs if desired, and enjoy the comforting, layered flavors of this slow-cooked classic.

    Notes

    For extra depth, roast the vegetables or chicken beforehand. Adjust seasoning to taste at the end, and consider adding a dash of vinegar or lemon for brightness. The soup keeps well and can be made ahead for easy weeknight meals.
    This soup isn’t just comfort food. It’s a reminder that simple ingredients, cooked slowly, can create something deeply satisfying. Feel free to toss in a handful of your favorite greens or a splash of lemon for brightness. It’s a dish that welcomes improvisation, so make it your own and enjoy the process.