Blog

  • Eggplant Parmesan Recipe: A Cozy Classic with a Twist

    Eggplant Parmesan Recipe: A Cozy Classic with a Twist

    Eggplant Parmesan is one of those dishes I turn to when I want comfort and a little bit of nostalgia. But I like to give it a twist—using fresh herbs and a touch of smoked paprika in the breadcrumb coating for extra flavor. It’s a dish that feels like a warm hug but still surprises with its smoky depth. Perfect for those weekends when you want something satisfying but not heavy.

    Why I Keep Coming Back to This Recipe

    It’s forgiving in the oven and flexible with ingredients. The crispy fried eggplant offers a satisfying crunch, while the cheesy, saucy layers keep me coming back. Plus, it’s a dish that tastes even better the next day, making leftovers a treat. I love how it fills my kitchen with a warm, savory aroma—reminding me of family dinners and lazy weekends.

    Eggplant Parmesan Ingredients Breakdown

    • Eggplants: Their spongy texture absorbs flavors and crisps up beautifully when fried.
    • Breadcrumbs: Provides crunch. Use panko for extra lightness, or seasoned for flavor.
    • Parmesan cheese: Adds saltiness and umami; opt for freshly grated for best flavor.
    • Marinara sauce: A vibrant, tangy base that balances richness. Homemade or store-bought works.
    • Mozzarella: Melts into gooey layers. Fresh mozzarella creates a creamier texture.
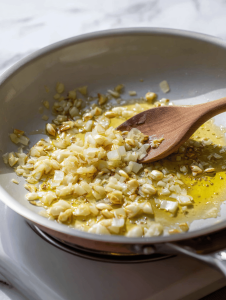
    • Olive oil: For frying; choose good-quality extra virgin for flavor.
    • Fresh basil: Brightens the dish with aromatic freshness.

    Tools of the Trade for Eggplant Parmesan

    • Baking dish: For layering and baking the assembled eggplant slices.
    • Frying pan: To fry the eggplant slices until crispy.
    • Cooking thermometer: To monitor oil temperature for perfect frying.
    • Wire rack: To drain excess oil from fried eggplant.
    • Mixing bowls: For preparing dredging stations and mixing herbs.

    Crafting the Perfect Eggplant Parmesan: Step-by-Step

    Step 1: Preheat your oven to 200°C (390°F).

    Step 2: Slice eggplants into 1/2 inch thick rounds. Salt them generously and let sit for 20 minutes to draw out bitterness.

    Step 3: Pat eggplants dry, then dredge in seasoned flour, dip in beaten eggs, and coat with a mixture of breadcrumbs and Parmesan cheese.

    Step 4: Fry eggplant slices in hot oil over medium heat until golden brown, about 3-4 minutes per side.

    Step 5: Layer fried eggplants in a baking dish with marinara sauce and mozzarella, then bake at 180°C (350°F) for 25-30 minutes until bubbly.

    Step 6: Let sit for 5 minutes before serving. Garnish with fresh basil or a sprinkle of Parmesan.

    Cooking Checkpoints & Tips to Nail It

    • Eggplant slices should be golden and crispy, not soggy. Keep an eye on frying temperature.
    • The sauce should be bubbling around the edges before you pull it out of the oven.
    • Cheese should be melted and slightly browned, not dried out or greasy.
    • Rest the dish for at least 5 minutes to let the flavors meld and the cheese set.

    Common Mistakes & How to Fix Them

    • Eggplant soggy and greasy.? Use a slotted spoon to transfer eggplant slices from oil to avoid excess grease.
    • Bitterness and excess moisture.? Salt eggplant slices early and let sit for 20 minutes.
    • Underbaked or runny cheese.? Bake at 180°C (350°F) until cheese is bubbly and golden.
    • Messy, melted cheese slides off.? Let the baked dish rest for 5 minutes before serving.

    Eggplant Parmesan with a Twist

    Eggplant Parmesan is a comforting dish featuring crispy fried eggplant layers topped with marinara and melted cheese. This version uses fresh herbs and smoked paprika in the breadcrumb coating for extra flavor, resulting in a golden, bubbly casserole with a smoky depth. The dish offers a satisfying crunch combined with gooey cheese and rich tomato sauce, perfect for cozy weekends.
    Prep Time 20 minutes
    Cook Time 35 minutes
    Total Time 55 minutes
    Servings: 4
    Course: Main Course
    Cuisine: Italian-American
    Calories: 420

    Ingredients
      

    • 2 large eggplants sliced into 1/2 inch rounds
    • 1 cup all-purpose flour for dredging
    • 3 large eggs beaten
    • 2 cups breadcrumbs panko preferred, mixed with herbs and smoked paprika
    • 1/2 cup Parmesan cheese freshly grated
    • 2 cups marinara sauce store-bought or homemade
    • 8 oz mozzarella cheese shredded or sliced
    • 1/4 cup olive oil for frying
    • 1 bunch fresh basil chopped for garnish

    Equipment

    • Baking dish
    • Frying pan
    • Cooking thermometer
    • Wire rack
    • Mixing bowls

    Method
     

    1. Preheat your oven to 180°C (350°F) and prepare a baking dish.
    2. Slice the eggplants into 1/2 inch thick rounds, then sprinkle generously with salt and let sit for 20 minutes to draw out excess moisture and bitterness.
    3. Pat the eggplant slices dry with paper towels to remove moisture, preparing them for dredging.
    4. Set up your dredging station: place flour in one shallow dish, beaten eggs in another, and a mixture of breadcrumbs, Parmesan, smoked paprika, and herbs in a third.
    5. Dredge each eggplant slice first in flour, then dip into the beaten eggs, and finally coat thoroughly with the breadcrumb mixture, pressing gently to adhere.
    6. Heat olive oil in a frying pan over medium heat, and fry the coated eggplant slices in batches for about 3-4 minutes per side, until golden brown and crispy.
    7. Transfer the fried eggplant slices to a wire rack to drain excess oil, then repeat with remaining slices.
    8. Spread a thin layer of marinara sauce in the baking dish, then arrange a layer of fried eggplant slices over the sauce.
    9. Sprinkle with shredded mozzarella and a bit of Parmesan cheese, then spoon more marinara over the top.
    10. Repeat layering with remaining eggplant, sauce, and cheese, finishing with a top layer of cheese.
    11. Bake in the preheated oven for 25-30 minutes, until bubbling and cheese is golden and melted. The aroma should be warm and savory.
    12. Remove from oven, let rest for 5 minutes, then garnish with freshly chopped basil and serve hot for a satisfying, crispy, cheesy experience.

    Notes

    For extra flavor, use freshly grated Parmesan and a mix of fresh herbs in the breadcrumb coating. Letting the dish rest before slicing helps the cheese set, making it easier to serve clean slices.
    This dish is a testament to patience and layering flavors. The crispy eggplant contrasts beautifully with the rich, tangy sauce and gooey cheese. It’s a forgiving recipe that invites tweaks—more herbs, a spicy kick, or even a drizzle of honey on top. Once out of the oven, pairing it with a simple green salad keeps it fresh and balanced. It’s a cozy, hearty meal that feels like a warm hug on a busy night.

  • Stuffed Peppers Recipe: A Cozy Twist on a Classic

    Stuffed Peppers Recipe: A Cozy Twist on a Classic

    I’ve always loved how stuffed peppers combine the freshness of the vegetable with the heartiness of the filling. It’s a dish that feels like a little celebration of seasonal produce, especially when peppers are at their peak. Over the years, I’ve tweaked the filling to suit whatever I have on hand, which makes it a perfect go-to.
    What keeps pulling me back is that first bite — the sweet, slightly smoky pepper with the savory, herby stuffing. It’s a dish that feels like a warm embrace after a long day, simple but deeply satisfying.

    Why I Keep Coming Back to This Dish

    It’s the perfect mix of practicality and comfort. I love how adaptable it is with whatever ingredients I have. The smell alone — smoky peppers, herbs, and warm cheese — pulls me in every time. Plus, it’s a meal that feels like a small victory, especially when I get the filling just right.

    Inside the Stuffing: What’s in It?

    • Bell peppers: : Sweet, juicy, and colorful, they’re the vessel for all that savory goodness.
    • Cooked rice or grains: : Adds bulk and a chewy texture, soaking up all those flavorful juices.
    • Ground meat or lentils: : Provides protein, making the dish filling and hearty.
    • Fresh herbs: : Brighten everything with a burst of aromatic freshness.
    • Cheese (optional): : Melts into gooey goodness, adding richness and a little salt.
    • Lemon juice or zest: : Gives a zingy brightness that cuts through the richness.
    • Olive oil: : Helps sauté aromatics and adds a subtle fruity note.

    Tools of the Trade for Stuffed Peppers

    • Baking dish: Holds the peppers upright and collects any drips.
    • Skillet: Sautés the aromatics and cooks the filling ingredients.
    • Knife: Slices tops off peppers and chops herbs and vegetables.
    • Spoon: Fills the peppers evenly and presses down the stuffing.
    • Aluminum foil: Covers the dish to trap moisture and heat evenly.

    Step-by-Step to Stuffed Perfection

    Step 1: Preheat your oven to 190°C (375°F).

    Step 2: Slice the tops off 4 large bell peppers and scoop out the seeds.

    Step 3: In a skillet, heat a tablespoon of olive oil over medium heat.

    Step 4: Add 1 chopped onion and 2 minced garlic cloves; sauté until translucent and fragrant, about 5 minutes.

    Step 5: Mix cooked rice, ground beef or lentils, chopped herbs, and a squeeze of lemon juice in a bowl; season generously with salt and pepper.

    Step 6: Stuff each pepper with the filling, pressing down slightly.

    Step 7: Arrange peppers in a baking dish, drizzle with a bit of olive oil, and cover with foil.

    Step 8: Bake for 35-40 minutes until peppers are tender and filling is heated through.

    Step 9: Remove foil, sprinkle with cheese if desired, and bake uncovered for another 5 minutes until bubbly.

    Cooking Tips and Tricks for Perfect Stuffed Peppers

    • Ensure peppers are evenly stuffed for uniform cooking.
    • Check that the filling is hot and cooked through before serving.
    • Peppers should be tender but not falling apart after baking.
    • A crust of melted cheese adds a nice texture contrast and flavor.

    Common Pitfalls and How to Fix Them

    • Peppers get squished and lose shape.? Use a sharp knife to easily cut through peppers without crushing.
    • Cheese gets rubbery or overcooked.? Bake uncovered for the last 5 minutes to melt cheese and crisp the top.
    • Filling dries out or burns.? Add a splash of water or broth if filling looks dry before baking.
    • Overstuffed peppers split open in the oven.? Check that peppers are evenly stuffed and packed gently to avoid bursting.

    Stuffed Bell Peppers

    This dish features bell peppers filled with a savory mixture of cooked rice, ground meat or lentils, fresh herbs, and cheese, then baked until tender and bubbly. The peppers are roasted to a slightly smoky sweetness, while the filling remains hearty and flavorful, with a pleasing contrast of textures. The final appearance is colorful, with melted cheese topping and a fragrant aroma that invites you to dig in.
    Prep Time 15 minutes
    Cook Time 45 minutes
    Total Time 1 hour
    Servings: 4
    Course: Main Course
    Cuisine: Comfort Food
    Calories: 320

    Ingredients
      

    • 4 large bell peppers tops sliced off and seeds removed
    • 1 cup cooked rice white or brown rice works well
    • 1/2 pound ground beef or lentils cooked and drained if using beef
    • 1 onion chopped
    • 2 cloves garlic minced
    • 2 tablespoons olive oil
    • 2 tablespoons chopped fresh herbs such as parsley or basil
    • 1 lemon lemon juice freshly squeezed
    • 1/2 cup shredded cheese cheddar, mozzarella, or your choice
    • to taste salt and pepper

    Equipment

    • Baking dish
    • Skillet
    • Knife
    • Spoon
    • Aluminum foil

    Method
     

    1. Preheat your oven to 190°C (375°F). Slice the tops off the bell peppers and carefully scoop out the seeds and membranes, creating a hollow cavity in each.
    2. Heat the olive oil in a skillet over medium heat until shimmering. Add the chopped onion and sauté until translucent and fragrant, about 5 minutes. Add the minced garlic and cook for another minute until fragrant.
    3. In a large mixing bowl, combine the cooked rice, cooked ground meat or lentils, chopped herbs, lemon juice, and a pinch of salt and pepper. Mix well to evenly distribute all ingredients.
    4. Spoon the filling into each hollowed-out pepper, pressing down gently to pack it in. Fill all peppers until they are generously stuffed but not overflowing.
    5. Arrange the filled peppers upright in a baking dish. Drizzle a little olive oil over the tops and cover the dish tightly with aluminum foil to trap moisture.
    6. Bake in the preheated oven for 35 to 40 minutes, until the peppers are tender and the filling is heated through, filling the kitchen with a savory aroma.
    7. Remove the foil and sprinkle the shredded cheese evenly over each stuffed pepper. Return to the oven uncovered and bake for another 5 minutes, until the cheese is melted and bubbly with a golden crust.
    8. Take the dish out of the oven and let the peppers rest for a few minutes. The cheese will set slightly, making them easier to serve.
    9. Garnish with additional chopped herbs if desired, and serve the stuffed peppers warm, enjoying the tender, smoky exterior with a flavorful, hearty filling.

    Notes

    Ensure peppers are evenly stuffed for balanced cooking. Check that the filling is hot and cheese is melted before serving. You can customize the filling with different herbs, grains, or cheeses for variety.
    This dish is a messy, comforting kind of dinner — the sort that makes you feel like you’re wrapping up a hug. It’s forgiving, customizable, and just the right amount of filling for a weeknight that’s screaming for something warm and satisfying. No matter how many times you make it, the smell of roasted peppers and seasoned filling always pulls you back.
    Enjoy tweaking the herbs, swapping out the protein, or even adding a drizzle of hot sauce to keep it your own. It’s the kind of meal that welcomes improvisation, so don’t stress the small stuff. Just dig in, plates in hand, and enjoy the simple joy of a homemade stuffed pepper.

  • Emeril Lagasse’s Jambalaya: A Deep Dive into the Soul of Creole Cooking

    Emeril Lagasse’s Jambalaya: A Deep Dive into the Soul of Creole Cooking

    Jambalaya has always been a dish of contradictions for me—simple ingredients, yet the layering of flavors feels like a small miracle. It’s a dish that reminds me of lazy Sunday afternoons and the chaos of family dinners. Making it from scratch means I get to control every spice and ingredient, turning a humble pot into something soulful.

    Why I Keep Returning to This Classic

    Every spoonful reminds me of lively gatherings and the chaos of making something from scratch. It’s forgiving enough to tweak, yet satisfying enough to master. The smoky, spicy aroma alone pulls me back, craving that comfort and pride in a dish I built myself.

    Inside the Ingredients: What Makes It Sing

    • Andouille sausage: Spicy, smoky, rich sausage that adds depth—swap with chorizo if unavailable.
    • Long-grain white rice: The backbone, absorbs flavors, keeps the texture light—try jasmine for an aromatic twist.
    • Holy trinity (onions, celery, bell peppers): Flavor foundation, fresh and vibrant—use shallots or fennel for different layers.
    • Crushed tomatoes: Adds acidity, sweetness, and body—use fire-roasted for a smoky kick.
    • Chicken stock: The savory liquid that keeps everything moist—vegetable broth works in a pinch.
    • Spices (paprika, cayenne, thyme): Brings warmth, heat, and aroma—adjust cayenne for your spice tolerance.
    • Garlic: A pungent punch of flavor—roasted garlic can deepen the sweetness.

    Tools of the Trade for a Perfect Jambalaya

    • Large heavy-bottomed pot or Dutch oven: Holds all ingredients and ensures even heat distribution.
    • Sharp chef’s knife: Chops vegetables, meats, and herbs precisely.
    • Wooden spoon: Stirs without scratching the pot and helps develop flavors.
    • Measuring cups and spoons: Keeps ingredients balanced and consistent.
    • Ladle: Serves the hearty dish without breaking the rice.

    The Cooking Journey: From Prep to Plate

    Step 1: Start with the holy trinity—onions, celery, and bell peppers. Chop everything finely; it’s the flavor base.

    Step 2: Cook the sausage slices until they’re browned and a little crispy, about 5 minutes over medium heat.

    Step 3: Add the chicken and cook until it’s no longer pink—about 8 minutes, stirring often.

    Step 4: Stir in garlic, paprika, cayenne, and thyme; cook until fragrant, around 1 minute.

    Step 5: Pour in crushed tomatoes and chicken stock; bring to a simmer.

    Step 6: Add the rice, cover, and reduce heat to low—let it cook gently for 20-25 minutes.

    Step 7: Check periodically to make sure it’s not drying out. If so, splash in a little more stock.

    Step 8: When the rice is tender and the flavors meld, remove from heat and let it rest, covered, for 10 minutes.

    Step 9: Fluff with a fork, taste, and adjust salt and pepper as needed.

    Cooking Checks and Tips to Keep It Real

    • The rice should be tender and slightly creamy, not mushy.
    • The dish should smell smoky, spicy, with a hint of tomato sweetness.
    • The sausage should be browned and crispy around the edges.
    • If the rice is undercooked, add a splash of hot chicken stock and cover again.

    Common Pitfalls and How to Dodge Them

    • Sausage is boiled rather than browned.? Use high heat when browning sausage to avoid steaming, not searing.
    • The rice is overcooked or sticking to the pot.? Add a splash of water if rice sticks to the bottom.
    • Too much charring on the bottom, making it bitter.? Reduce heat earlier if ingredients are burning.
    • Rice turns into porridge.? Stir less after adding stock to prevent mushiness.

    Classic Cajun Jambalaya

    This flavorful Cajun jambalaya is made by simmering spicy Andouille sausage, chicken, and aromatic vegetables with rice and bold spices. The dish develops a hearty, slightly creamy texture with a smoky aroma, showcasing vibrant layers of flavor. It’s a comforting one-pot meal perfect for gathering around the table.
    Prep Time 15 minutes
    Cook Time 35 minutes
    Total Time 50 minutes
    Servings: 6
    Course: Main Course
    Cuisine: Cajun
    Calories: 420

    Ingredients
      

    • 1 lb Andouille sausage sliced
    • 1 lb boneless chicken thighs cut into bite-sized pieces
    • 1 cup long-grain white rice rinsed
    • 1 large onion finely chopped
    • 1 stalk celery finely chopped
    • 1 large bell pepper finely chopped
    • 3 cloves garlic minced
    • 1 can crushed tomatoes 14 oz, fire-roasted if possible
    • 2 cups chicken stock
    • 1 teaspoon paprika
    • 0.5 teaspoon cayenne pepper adjust to spice preference
    • 1 teaspoon dried thyme
    • 2 tablespoons vegetable oil

    Equipment

    • Large heavy-bottomed pot or Dutch oven
    • Sharp chef’s knife
    • Wooden spoon
    • Measuring cups and spoons
    • Ladle

    Method
     

    1. Chop the onion, celery, and bell pepper into small, even pieces to create a colorful flavor base.
    2. Heat vegetable oil in your heavy-bottomed pot over medium heat until shimmering, then add the sliced sausage. Cook until browned and crispy around the edges, about 5 minutes, releasing a savory aroma.
    3. Add the chicken pieces to the pot and cook, stirring often, until no longer pink and slightly golden, about 8 minutes. This builds a rich, meaty foundation for the dish.
    4. Stir in the minced garlic, paprika, cayenne, and thyme, cooking for about 1 minute until fragrant and the mixture turns a deep, aromatic hue.
    5. Pour in the crushed tomatoes and chicken stock, stirring to combine everything and bring the mixture to a gentle simmer. You should see bubbling around the edges.
    6. Stir in the rinsed rice, making sure it’s evenly distributed in the liquid. Cover the pot and reduce the heat to low, allowing it to simmer gently for 20 to 25 minutes, until the rice is tender and has absorbed most of the liquid.
    7. Periodically check the dish, adding a splash of hot chicken stock if it begins to dry out, ensuring the rice stays moist and flavorful.
    8. Once the rice is tender and the flavors meld together, turn off the heat and let it rest, covered, for about 10 minutes. This helps the flavors settle and the dish develop a cohesive texture.
    9. Fluff the jambalaya gently with a fork to aerate the rice, then taste and adjust the salt and spice levels as needed. Serve hot, garnished with fresh herbs if desired.
    This jambalaya isn’t just a one-pot wonder; it’s a reminder of how simple ingredients can come together into something warm and complex. No matter how many times I make it, the smell of smoky sausage and spicy peppers still pulls me in. It’s a dish that feels like a hug—comforting, rich, and just a little bit fiery. So, dive in, make it your own, and enjoy the messy joy of cooking something that’s rooted in tradition but personal every time.

  • Rachael Ray’s 30-Minute Meals: A Quirky Spin on Weeknight Simplicity

    Rachael Ray’s 30-Minute Meals: A Quirky Spin on Weeknight Simplicity

    Rachael Ray’s 30-minute meals are a gift for anyone who’s ever looked at their clock and felt the dread of an empty fridge. But what if we took her concept and added a bit of a twist? I like to think of this as a way to make a fast meal that feels a little more personal, a little more layered. It’s about turning everyday ingredients into something that tastes like it took longer than it did.

    Why I Keep Coming Back to This

    It’s the perfect balance of speed and flavor, especially when I need dinner on the table fast but don’t want to skimp on taste. The way the garlic and lemon brighten everything up makes each bite feel fresh, even if I’ve made it a dozen times. It’s a reliable crowd-pleaser that I can tweak with what’s in the fridge, making every dinner a little less routine.

    What’s in the Box? Ingredient Insights

    • Bell peppers: Sweet, juicy, and colorful—crunchy when fresh, tender when cooked. Swap with zucchini for a milder, softer bite.
    • Chicken breasts: Lean and quick to cook, they stay tender with a good sear. Use thighs for more flavor and juiciness.
    • Garlic: Pungent and aromatic, it wakes up the dish. Substitute with shallots if you prefer a milder garlic note.
    • Olive oil: Rich and fruity, it helps everything brown beautifully. Avocado oil works if you want a higher smoke point.
    • Lemon juice: Brightens the whole plate with a zingy, citrusy punch. Lime juice is a good swap for a different vibe.
    • Herbs (parsley, basil): Fresh and fragrant, they add a pop of color and freshness. Dried herbs can work but lose some vibrancy.

    Must-Have Tools for a Quick Turnaround

    • Large skillet: For searing, sautéing, and tossing everything together.
    • Sharp chef’s knife: Quick, clean cuts to speed up prep.
    • Wooden spoon or spatula: Stirring and combining ingredients without scratching your pan.
    • Measuring spoons & cups: Ensuring accurate seasoning and portioning.

    The Rapid-Fire Prep & Cook Journey

    Step 1: Start by gathering all your ingredients and tools.

    Cooking Cues & Confidence Boosters

    • Vegetables should be tender but still have a slight crunch.
    • Meat or protein should be cooked through with a nice sear, not charred.
    • Sauce should be glossy and coat the ingredients without pooling.

    Common Flubs & How to Dodge Them

    • Letting the sauce reduce too much before adding liquids.? If the sauce gets too thick, add a splash of broth or water.
    • Cooking on high heat too long.? If ingredients stick or burn, lower the heat immediately.
    • Adding cold meat straight from the fridge.? If the meat isn’t searing well, make sure the pan is hot enough before adding.
    • Overcooking vegetables.? If veggies are mushy, remove them sooner.

    Lemon Herb Chicken with Bell Peppers

    This quick and vibrant dish features tender chicken breasts seared to perfection, complemented by colorful bell peppers and a bright lemon garlic sauce. The dish is finished with fresh herbs, resulting in a glossy, flavorful plate with a satisfying balance of textures—crispy edges on the chicken, tender peppers, and a zesty finish.
    Prep Time 10 minutes
    Cook Time 15 minutes
    Total Time 25 minutes
    Servings: 4
    Course: Main Course
    Cuisine: American
    Calories: 350

    Ingredients
      

    • 4 pieces chicken breasts pounded to even thickness for quick cooking
    • 2 bell peppers bell peppers sliced into strips
    • 4 cloves garlic minced
    • 2 tablespoons olive oil
    • 2 tablespoons lemon juice freshly squeezed
    • 2 tablespoons fresh herbs chopped parsley and basil mixed
    • to taste salt and pepper

    Equipment

    • Large skillet
    • Sharp chef’s knife
    • Wooden spoon or spatula
    • Measuring spoons & cups

    Method
     

    1. Pat the chicken breasts dry and season them generously with salt and pepper. Heat a large skillet over medium-high heat and add a tablespoon of olive oil. When shimmering, place the chicken in the pan and sear for about 4-5 minutes per side until golden brown and cooked through. Remove and set aside.
    2. Reduce the heat to medium and add the remaining tablespoon of olive oil to the same skillet. Toss in the sliced bell peppers and cook for about 3-4 minutes, stirring occasionally, until they start to soften but still retain some crunch.
    3. Add the minced garlic to the peppers and cook for another 30 seconds until fragrant, with a delicious aroma filling the air.
    4. Return the chicken to the skillet, placing it on top of the peppers. Squeeze fresh lemon juice over everything and cook for an additional 2 minutes, allowing the flavors to meld and the sauce to coat the ingredients with a glossy finish.
    5. Sprinkle the chopped herbs over the dish and give everything a gentle toss to combine. Taste and adjust seasoning with salt and pepper as needed.
    6. Serve the chicken breasts sliced or whole, topped with the colorful peppers and sauce. Enjoy this vibrant, flavorful, and quick meal that’s perfect for a busy weeknight.
    This recipe isn’t just about quickness; it’s about reclaiming dinner time without sacrificing flavor or fun. Every time I make this, I feel a little proud of how straightforward yet satisfying it turns out. Feel free to tweak the spices or add a splash of your favorite hot sauce to make it truly yours. Enjoy the chaos and the calm—this dish is a tiny victory in your busy schedule.

  • Mastering Bobby Flay’s Burger: A Juicy, Charred Dream in Your Own Kitchen

    Mastering Bobby Flay’s Burger: A Juicy, Charred Dream in Your Own Kitchen

    This recipe is a deep dive into those classic flavors we chase after—smoky, juicy, and perfectly charred. I’ve spent years trying to replicate that Bobby Flay burger magic, and honestly, it’s about mastering the simple details. It’s not about fancy tricks, but about understanding the heat, the timing, and the patience.

    Why This Burger Keeps Calling Me Back

    It’s the perfect balance of smoky char and juicy bite. Every time I make it, I remember those summer cookouts and lazy weekends. The process is simple but satisfying—like a small victory in the chaos of daily life. No matter how many burgers I’ve flipped, this one still feels special.

    Breaking Down the Perfect Burger

    • Ground beef (80/20): Juicy, flavorful, and tender—don’t skimp on fat.
    • Salt and pepper: Basic seasonings, but crucial for flavor—don’t skip.
    • Cheddar cheese: Sharp, melts beautifully—adds richness.
    • Buns: Toasted lightly, they hold everything together without sogging.
    • Onions: Caramelized, sweet, and smoky—adds depth.
    • Lettuce and tomato: Fresh, crisp, and cool—balance the richness.
    • Pickles: Vinegary, crunchy, and tangy—cut through the fat.

    Tools of the Trade for Burger Brilliance

    • Cast-iron skillet: Provides even heat for that perfect sear.
    • Spatula: Helps flip the burger without losing juices.
    • Meat thermometer: Ensures the burger is cooked perfectly without guessing.
    • Bowl: For gently mixing and forming the patties.

    The Art of the Perfect Burger: Step-by-Step

    Step 1: Gather your equipment: a sturdy cast-iron skillet, a spatula, and a meat thermometer.

    Step 2: Form your burger patties with a gentle touch, avoiding over-pressing, to keep them tender.

    Step 3: Preheat the skillet over medium-high heat until it’s just starting to shimmer (around 200°C/390°F).

    Step 4: Place the patties in the pan, listening for a satisfying sizzle that signals good searing.

    Step 5: Cook for about 3-4 minutes per side for medium, flipping only once.

    Step 6: Use the thermometer to check for an internal temp of 70°C/160°F for safety.

    Step 7: Let the burgers rest for 2 minutes off the heat to redistribute juices.

    Step 8: Finish with your favorite toppings and a toasted bun.

    Cooking Checks: When to Know Your Burger Is Just Right

    • The outside is deep golden brown with a slight crispness.
    • The internal temperature hits 70°C/160°F for safety and juiciness.
    • The juices run clear when you pierce the side of the patty.
    • The burger feels firm but still gives when gently pressed.

    Common Burger Flubs and How to Fix Them

    • Burger sticking to the skillet.? If the burger sticks to the pan, add a little oil or preheat longer.
    • Dry, overcooked burger.? If the patty is dry, reduce cooking time or add a slice of cheese for moisture.
    • Lack of a good crust.? If the burger isn’t searing properly, increase heat slightly and don’t overcrowd the pan.
    • Uneven doneness.? If the burger is unevenly cooked, flip more frequently and check temp earlier.

    Classic Juicy Charred Burger

    This burger features a juicy ground beef patty cooked to perfection with a smoky char, topped with melty cheddar, caramelized onions, and fresh toppings, all nestled in a toasted bun. The process emphasizes proper heat, timing, and patience to achieve a crispy exterior and tender interior, resulting in a flavorful, satisfying bite.
    Prep Time 15 minutes
    Cook Time 10 minutes
    Total Time 25 minutes
    Servings: 4
    Course: Main Course
    Cuisine: American
    Calories: 650

    Ingredients
      

    • 1 lb pound ground beef (80/20) for juicy, flavorful patties
    • 1 tsp teaspoon salt crucial for flavor
    • 1/2 tsp teaspoon black pepper freshly ground for best flavor
    • 4 slices slices cheddar cheese sharp melts well
    • 4 buns burger buns lightly toasted
    • 1 large onion for caramelized onions
    • 1 large tomato sliced
    • 4 leaves lettuce fresh and crisp
    • 4 slices pickles vinegary and crunchy
    • 2 tbsp tablespoons oil for cooking and toasting buns

    Equipment

    • Cast iron skillet
    • Spatula
    • Meat thermometer
    • Bowl

    Method
     

    1. Gather your equipment: a cast-iron skillet, a spatula, and a meat thermometer. Preheat the skillet over medium-high heat until it’s just starting to shimmer, around 200°C/390°F.
    2. In a bowl, gently mix the ground beef with salt and pepper, taking care not to overwork the meat to keep the patties tender. Form four equal-sized patties, each about ¾ inch thick, handling the meat lightly.
    3. Place the patties carefully onto the hot skillet, listening for a satisfying sizzle. Let them cook undisturbed for about 3-4 minutes until the bottom develops a deep golden-brown crust.
    4. Flip the burgers using a spatula, and cook for another 3-4 minutes on the second side, aiming for an internal temperature of 70°C/160°F for safety and juiciness. Add a slice of cheddar on top during the last minute to melt.
    5. Meanwhile, thinly slice the onion and cook it in a separate pan with a tablespoon of oil over medium heat, stirring occasionally until sweet, golden, and caramelized—about 10 minutes.
    6. While the burgers rest for 2 minutes off the heat, lightly toast the buns in the skillet with a little oil until golden brown and crisp.
    7. Assemble your burger by spreading the bottom bun with some caramelized onions, then layering with lettuce, tomato slices, and pickles. Place the cooked patty with melted cheese on top, then add the top bun.
    8. Serve your burger immediately, enjoying the crispy exterior, juicy interior, and balanced toppings that make every bite satisfying.
    This burger recipe is more than just a meal; it’s an act of reclaiming the grill in your kitchen. Each step, from forming the patties to achieving that perfect char, feels like a small victory. Feel free to tweak the toppings or seasoning—this is your canvas. Bite into it and savor the chaos, the joy, the simple thrill of a burger well-made.

  • Jamie Oliver’s Chicken Fajitas: A Kitchen Adventure Beyond the Usual Wraps

    Jamie Oliver’s Chicken Fajitas: A Kitchen Adventure Beyond the Usual Wraps

    Fajitas often get a bad rap as a quick, uninspired meal, but there’s a lot more room for creativity than just wrapping meat and peppers in a tortilla. I love how this dish can be a canvas for experimenting with smoky spices, fresh herbs, and vibrant vegetables. It’s also a reminder that simple ingredients, treated right, can shine brighter than fancy sauces or complicated techniques.

    Why this dish keeps calling me back

    The balance of smoky peppers, tender chicken, and sharp lime keeps each bite interesting. It’s a dish that feels familiar but still exciting, especially when I tweak the spices or add a new topping. Plus, it’s quick enough to pull together after busy days, making it a reliable go-to.

    Breaking down the key ingredients

    • Chicken breasts or thighs: Juicy and quick-cooking, I prefer thighs for flavor and tenderness, but breasts work fine with careful handling.
    • Bell peppers: Colorful and sweet, they add crunch and brightness. Use red, yellow, or green. Skip if allergic; zucchini is a decent swap.
    • Onions: Layered with sweetness when caramelized, they provide a savory base. Shallots can substitute if you want a milder bite.
    • Spices (paprika, cumin, chili powder): Smoky, warm, and slightly spicy. Adjust for heat preference or add smoked paprika for extra depth.
    • Lime and fresh herbs: Brightens everything with a citrus punch. Lemon can replace lime for a different zing.
    • Tortillas: Soft, warm, and pliable. Corn or flour—your call, but warm them properly to avoid tearing.
    • Oil (vegetable or olive): For searing; I keep it simple, but avocado oil adds a mild, nutty flavor.

    Tools of the trade for perfect fajitas

    • Large skillet or griddle: To sear and cook the chicken and vegetables evenly.
    • Tongs: For flipping and tossing ingredients without breaking the slices.
    • Sharp knife: To slice chicken, peppers, and onions precisely.
    • Cutting board: A sturdy surface for prep work.
    • Warmers or oven: To keep tortillas warm and pliable.

    Step-by-step to flavor-packed fajitas

    Step 1: Heat a large skillet over medium-high heat, about 200°C (400°F).

    Step 2: Add sliced chicken, season with salt, pepper, and a pinch of smoked paprika. Cook for 5-7 minutes until browned and cooked through.

    Step 3: In a separate pan, sauté sliced peppers and onions in a splash of oil, until they soften and char slightly, about 8-10 minutes.

    Step 4: Combine chicken and vegetables, squeeze fresh lime over, and stir to coat. Warm tortillas in a dry pan or oven.

    Step 5: Serve immediately with your favorite toppings—sour cream, salsa, cheese, or avocado.

    Cooking checkpoints and pro tips

    • Chicken should be juicy and browned, not dry or burnt.
    • Peppers and onions should be tender with a slight char, not soggy.
    • Tortillas should be warm and pliable, not crackly or cold.

    Common pitfalls and how to fix them

    • Chicken is undercooked or dry.? Add a splash of water and cover if chicken isn’t cooking evenly.
    • Peppers are soggy or lack smoky flavor.? Reduce heat and cook peppers longer for better char.
    • Tortillas are cold or stiff.? Wrap tortillas in foil and warm in oven for 10 mins.
    • Ingredients steam instead of sear.? Don’t overcrowd the pan, cook in batches if needed.

    Colorful Chicken Fajitas

    This dish features tender chicken slices and vibrant bell peppers cooked with smoky spices, sautéed to a slightly charred finish. The ingredients are quickly seared in a hot skillet, then combined with fresh lime juice for brightness, resulting in a juicy, flavorful filling wrapped in warm tortillas. The final dish offers a balance of smoky, tangy, and savory flavors with a lively, colorful appearance.
    Prep Time 15 minutes
    Cook Time 20 minutes
    Total Time 35 minutes
    Servings: 4
    Course: Main Course
    Cuisine: Mexican
    Calories: 350

    Ingredients
      

    • 2 large Chicken breasts or thighs sliced into strips
    • 3 bell peppers bell peppers mixed colors, sliced into strips
    • 1 large onion sliced into strips
    • 1 teaspoon paprika smoked for extra depth
    • 1 teaspoon cumin
    • 1 teaspoon chili powder adjust for heat preference
    • 2 tablespoons oil vegetable or olive oil
    • 1 lime lime juiced over cooked ingredients
    • 8 small tortillas warm before serving

    Equipment

    • Large skillet or griddle
    • Tongs
    • Sharp knife
    • Cutting board
    • Oven or warming drawer

    Method
     

    1. Heat a large skillet over medium-high heat until it’s hot and slightly shimmering, about 200°C (400°F).
    2. Add sliced chicken to the skillet, season with salt, pepper, and smoked paprika, then spread out into a single layer. Cook for 5-7 minutes, flipping occasionally, until the chicken is browned and cooked through, and you hear a gentle sizzling sound.
    3. In a separate pan or after removing the chicken, add a splash of oil and sauté sliced peppers and onions over medium heat. Stir frequently, cooking for about 8-10 minutes until they soften, become slightly charred, and develop a smoky aroma.
    4. Combine the cooked chicken and sautéed vegetables in the skillet, squeeze fresh lime juice over the mixture, and toss gently to coat everything evenly. Let it cook together for another minute to meld the flavors.
    5. While the filling cooks, warm the tortillas in a dry skillet or wrap them in foil and place in a low-temperature oven for about 10 minutes until soft and pliable.
    6. Serve the flavorful chicken and pepper mixture hot, spooned into warm tortillas, and add your favorite toppings such as sour cream, salsa, cheese, or avocado for extra richness and texture.

    Notes

    Ensure not to overcrowd the pan to allow proper searing. Adjust spice levels to taste, and serve immediately for best flavor and texture.
    Fajitas are such a flexible, forgiving dish. Once you get the hang of balancing the smoky peppers with juicy chicken, it’s hard to go back to bland versions. Feel free to tweak the spices or add a splash of hot sauce for extra kick. The real magic is in making it your own, with what you love most on hand.

  • Rihanna’s Favorite Caribbean Dishes: A Deep Dive into Authentic Flavors

    Rihanna’s Favorite Caribbean Dishes: A Deep Dive into Authentic Flavors

    Caribbean cuisine isn’t just about the spice—it’s about the layers of flavor that tell a story of history, resilience, and joy. These dishes often feel like a celebration, even in the simplest versions. When Rihanna shares her favorites, I see a reflection of that vibrant spirit, a reminder that food can carry memories across oceans.

    Why I Keep Coming Back to This Dish

    The complex balance of heat, citrus, and coconut keeps surprising me. It’s a dish that feels like a warm hug but also sparks a party on my plate. Every time I make it, I remember the chaotic joy of island markets and lazy afternoons. It’s comfort with a punch of bold, unapologetic flavor that always pulls me back.

    Breaking Down the Key Ingredients

    • Lime juice: Freshly squeezed for that zesty punch that balances richness. Use bottled if fresh isn’t available, but nothing beats the real deal.
    • Caribbean hot sauce: Adds a smoky heat that’s essential. If you prefer milder, cut it with a touch of honey or omit for less spice.
    • Coconut milk: Creamy and fragrant, it’s the backbone of the sauce. Light coconut milk works well if you want less richness.
    • Thyme: Fresh thyme infuses earthy aroma, almost lemony when cooked. Dried works in a pinch, but fresh is best.
    • Bell peppers: Colorful, sweet, and slightly crisp—choose vibrant reds or yellows for visual pop.
    • Plantains: Fried until golden, with a crispy exterior and soft interior, they add a sweet, starchy counterpoint.
    • Cilantro: Fresh and bright, sprinkle it last to keep its vibrant flavor and aroma.

    Tools of the Trade for Caribbean Cooking

    • Heavy skillet or cast-iron pan: For achieving that perfect char and even heat distribution.
    • Sharp knife: Chopping vegetables and preparing your protein with precision.
    • Marinating bowl: To soak your protein in flavors and tenderize.
    • Wooden spoon: Stirring and blending flavors without scratching your pan.
    • Measuring spoons and cups: For accurate seasoning and liquids.

    Step-by-Step: Crafting the Perfect Caribbean Dish

    Step 1: Start by marinating your choice of protein—chicken, fish, or tofu—in a mixture of lime juice, garlic, and a splash of Caribbean hot sauce. Let it sit for at least 30 minutes.

    Step 2: Heat a heavy skillet over medium heat, about 180°C (350°F). Add some oil and cook your protein until it’s golden and slightly charred, about 8-10 minutes.

    Step 3: While that cooks, prepare your vegetable base. Sauté chopped bell peppers, onions, and a hint of thyme until everything is soft and fragrant, about 5 minutes.

    Step 4: Add your cooked protein to the veggie mixture, pour in a splash of coconut milk, and simmer for 10 more minutes until the flavors meld and the sauce thickens.

    Step 5: Finish with a squeeze of fresh lime and a handful of chopped cilantro. Serve hot, with rice or fried plantains.

    Cooking Checkpoints & Tips to Keep in Mind

    • Ensure protein is fully cooked—internal temperature should reach 74°C (165°F).
    • Veggies should be soft but still vibrant in color, not mushy.
    • Sauce should be rich, slightly thickened, with a bright citrus aroma.

    Common Mistakes & How to Fix Them

    • Sauce is too gloopy and stiff.? Add a splash of water or broth to loosen a too-thick sauce.
    • Ingredients burn before cooking through.? Reduce heat slightly if ingredients start burning or sticking.
    • Dish lacks brightness.? Add a little more lime juice or vinegar if flavors are dull.
    • Meat or fish isn’t cooked through.? If protein is undercooked, continue simmering or sear longer.

    Caribbean Coconut Chicken with Plantains and Bell Peppers

    This vibrant Caribbean dish features marinated chicken seared to golden perfection, simmered with a fragrant mixture of bell peppers, thyme, and coconut milk. The dish boasts a rich, slightly thickened sauce with bright citrus and smoky heat, complemented by crispy fried plantains and fresh cilantro for a colorful, flavorful presentation.
    Prep Time 35 minutes
    Cook Time 30 minutes
    Total Time 1 hour 5 minutes
    Servings: 4
    Course: Main Course
    Cuisine: Caribbean
    Calories: 450

    Ingredients
      

    • 2 lbs chicken breasts or thighs cut into bite-sized pieces
    • 1/4 cup lime juice freshly squeezed
    • 2 cloves garlic minced
    • 1 tbsp Caribbean hot sauce smoky and spicy
    • 1 can coconut milk 13.5 oz, full-fat preferred
    • 1 tsp dried thyme or fresh thyme, about 2 sprigs
    • 2 bell peppers red and yellow, sliced
    • 2 ripe plantains plantains peeled and sliced into rounds
    • 1 tbsp oil for frying plantains
    • 2 tbsp oil for cooking chicken and veggies
    • 1 lime fresh lime juice for finishing
    • a handful cilantro chopped, for garnish

    Equipment

    • Heavy skillet or cast-iron pan
    • Sharp knife
    • Marinating bowl
    • Wooden spoon
    • Measuring spoons and cups

    Method
     

    1. Mix chicken pieces with lime juice, minced garlic, and hot sauce in a marinating bowl. Cover and let sit for at least 30 minutes to tenderize and infuse flavor.
    2. Heat a heavy skillet over medium heat and add a tablespoon of oil. Once shimmering, add marinated chicken pieces and cook until golden and slightly charred, about 8-10 minutes, stirring occasionally.
    3. Remove cooked chicken and set aside. In the same pan, add a bit more oil if needed, then sauté sliced bell peppers and thyme until the veggies are soft, fragrant, and vibrant, about 5 minutes.
    4. Add the cooked chicken back into the skillet with the peppers and pour in the coconut milk. Stir well, then lower the heat and simmer for about 10 minutes until the sauce thickens slightly and flavors meld.
    5. While the sauce simmers, heat oil in a separate pan over medium heat. Fry plantain slices until golden brown and crispy around the edges, about 2-3 minutes per side. Drain on paper towels.
    6. Finish the chicken dish with a squeeze of fresh lime juice and sprinkle chopped cilantro over the top for bright, fresh flavor.
    7. Serve the flavorful Caribbean chicken and sauce hot, accompanied by crispy fried plantains and rice if desired. Enjoy the bold, comforting flavors with a vibrant, colorful presentation.

    Notes

    Use fresh thyme and lime for the best flavor. Adjust hot sauce to taste for spiciness. Serve with rice or additional plantains for a complete meal.
    This dish isn’t just about the flavors, though they’re bold and complex. It’s about the memories tied to these ingredients—the laughter, the chaos of a busy kitchen, and that one summer trip to the islands. Each bite brings a little piece of that warmth and vibrancy home, no matter where you are. Remember, the best dishes come from adjusting and tasting—so don’t be afraid to make it your own.

  • Snoop Dogg’s Fried Bologna Sandwich: A Retro Snack with a Savory Twist

    Snoop Dogg’s Fried Bologna Sandwich: A Retro Snack with a Savory Twist

    The fried bologna sandwich is a throwback that never really went out of style. It’s got that nostalgic, greasy charm that hits a sweet spot in your soul—simple ingredients, big flavor. I love how a few basic pantry items can turn into a satisfying snack or meal in minutes. It’s a reminder that sometimes, the simplest things are the best.

    Why I Keep Coming Back to This Sandwich

    It’s quick, messy, and full of nostalgia. Every bite reminds me of childhood afternoons and late-night bites. The crispy edges and simple ingredients make it a comfort I crave when I need a break from fancy. It’s honest, satisfying, and totally unpretentious—no fuss, just flavor.

    Breaking Down the Bites: Ingredients & Their Role

    • Bologna — my go-to for that salty, umami punch, but turkey or plant-based slices work too.: Crispy, greasy, satisfying—an indulgence you can tweak.
    • Bread — sturdy white bread holds everything together, but sourdough adds extra tang.: Toasted to perfection for a crunchy bite.
    • Mustard or mayo — adds creaminess and tang, balancing the salty meat.: Use your favorite or skip for a cleaner bite.
    • Egg — optional but adds richness and gooeyness.: Fried sunny side up, yolk runny, for that extra layer of indulgence.
    • Butter — for frying and extra flavor.: Melted in the pan, it makes everything golden and flavorful.
    • Hot sauce (optional) — for a spicy kick.: A splash brightens up the whole sandwich.
    • Pickles (optional) — adds crunch and acidity.: Cool, sharp contrast to the salty bologna.

    Tools of the Trade for a Crispy Bologna Sandwich

    • Skillet — a heavy-bottomed one keeps heat even.: To fry the bologna slices evenly and get that crispy edge.
    • Spatula — a sturdy one for flipping and pressing.: To handle the bologna slices and egg gently.
    • Toaster or oven — for bread.: To get that perfect golden toast.
    • Knife — for spreading condiments and slicing.: To assemble and serve your sandwich neatly.

    How to Make the Perfect Fried Bologna Sandwich

    Step 1: Start with a hot, heavy skillet over medium heat, about 160°C (320°F).

    Step 2: Lay your bologna slices flat in the pan, and let them sizzle for about 2 minutes per side, until they’re golden and slightly crispy.

    Step 3: If the edges curl up or stick, gently press them down with a spatula. Add a little butter in the last 30 seconds for extra richness.

    Step 4: Toast your bread until golden, then spread with a smear of mustard or mayo, whatever you prefer.

    Step 5: Fry an egg in the same pan if you like that extra gooey yolk. Assemble the sandwich with fried bologna, egg, and bread.

    Step 6: Let it sit for a minute before slicing—this helps everything set and keeps it from falling apart.

    Step 7: Enjoy immediately, maybe with some pickles or hot sauce on the side.

    Cooking Checkpoints & Tips for the Fried Bologna Sandwich

    • Bologna edges should be crispy and golden, not burnt.
    • Bread should be toasted but not charred—keep an eye on it.
    • Egg, if used, should be cooked sunny side up with a runny yolk.
    • The sandwich should hold together without falling apart when you pick it up.

    Common Mistakes & How to Fix Them

    • Over-torched slices that turn black and bitter.? USE LOW HEAT to prevent burning the bologna edges.
    • Bologna that is overly crisp and tough.? Add a splash of water or cover the pan to rehydrate a dry bologna.
    • Toasting bread too long, resulting in char.? Remove bread early if it starts to burn.
    • Bologna sticking or tearing in the pan.? Use a non-stick pan if sticking is a problem.

    Fried Bologna Sandwich

    This classic fried bologna sandwich combines crispy, golden-brown slices of bologna with toasted bread, often topped with a fried egg and condiments for added richness. The dish features a satisfying crunch and savory flavor, served hot and messy with a nostalgic appeal. It’s quick to prepare, making it a perfect comfort food for a satisfying snack or meal.
    Prep Time 5 minutes
    Cook Time 10 minutes
    Total Time 15 minutes
    Servings: 1
    Course: Main Course
    Cuisine: American
    Calories: 550

    Ingredients
      

    • 2 slices bologna preferably thick slices for crispiness
    • 2 slices white bread toasted until golden
    • 1 tablespoon butter for frying and browning bread
    • 1 tablespoon mustard or mayo spread on bread
    • 1 egg egg optional, fried sunny side up
    • Hot sauce to taste hot sauce optional, for spicy kick
    • Pickles to taste pickles optional, adds crunch and acidity

    Equipment

    • Heavy-bottomed skillet
    • Spatula
    • Toaster or oven
    • Knife

    Method
     

    1. Start by heating a heavy-bottomed skillet over medium heat and add a tablespoon of butter. Let it melt and sizzle, filling the kitchen with a rich, savory aroma.
    2. Lay the slices of bologna flat in the hot skillet, making sure they aren’t overlapping. Let them cook for about 2 minutes on each side until they turn golden brown and develop crispy edges, with some bubbling and a slight curl.
    3. While the bologna fries, toast your bread until it’s golden and crispy—either in a toaster or under the broiler for a few minutes. Spread mustard or mayo on one side of each slice for added flavor.
    4. If you like, crack an egg into the skillet alongside the bologna and fry sunny side up until the whites are set but the yolk remains runny. The sizzling sounds and the aroma of the egg will add extra richness.
    5. Once the bologna slices are crispy and browned, carefully remove them from the skillet using a spatula and set aside. If you fried an egg, gently slide it onto one slice of toasted bread.
    6. Assemble the sandwich by placing the crispy bologna on the toasted bread with the fried egg, then cover with the second slice of bread. Press lightly to help everything hold together.
    7. Cut the sandwich in half if desired, and serve immediately with a drizzle of hot sauce or a few pickles on the side for extra crunch and flavor.

    Notes

    For extra flavor, try adding a slice of cheese or a dash of hot sauce inside the sandwich. Be careful not to burn the bologna edges; cook on medium heat and monitor closely. This dish is best enjoyed hot and messy—grab it with both hands and dig in!
    This sandwich is all about that crispy, salty edge of the bologna paired with the soft bread and optional egg. It’s a quick, satisfying bite that pulls you back to childhood or late-night snack cravings. Feel free to tweak the toppings or add a dash of hot sauce, but don’t skip the crispy edges—they make all the difference. Dive into this simple comfort food and enjoy the chaos of flavors and textures.

  • Lady Gaga Pasta: An Unconventional Love Letter to Comfort Food

    Lady Gaga Pasta: An Unconventional Love Letter to Comfort Food

    Lady Gaga Pasta is my go-to when I want something familiar but with a twist. It’s a recipe born from late-night cravings and a need for comfort that’s loud and unapologetic. The ingredients are simple, but the way they come together feels like a small act of rebellion against the ordinary.

    Why I Keep Coming Back to This Dish

    It’s honest, quick, and hits all the right notes—bright, garlicky, a little chaotic. Every time I make it, I remember why I started cooking in the first place—simple ingredients, big flavors, no fuss. It’s a reminder that comfort food can be loud and proud, even in a rush.

    The Heart of It: Ingredient Breakdown

    • Spaghetti or linguine: A sturdy, neutral base. If you’re out, any long pasta works—just keep it al dente.
    • Fresh basil: Fragrant, bright, and slightly sweet—adds the punch. Dried basil can be a dull swap.
    • Garlic: The flavor cornerstone—aromatic, pungent, and essential for that savory kick.
    • Olive oil: Use good quality—rich, fruity oil makes all the difference.
    • Pasta water: Salty, starchy magic that helps bind and loosen the sauce—don’t skip this.
    • Salt: Salty like the sea—necessary for seasoning the pasta water.
    • Chili flakes (optional): Spicy, fiery—if you want to turn up the heat, sprinkle a pinch.

    Tools of the Trade for Lady Gaga Pasta

    • Large pot: Boiling water for pasta, ensuring it cooks evenly.
    • Deep skillet or frying pan: Sautéing garlic and basil quickly for maximum flavor.
    • Tongs or pasta fork: Easily lifting and tossing the pasta.
    • Measuring cup: Saving pasta water for the sauce.

    Cooking the magic step-by-step

    Step 1: Boil a large pot of salted water—about 4 liters (4 quarts)—until it’s rolling, then toss in your pasta. Don’t forget, salty water should taste like the sea.

    Step 2: While the pasta cooks, chop up a good handful of fresh basil and garlic. Keep them ready—this dish is all about quick, vibrant flavors.

    Step 3: In a pan, heat some olive oil over medium heat (about 160°C/320°F). Sauté garlic until fragrant—about 30 seconds—then toss in the basil just to release its aroma.

    Step 4: Drain the pasta when al dente—firm to the bite but not hard—about 8-10 minutes. Save a cup of pasta water for the sauce.

    Cues to Keep You on Track During Cooking

    • Pasta should be just tender, with a slight bite—test a piece after 8 minutes.
    • Garlic and basil should smell fragrant but not burnt—remove from heat if they start to brown.
    • Sauce should coat the pasta smoothly, with a bit of reserved water loosened in—don’t let it dry out.

    Common Pitfalls and How to Dodge Them

    • Burning garlic.? If the garlic turns brown quickly—reduce heat and add a splash of water to cool it down.
    • Clumping pasta.? If the pasta sticks—stir frequently and add a splash of reserved pasta water.
    • Sauce drying out.? If the sauce is too thick—stir in more pasta water until silky.
    • Overcooking herbs.? If basil wilts too much—add it at the last moment to keep its color and flavor.

    Lady Gaga Pasta

    Lady Gaga Pasta is a bold, garlic-infused spaghetti dish that comes together quickly with fresh basil and good-quality olive oil. The pasta is cooked al dente and coated in a fragrant, slightly chaotic sauce that’s vibrant and satisfying, with a touch of heat if desired. It’s a simple yet rebellious comfort food that celebrates big flavors with minimal fuss.
    Prep Time 5 minutes
    Cook Time 10 minutes
    Total Time 15 minutes
    Servings: 2
    Course: Main Course
    Cuisine: Italian
    Calories: 600

    Ingredients
      

    • 200 g spaghetti or linguine preferably al dente
    • 3 cloves garlic finely chopped
    • 1/4 cup good quality olive oil rich and fruity
    • 1/4 cup fresh basil roughly chopped
    • 1 cup pasta water reserved from cooking pasta
    • to taste salt for pasta water and seasoning
    • a pinch chili flakes optional chili flakes for heat

    Equipment

    • Large pot
    • Deep skillet or frying pan
    • Tongs or pasta fork
    • Measuring cup

    Method
     

    1. Bring a large pot of salted water to a rolling boil, tasting it to ensure it’s salty like the sea. Add the pasta and cook until just al dente, about 8-10 minutes, stirring occasionally to prevent sticking.
    2. While the pasta cooks, finely chop the garlic and roughly tear or chop the fresh basil to release their fragrant oils and flavors.
    3. Heat the olive oil in a deep skillet over medium heat until it shimmers and begins to gently bubble. Add the minced garlic and sauté for about 30 seconds until fragrant, being careful not to brown it.
    4. Immediately add the chopped basil to the skillet, stirring quickly to release its aroma without overcooking, about 10-15 seconds.
    5. Once the pasta is al dente, reserve 1 cup of the starchy pasta water and then drain the pasta, setting it aside.
    6. Transfer the drained pasta to the skillet with the garlic and basil, tossing gently to coat the noodles in the fragrant oil.
    7. Pour in about half of the reserved pasta water, stirring to loosen the sauce and help it cling to the pasta, creating a silky coating.
    8. Season with salt to taste, and if desired, sprinkle with chili flakes for a spicy kick, tossing everything together until well coated and glossy.
    9. If the sauce seems too thick, add a splash more of the reserved pasta water until it reaches your desired silky consistency.
    10. Give everything one last toss, making sure the basil stays vibrant and the pasta is evenly coated with the fragrant, chaotic sauce.
    11. Serve immediately, garnished with extra basil if desired, and enjoy this loud, flavorful, rebellious pasta dish!
    This pasta isn’t about perfection; it’s about feeling the chaos and joy of cooking something soulfully simple. The basil’s bright scent, the garlic’s punch, and the silky pasta all come together in a way that makes you pause and smile. Play around—add a splash of lemon or a pinch of chili flakes for your signature twist. The best part? It’s quick enough for when life’s a bit hectic but you still crave something real.

  • Snoop Dogg Mac and Cheese: A Soulful Spin on a Classic

    Snoop Dogg Mac and Cheese: A Soulful Spin on a Classic

    This Snoop Dogg-inspired mac and cheese is where comfort meets swagger. It’s a reminder that even the simplest dishes can carry layers of flavor when you add a little attitude and a lot of love. I love how the smoky heat from hot sauce and the richness of cheddar transform this classic into something more soulful.

    Why This Recipe Won’t Leave Your Rotation

    It’s the kind of comfort food that feels like a warm hug, but with layers of bold, smoky flavor. Perfect for nights when you need a little soul in your bowl. Plus, it’s endlessly customizable—spicy, cheesy, or spicy-cheesy—whatever your mood, it’s got you.

    The Flavors & Foundations

    • Cheddar cheese: Sharp, tangy, melts into a velvety sauce. Swap with Gruyère for nuttier depth.
    • Hot sauce: Adds smoky heat, brightens the dish. Use a splash of sriracha or chipotle for different vibes.
    • Butter: Richness base for roux, enhances overall creaminess. Substitute with ghee for a nuttier note.
    • Flour: Thickening agent, gives sauce structure. Whole wheat works fine if you want a nuttier touch.
    • Pasta: Creamy, starchy foundation, varies in shape. Penne or elbows hold sauce well.
    • Milk: Creaminess without heaviness, balances flavors. Almond milk can be a dairy-free option.
    • Paprika: Adds a smoky, sweet aroma, enhances color. Smoked paprika intensifies the flavor.

    Tools & Gadgets for the Job

    • Large pot: Cook pasta evenly without overcrowding.
    • Whisk: Blend roux smoothly and prevent lumps.
    • Baking dish: Bake the assembled mac and cheese until bubbling and crispy.
    • Measuring cups and spoons: Ensure accurate ingredient quantities.
    • Rubber spatula: Fold ingredients gently and scrape the pan.

    Step-by-Step for the Soulful, Cheesy Goodness

    Step 1: Gather your ingredients and preheat your oven to 180°C (350°F).

    Step 2: Cook the pasta in salted boiling water until just al dente, about 8 minutes. Drain and set aside.

    Step 3: In a large saucepan, melt butter over medium heat. Add flour and whisk until smooth, about 1 minute.

    Step 4: Slowly pour in milk, whisking constantly to avoid lumps, and cook until the sauce thickens, around 5 minutes.

    Step 5: Stir in sharp cheddar, melting it down into the creamy base. Add a splash of hot sauce for a smoky kick.

    Step 6: Combine the pasta with the cheese sauce, then transfer to a baking dish. Top with more cheese and a sprinkle of paprika.

    Step 7: Bake for 20 minutes until bubbling and golden on top. Rest for 5 minutes before serving.

    Cooking Checkpoints & Tips to Keep It Real

    • Ensure pasta is al dente, not mushy, for the perfect bite.
    • Whisk the roux until smooth and bubbly, avoid clumps or burnt bits.
    • Watch the sauce as it thickens; it should coat the back of a spoon without running.
    • Bake until the top is golden and crispy, not just bubbly, for added texture.

    Common Pitfalls & How to Fix Them

    • Sauce gets too thick or clumpy.? Add a splash more milk, stir well to loosen thickened sauce.
    • Top gets burnt or overly crispy.? Reduce oven heat or bake for less time to prevent over-browning.
    • Lumps in the cheese sauce.? Stir continuously while adding milk to avoid lumps.
    • Cheese sauce breaks or separates.? Use fresh cheese for the best melt and flavor.

    Snoop Dogg-Inspired Smoky Mac and Cheese

    This smoky, cheesy mac and cheese combines sharp cheddar, hot sauce, and a buttery roux to create a rich, velvety sauce. Baked until bubbling and topped with paprika, it boasts a bold flavor profile with a creamy and crispy finish. Perfect as a soulful comfort dish with a touch of attitude.
    Prep Time 10 minutes
    Cook Time 30 minutes
    Total Time 40 minutes
    Servings: 4
    Course: Main Course
    Cuisine: American
    Calories: 620

    Ingredients
      

    • 8 oz pasta (penne or elbows) uncooked
    • 2 tbsp butter unsalted
    • 2 tbsp flour all-purpose
    • 1 1/2 cups milk dairy or plant-based
    • 2 cups sharp cheddar cheese grated
    • 1 tbsp hot sauce smoky or spicy, to taste
    • 1 tsp paprika smoked preferred
    • additional extra cheese for topping, optional

    Equipment

    • Large pot
    • Whisk
    • Baking dish
    • Measuring cups and spoons
    • Rubber spatula

    Method
     

    1. Bring a large pot of salted water to a boil and cook the pasta until just al dente, about 8 minutes. Drain and set aside.
    2. In a large saucepan, melt the butter over medium heat, listening for a gentle sizzle and watching it turn glossy.
    3. Add the flour to the melted butter, whisking constantly until the mixture is smooth and pale, about 1 minute. This creates a roux that thickens the sauce.
    4. Slowly pour in the milk while whisking vigorously to prevent lumps, and continue cooking until the sauce thickens and coats the back of a spoon, about 5 minutes.
    5. Stir in the grated cheddar cheese and hot sauce, stirring until the cheese is melted and the sauce is smooth, fragrant, and slightly bubbly.
    6. Add the cooked pasta to the cheese sauce, folding gently with a spatula until evenly coated and creamy.
    7. Transfer the cheesy pasta mixture to a baking dish, spreading it out evenly. Sprinkle with additional cheese and a light dusting of smoked paprika for color and extra flavor.
    8. Bake in a preheated oven at 180°C (350°F) for about 20 minutes, until bubbling around the edges and the top is golden brown with a crispy crust.
    9. Remove from oven and let rest for 5 minutes, allowing the sauce to settle and the cheese to set slightly for easier serving.
    10. Scoop out hearty portions, making sure to get that crispy top layer, and enjoy the bold, smoky flavors in every bite.

    Notes

    For an extra smoky kick, use chipotle hot sauce or sprinkle some chopped smoked bacon on top before baking.
    This dish isn’t just about melting cheese; it’s about comfort, chaos, and a little bit of that street-smart magic. Every bite delivers a complex blend of smoky, cheesy, and spicy notes that stick to your ribs and make you want more. Feel free to tweak the spice level or add a little extra cheese—this is your canvas, after all. Just enjoy the process and the flavors that come with it, no matter how rough around the edges.