Blog

  • dinner recipes with chicken breast

    dinner recipes with chicken breast

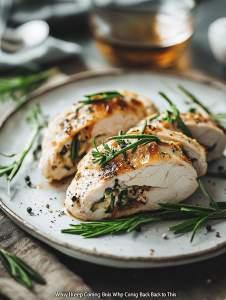
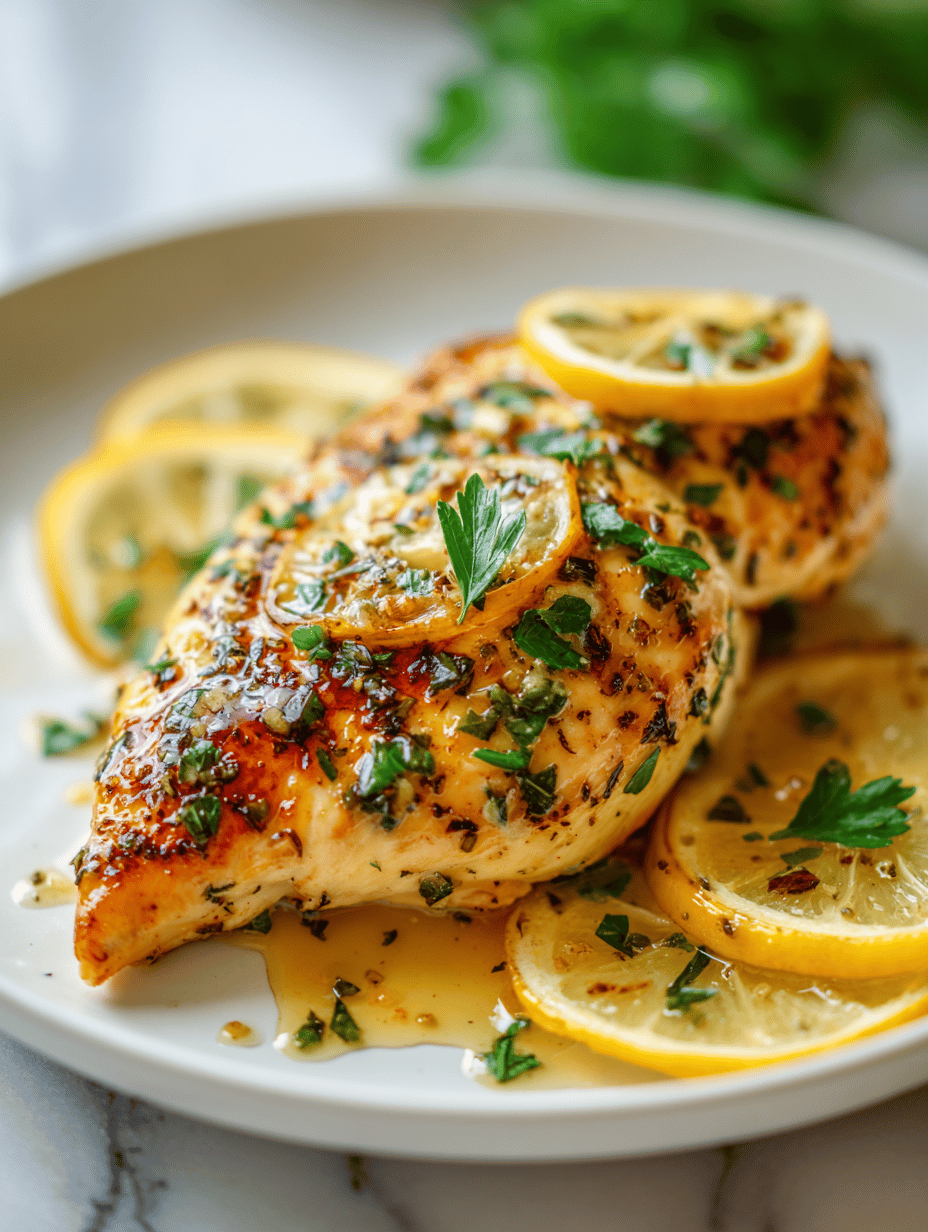
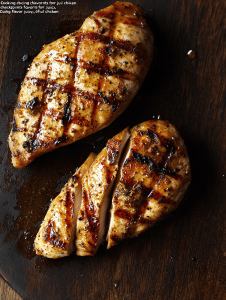
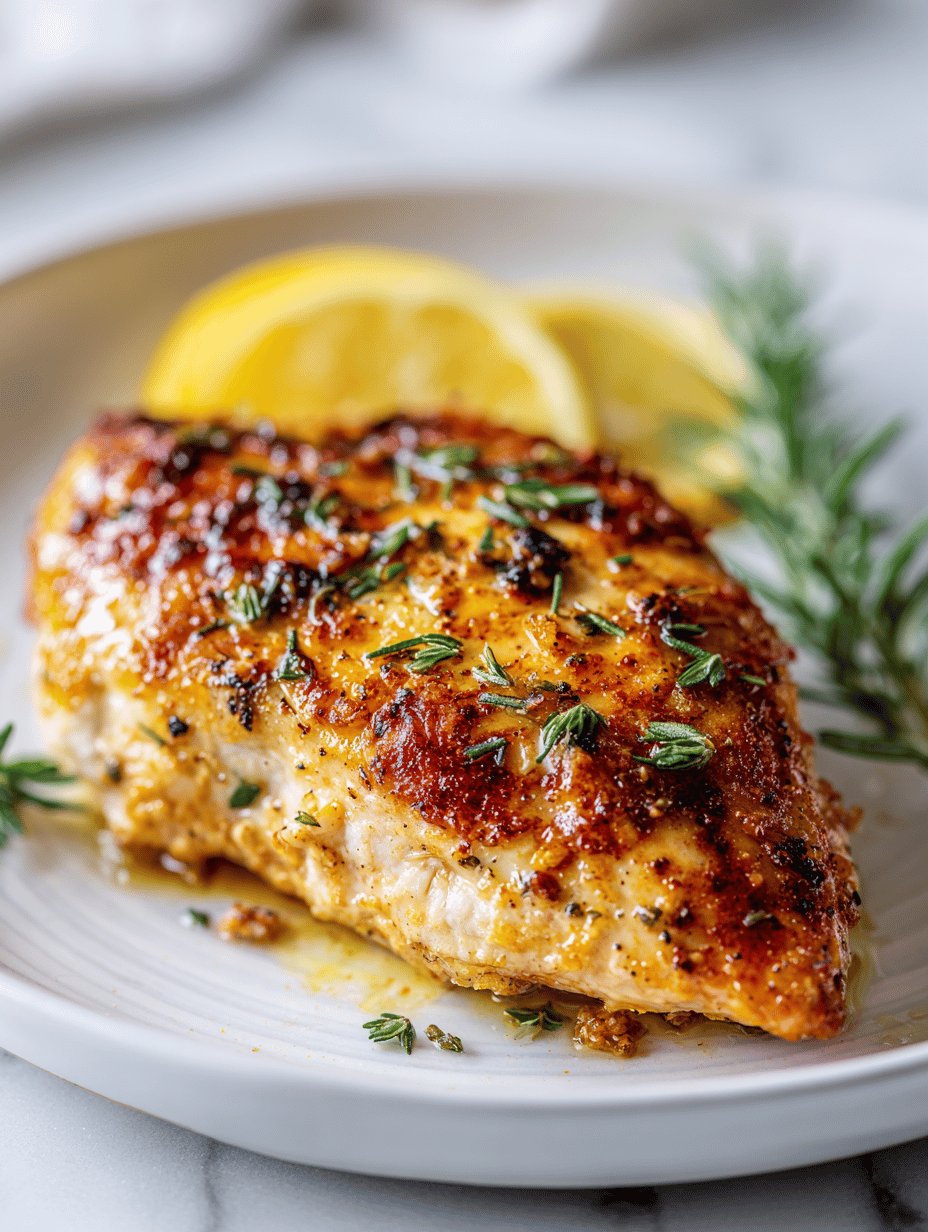
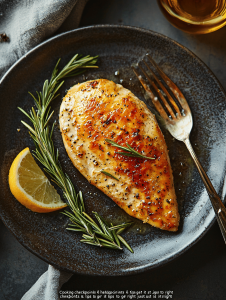
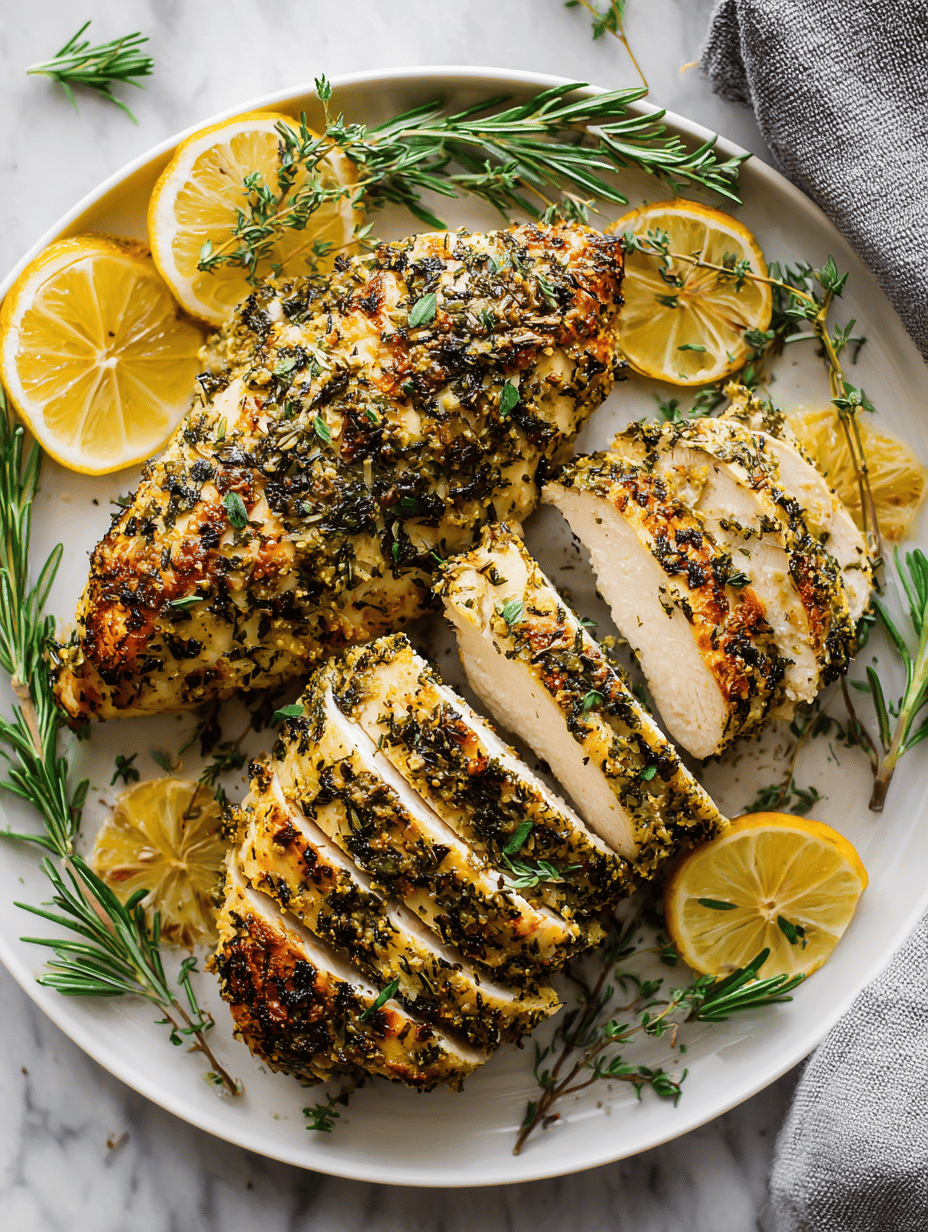
    Chicken breasts are a blank canvas, but they can also be tricky—dry if overcooked, bland if under-seasoned. I like to cook them with a smoky, herbaceous crust that adds depth and a hint of nostalgia. This method is about patience and respecting the meat’s natural juices.

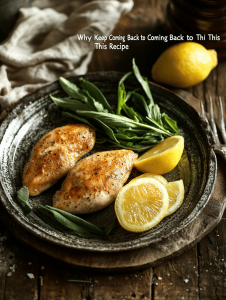
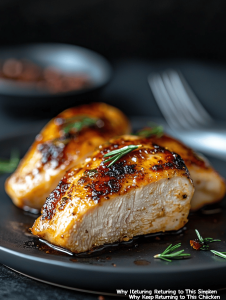
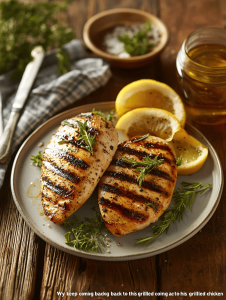
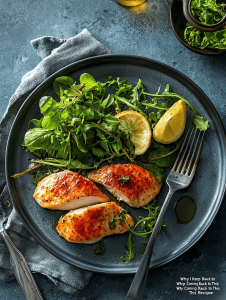
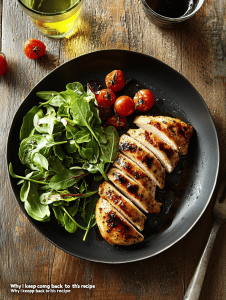
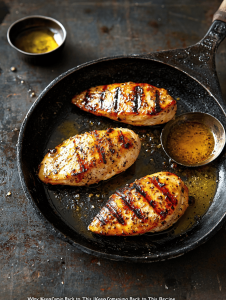
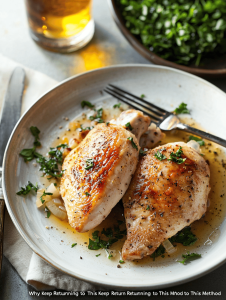
    Why I Keep Returning to This Method

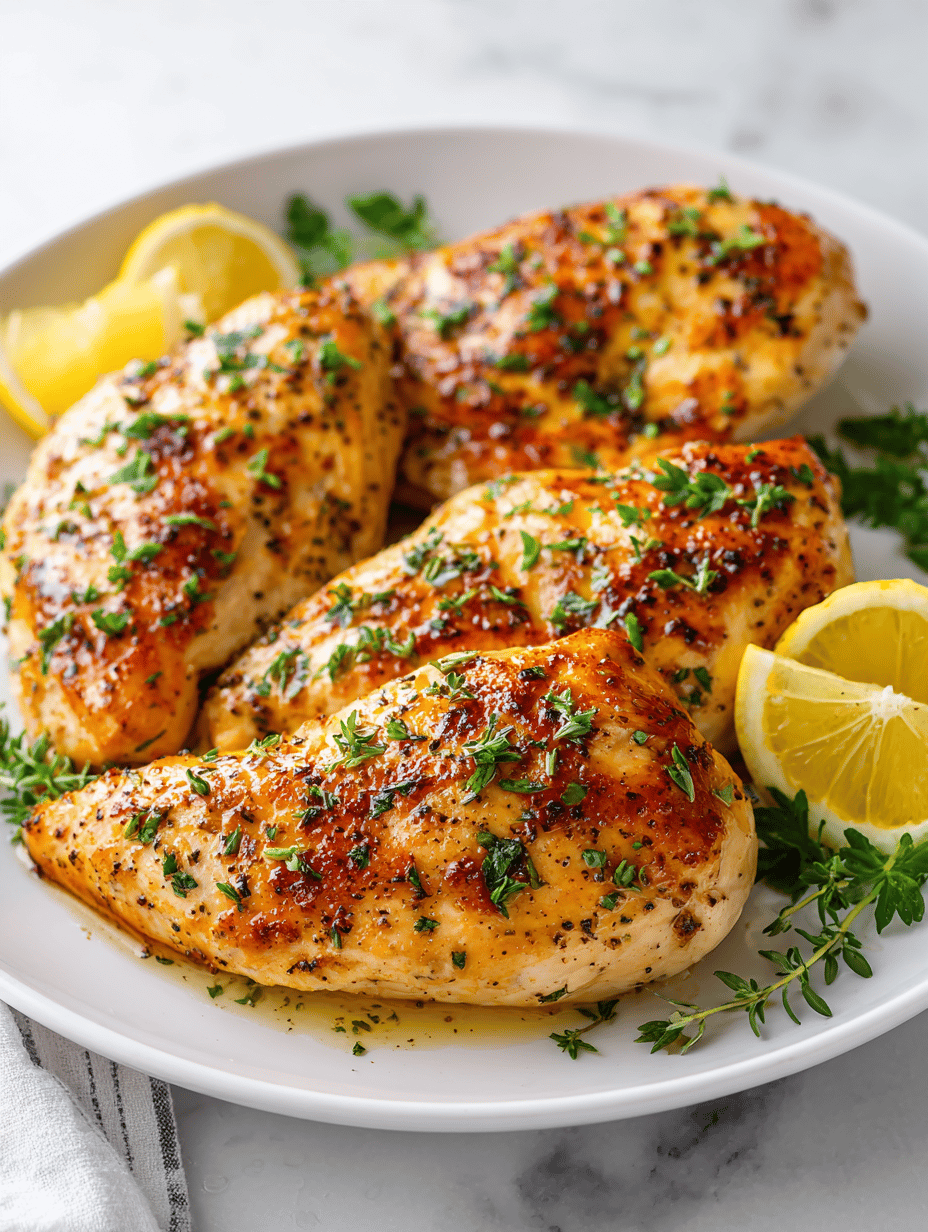
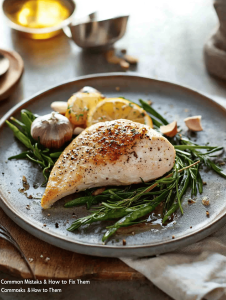
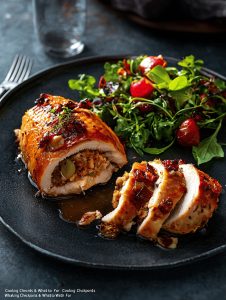
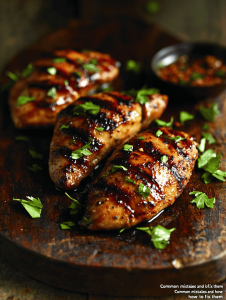
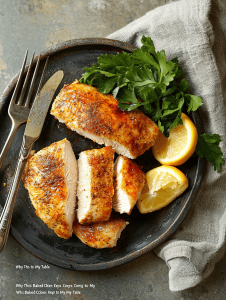
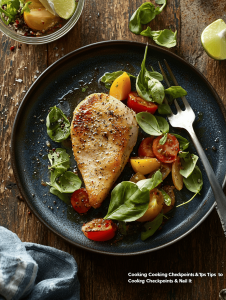
    It’s straightforward but yields a complex, satisfying dish. The crispy skin, smoky aroma, and juicy interior remind me that good things come from patience and attention. It’s versatile enough to pair with anything—salads, grains, or roasted vegetables—and always feels reliable when I want a comforting, honest meal.

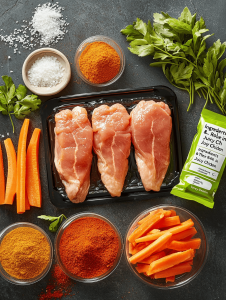
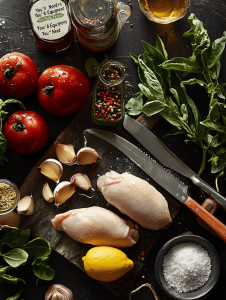
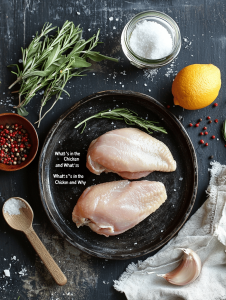
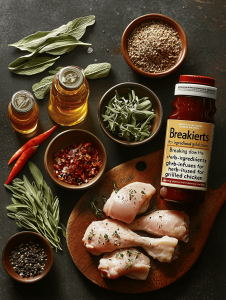
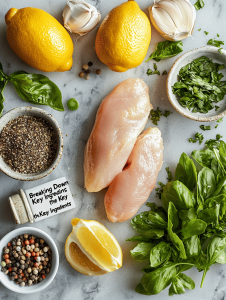
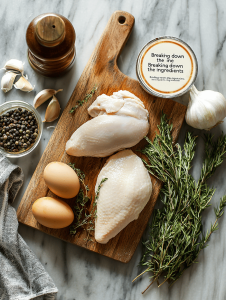
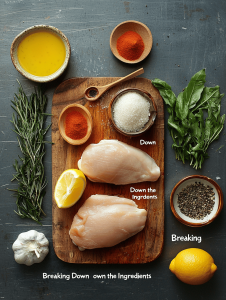
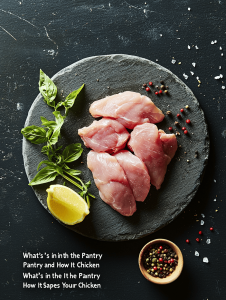
    What’s in the Pantry and How It Shapes Your Chicken

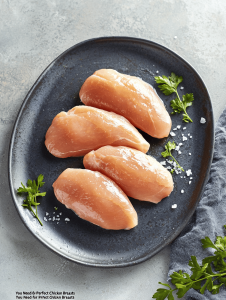
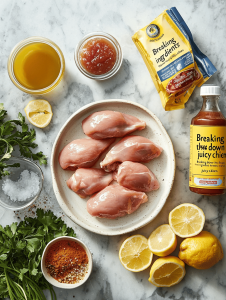
    • Chicken breast: Lean, tender, best cooked quickly to stay moist.
    • Salt and pepper: Basic but crucial for flavor—don’t skip.
    • Smoked paprika: Adds a smoky depth that elevates the simple meat.
    • Olive oil: High-smoke point, helps get that crisp skin.
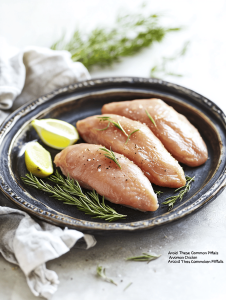
    • Fresh herbs (thyme, parsley): Brightens the dish, adds freshness.
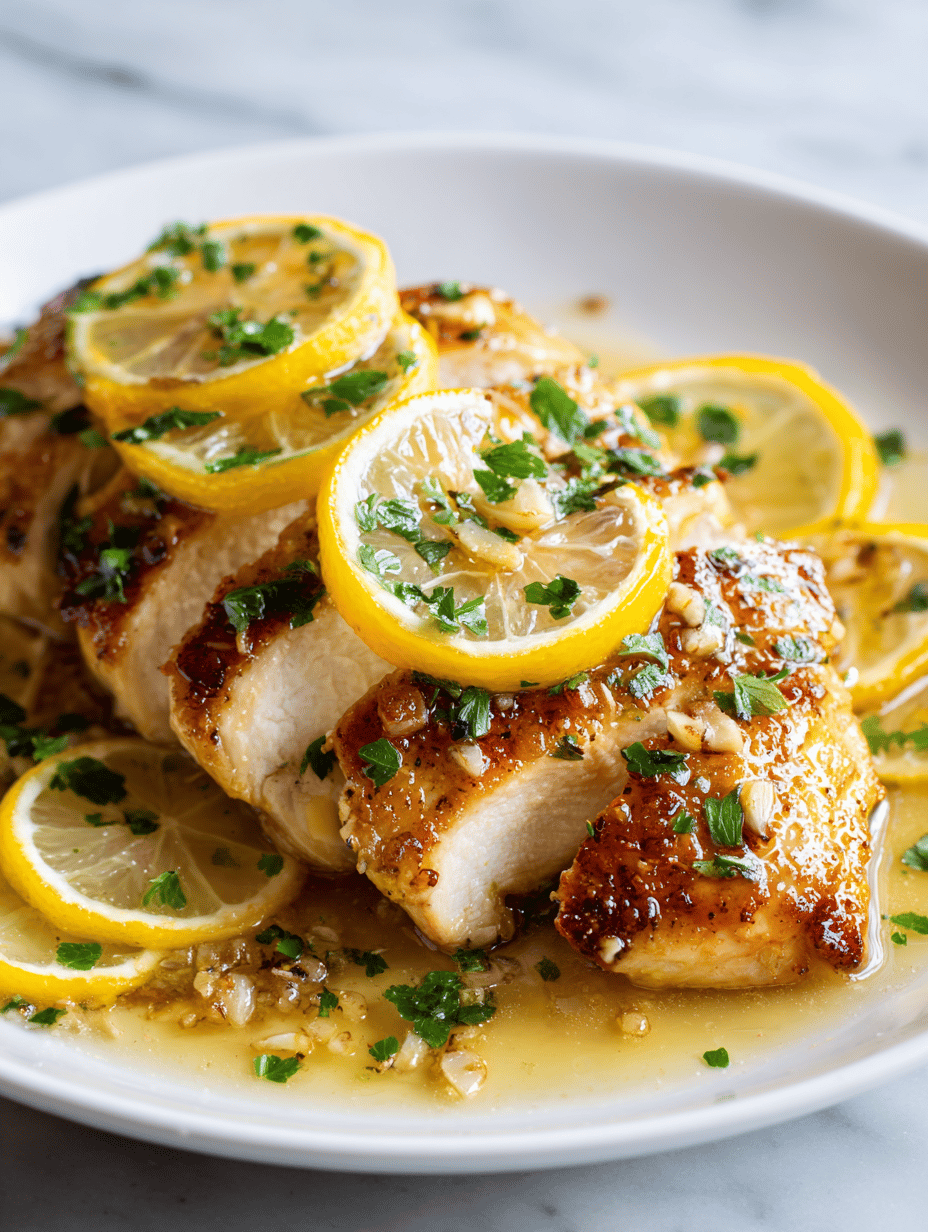
    • Lemon (optional): A quick squeeze brightens the flavors—think citrus glow.

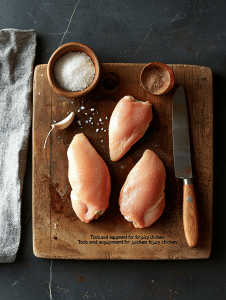
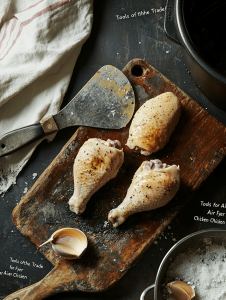
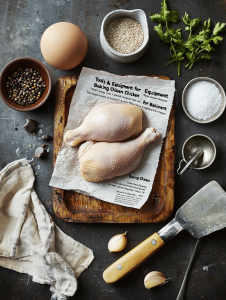
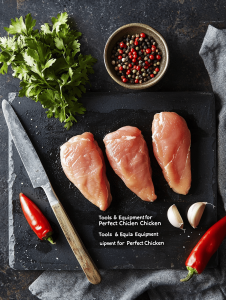
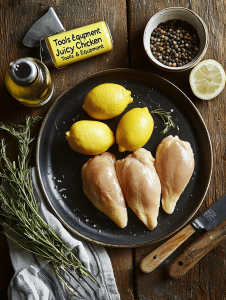
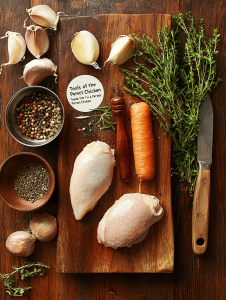
    Tools of the Trade for a Perfect Chicken

    • Cast-iron skillet: Provides even heat and a great sear.
    • Meat thermometer: Ensures accurate doneness.
    • Tongs: Helps flip and handle the chicken without piercing.
    • Paper towels: Drying the chicken for crisp skin.

    Cooking it through without drying it out takes patience and a keen eye for heat.

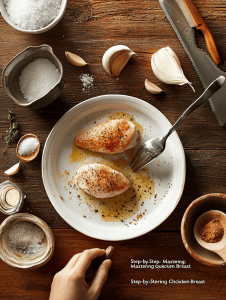
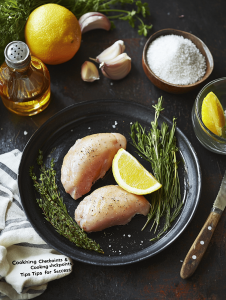
    Step 1: Start with a thick chicken breast, about 200 grams. Score the skin side lightly to help render fat.

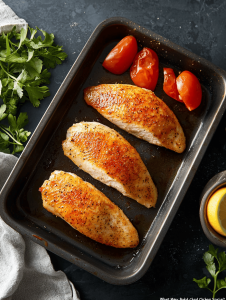
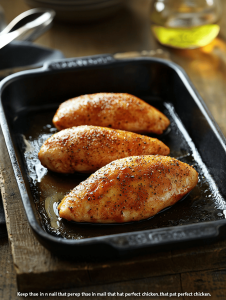
    Step 2: Pat dry with paper towels, then season generously with salt, pepper, and a pinch of smoked paprika.

    Step 3: Heat a cast-iron skillet over medium-high, about 200°C (390°F). When hot, add a splash of oil and lay the chicken skin-side down.

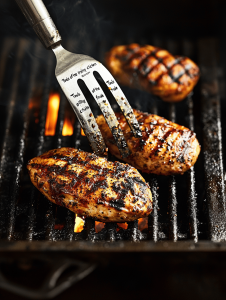
    Step 4: Cook for 8-10 minutes until the skin is golden and crisp, pressing down occasionally for even contact.

    Step 5: Flip the chicken, lower heat to medium (about 160°C/320°F), and cook for another 8 minutes.

    Step 6: Check for doneness: the juices should run clear, and the internal temperature should hit 75°C (165°F).

    Step 7: Remove from pan, let rest for 5 minutes. Resting keeps the juices in instead of running out.

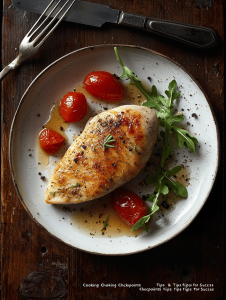
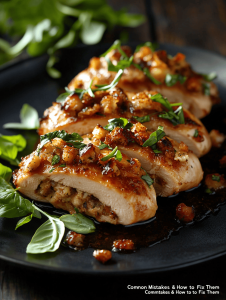
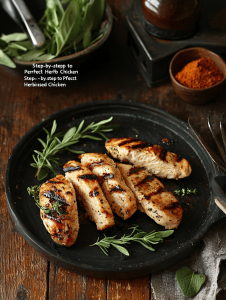
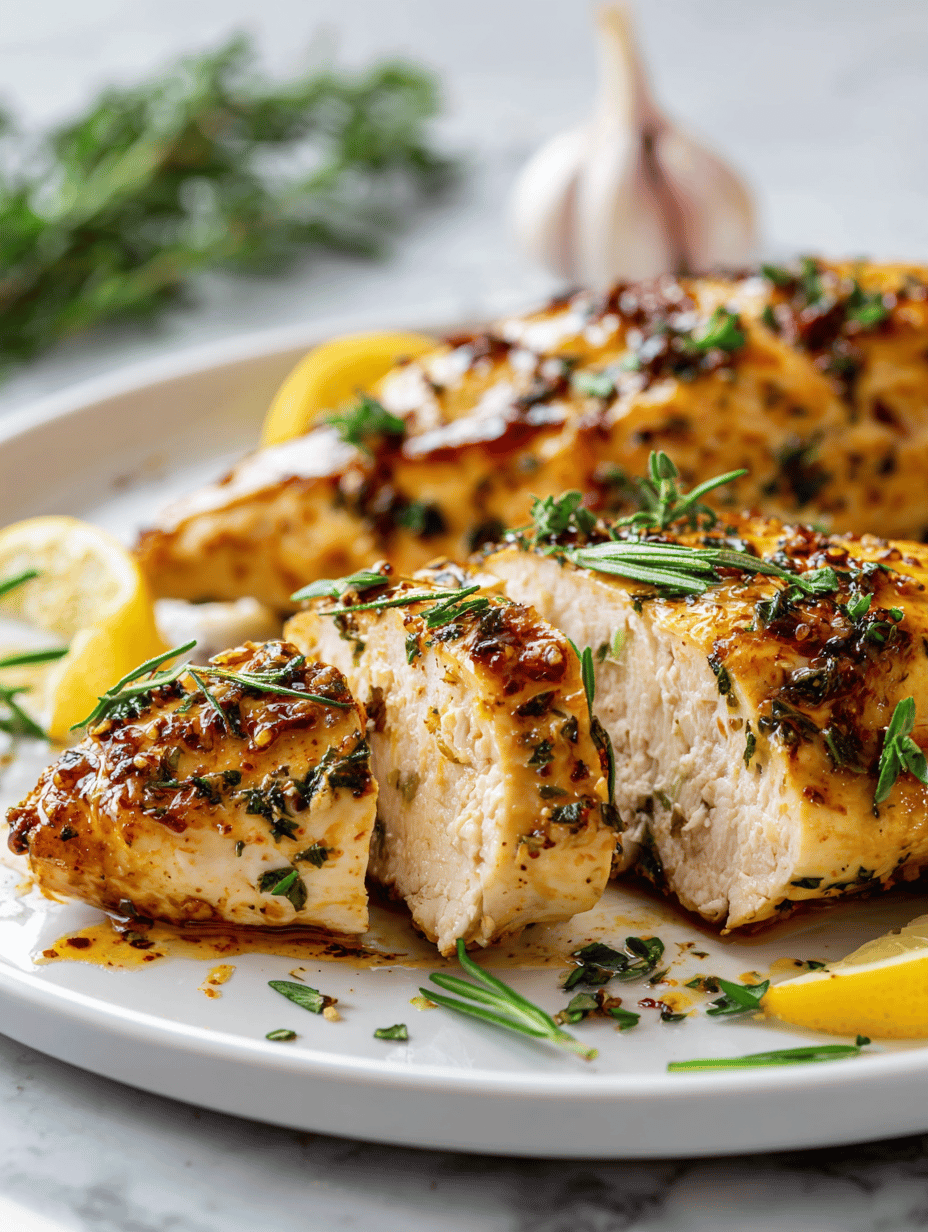
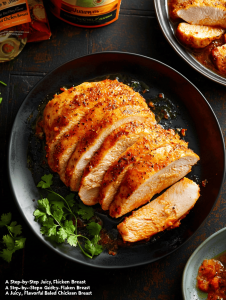
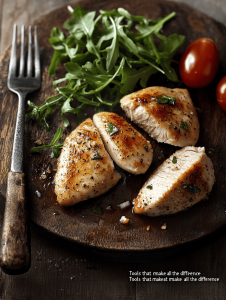
    Step 8: Serve sliced with a drizzle of the pan juices and a sprinkle of fresh herbs.

    Keep these in mind to nail that perfect chicken.

    • Skin should be golden and crisp, not pale or soggy.
    • Internal temperature must reach 75°C (165°F), no guessing.
    • Juices should run clear when pierced, not pink or cloudy.
    • Meat should be firm but not rubbery—press gently to check.

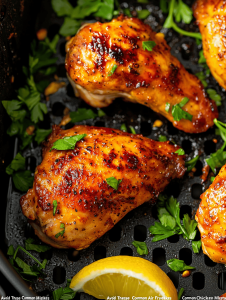
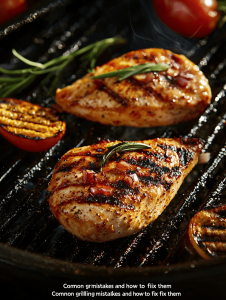
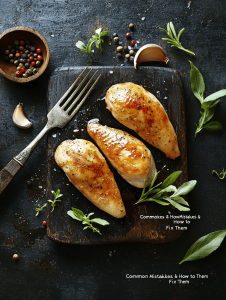
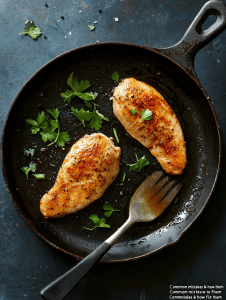
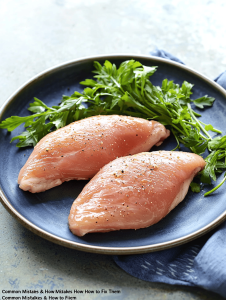
    Avoid These Common Chicken Pitfalls

    • Chicken skin turns soggy and rubbery.? Pat the chicken dry to prevent steaming, not frying.
    • Overcooked, dry chicken.? Lower heat after searing to finish cooking gently.
    • Guessing when the chicken is done.? Use a thermometer for precision.
    • Juices run out, leaving it dry.? Rest the meat before slicing.

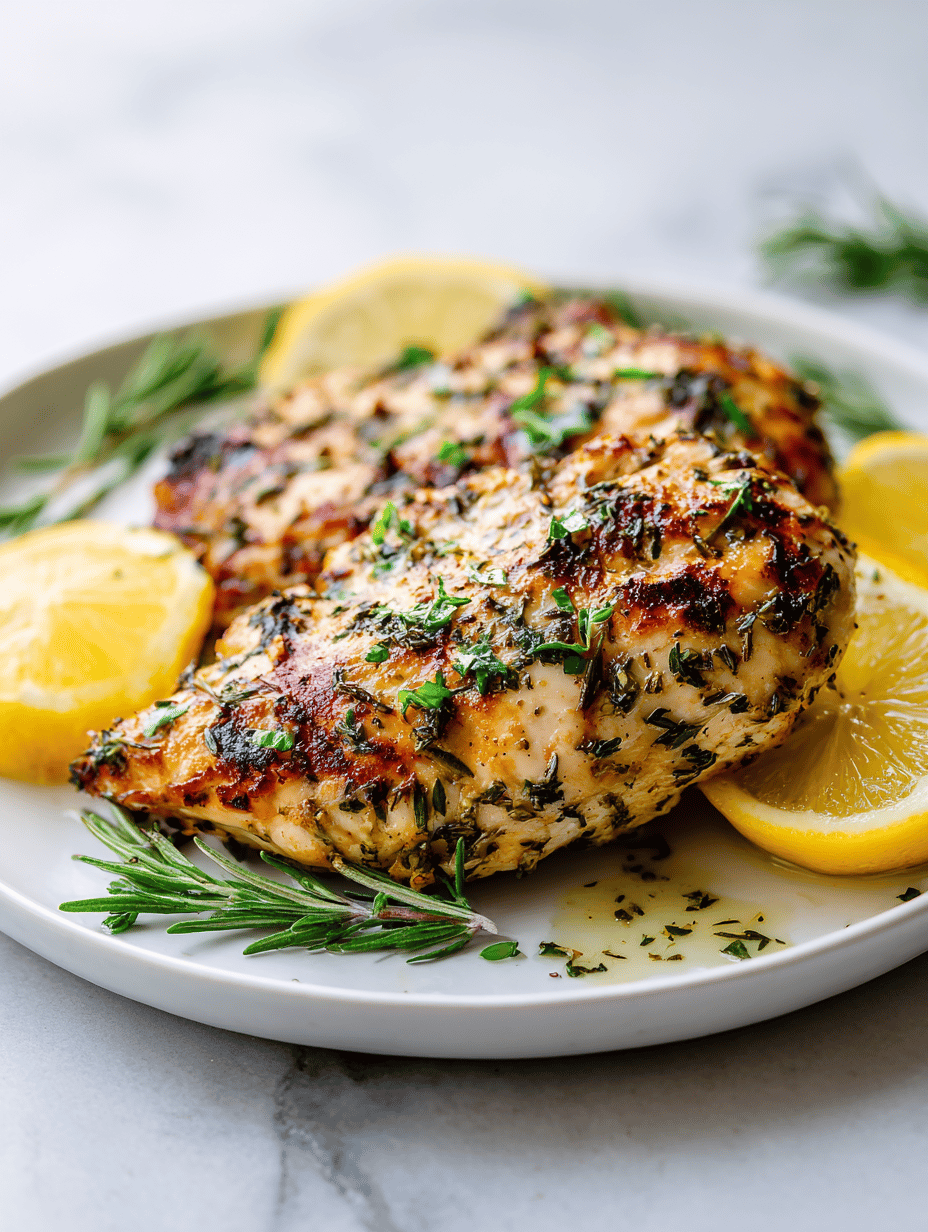
    Herb-Crusted Pan-Seared Chicken Breast

    This dish features chicken breasts cooked with a smoky, herbaceous crust that provides a crispy exterior and juicy interior. The method involves searing in a cast-iron skillet and finishing with gentle heat to preserve moisture, resulting in a visually appealing, tender piece of meat with golden skin. Bright herbs and optional lemon brighten the flavors, making it versatile for any meal.
    Prep Time 10 minutes
    Cook Time 20 minutes
    Total Time 30 minutes
    Servings: 2
    Course: Main Course
    Cuisine: Modern home-style
    Calories: 350

    Ingredients
      

    • 2 pieces chicken breasts preferably thick and with skin
    • 1 teaspoon salt
    • 1/2 teaspoon black pepper
    • 1/2 teaspoon smoked paprika adds smoky depth
    • 1 tablespoon olive oil high-smoke point
    • 2 tablespoons fresh herbs chopped thyme and parsley
    • 1 lemon lemon optional, for brightening

    Equipment

    • Cast iron skillet
    • Meat thermometer
    • Tongs
    • Paper towels

    Method
     

    1. Pat the chicken breasts dry thoroughly with paper towels to ensure crisp skin.
    2. Mix together the salt, pepper, and smoked paprika in a small bowl, then generously season both sides of each chicken breast with the mixture.
    3. Heat the cast-iron skillet over medium-high heat until it’s hot and slightly shimmering, about 2-3 minutes.
    4. Add a splash of olive oil to the skillet, swirling to coat the bottom evenly.
    5. Place the chicken breasts skin-side down in the skillet, pressing lightly with tongs to ensure contact, and listen for a sizzle.
    6. Cook the chicken for 8-10 minutes until the skin is golden brown and crispy, adjusting the heat if necessary to prevent burning.
    7. Flip the chicken breasts carefully using tongs, then reduce the heat to medium and cook for another 8 minutes.
    8. Use a meat thermometer to check that the internal temperature reaches 75°C (165°F); the juices should run clear when pierced.
    9. Remove the chicken from the skillet and let it rest on a plate for 5 minutes, tented loosely with foil if desired.
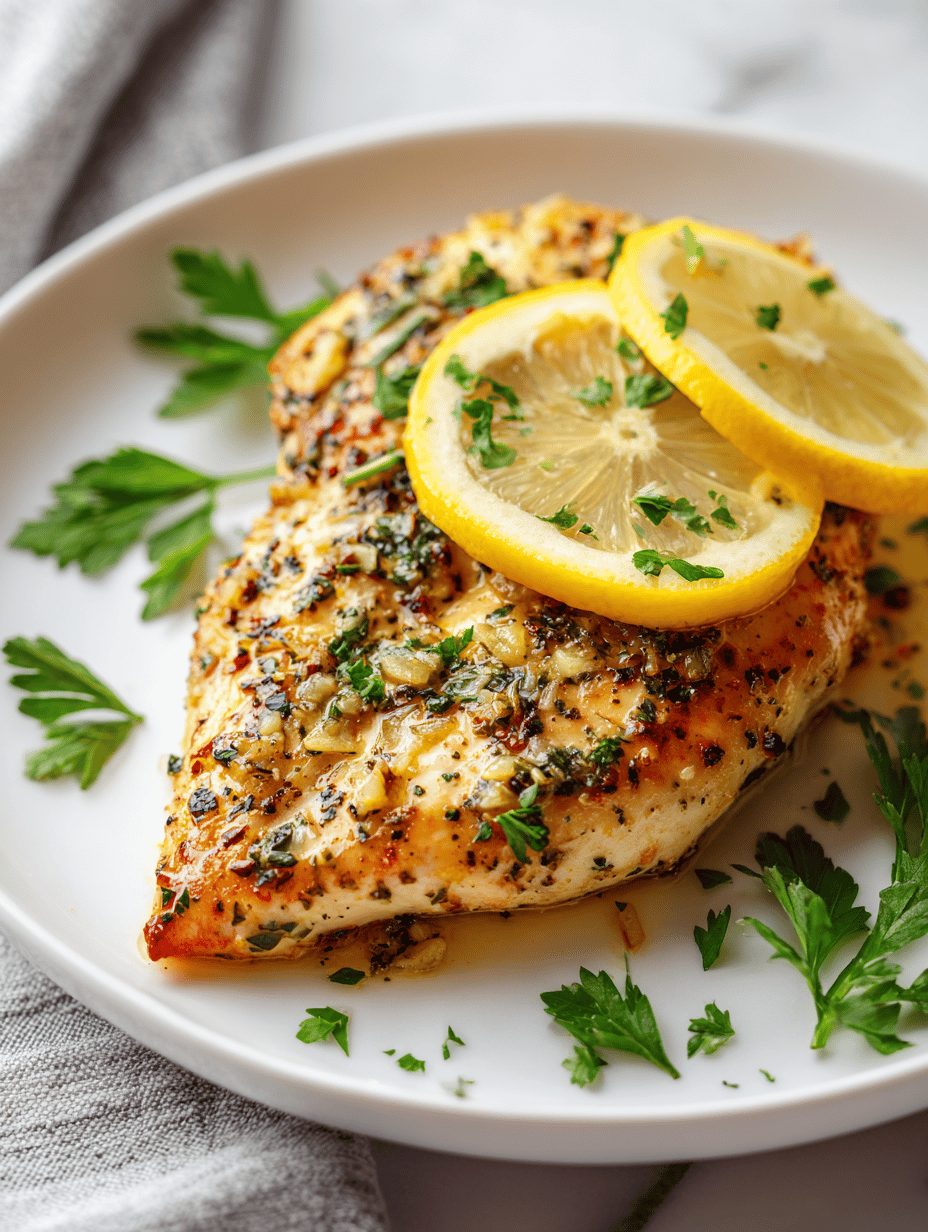
    10. Squeeze fresh lemon over the rested chicken and sprinkle with chopped herbs for added brightness and flavor.
    11. Slice the chicken if desired, then serve immediately with pan juices drizzled over the top for extra flavor.
    This recipe isn’t about fuss; it’s about coaxing flavor out of simple ingredients. The crispy skin, smoky aroma, and juicy meat come together in a way that feels honest and satisfying. It’s perfect for a weeknight dinner that’s quick but feels a little special. Play around with herbs or a squeeze of lemon to make it your own.

  • quick chicken breast recipes

    quick chicken breast recipes

    Chicken breasts are often dismissed as boring, but with a few tweaks, they can be transformed into a quick, satisfying meal. The secret is in the sear and proper rest—simple, honest, and forgiving. This recipe sidesteps the usual dry chicken trap by focusing on heat control and timing.

    Why Keep Coming Back to This Recipe

    It’s simple, forgiving, and always reliable. The quick sear locks in juices, creating a tender bite every time. Plus, it’s versatile—serve with salads, grains, or veggies. The process feels satisfying, knowing you can produce restaurant-quality chicken in under 20 minutes, no fuss, no stress.

    Ingredients & Their Role in Juicy Chicken

    • Chicken breasts: Lean, tender meat that benefits from quick, high-heat cooking to stay moist.
    • Salt & pepper: Basic seasoning that enhances natural flavor—don’t skimp.
    • Smoked paprika: Adds a smoky, slightly sweet depth—skip if you prefer pure chicken flavor.
    • Olive oil: Helps develop that golden crust and prevents sticking.
    • Lemon (optional): Brightens up the flavor—squeeze over just before serving.
    • Garlic powder (optional): A subtle savory note—can be swapped for fresh garlic.
    • Herbs (thyme, rosemary): Fresh or dried—adds aromatic layers, especially during resting.

    Tools You Need for Perfect Chicken Breasts

    • Cast iron skillet: Provides even heat and a good sear.
    • Meat thermometer: Ensures precise doneness.
    • Tongs: Handles chicken without piercing, keeping juices in.
    • Paper towels: Drying chicken for crispiness.

    Step-by-Step: Mastering Quick Chicken Breast

    Step 1: Start with a good hot pan—medium-high heat, around 200°C (390°F).

    Step 2: Pat the chicken dry. Season generously with salt, pepper, and a pinch of smoked paprika.

    Step 3: Place the chicken in the pan—lay it away from you to avoid splatters. Cook for 5-7 minutes without moving.

    Step 4: Flip once the edges turn golden and release easily—look for a slight caramelization.

    Step 5: Reduce heat to medium, cover loosely, and cook another 5 minutes, or until the internal temp hits 75°C (165°F).

    Step 6: Remove from heat, rest for 5 minutes—juices redistribute, keeping meat moist.

    Step 7: Slice against the grain, serve immediately, and enjoy the sizzle and aroma.

    Cooking Checkpoints & Tips for Success

    • Chicken should be opaque and firm but not rubbery.
    • Look for a golden crust that’s not burnt, around 7 minutes per side.
    • Use a digital thermometer—75°C (165°F) inside is perfect.
    • The juices should run clear when you pierce the thickest part.

    Common Mistakes & How to Fix Them

    • Overcooking or high heat.? If chicken turns rubbery, lower heat and cook longer with lid on.
    • Not using a thermometer.? If chicken is underdone, give it a few extra minutes on a lower temp.
    • Insufficient searing.? If the crust isn’t crispy, bump the heat up for the last minute.
    • Cutting into chicken too early.? If juices run pink, cook a bit longer to reach safe temp.

    Perfect Searing Chicken Breasts

    This recipe transforms simple chicken breasts into tender, juicy slices with a beautifully caramelized crust. Using high heat and precise timing, the chicken is seared to golden perfection and rested to lock in moisture, resulting in a versatile and satisfying main dish with a crisp exterior and moist interior.
    Prep Time 5 minutes
    Cook Time 15 minutes
    Total Time 20 minutes
    Servings: 4
    Course: Main Course
    Cuisine: International
    Calories: 250

    Ingredients
      

    • 4 pieces chicken breasts boneless, skinless
    • 1 teaspoon salt
    • 1/2 teaspoon black pepper
    • 1/2 teaspoon smoked paprika
    • 1 tablespoon olive oil for searing
    • 1 lemon lemon (optional) for squeezing over before serving
    • 1/2 teaspoon garlic powder optional
    • a few sprigs fresh herbs (thyme, rosemary) for resting

    Equipment

    • Cast iron skillet
    • Meat thermometer
    • Tongs
    • Paper towels

    Method
     

    1. Pat the chicken breasts dry with paper towels to ensure a good sear and season generously with salt, pepper, smoked paprika, and garlic powder on both sides.
    2. Heat the cast iron skillet over medium-high heat until it’s hot and starts to shimmer, about 2-3 minutes, with a faint smell of heating oil.
    3. Add the olive oil to the pan, swirling to coat the surface evenly, and listen for a gentle sizzle as the oil heats up.
    4. Place the chicken breasts in the pan, laying them away from you to avoid splashes, and let them cook undisturbed for 5-7 minutes until the edges turn golden and release easily from the pan.
    5. Flip each chicken breast using tongs, aiming for a deep golden brown crust, and cook for another 5 minutes on the second side, adjusting the heat if necessary.
    6. Insert a meat thermometer into the thickest part of each breast; once it reads 75°C (165°F), remove the chicken from the pan.
    7. Transfer the chicken to a plate, sprinkle with fresh herbs if using, and cover loosely with foil to rest for 5 minutes, allowing juices to redistribute.
    8. Squeeze fresh lemon over the rested chicken for a bright finish, then slice against the grain to serve.

    Notes

    Ensure not to overcook to keep the chicken tender and juicy. Resting is key to retaining moisture.
    This recipe is all about simplicity and patience—getting that perfect sear without overcooking. Once you nail the timing and heat, chicken breasts become tender, juicy, and flavorful without fuss. Play around with herbs or a squeeze of lemon for a fresh twist. Keep it handy for busy nights or last-minute guests—those slices, with their smoky edges and juicy core, will never disappoint.

  • stuffed chicken breast recipes

    stuffed chicken breast recipes

    Stuffed chicken breasts are a quiet hero for weeknights—simple, satisfying, and endlessly adaptable. I’ve always loved the thrill of stuffing, feeling like I’m creating a little surprise inside each piece. It’s a chance to get playful with flavors and textures, making a humble chicken something special. Plus, the smell of searing meat mixed with herbs and cheese is hard to beat.

    Why I Keep Coming Back to This

    It’s a straightforward dish that always impresses. The combination of savory filling and crispy exterior is endlessly customizable. Plus, it’s forgiving enough to experiment with different cheeses, herbs, or even a spicy kick. It makes me feel like a pro, even on my busiest nights.

    Breaking Down the Stuffing

    • Spinach: Fresh spinach wilts quickly, adding a bright, slightly bitter contrast.
    • Sun-dried tomatoes: Chewy, tangy, and packed with umami—rehydrate if they seem too dry.
    • Feta cheese: Salty and creamy, it melts into the filling, making every bite richer.
    • Garlic: A quick sauté releases its pungency and aroma, essential for flavor.
    • Olive oil: Good-quality oil helps sear the chicken and adds a fruity note.
    • Lemon zest: Brightens the filling with a fresh, citrusy zing, cutting through richness.
    • Fresh herbs: Basil or parsley add a fragrant, herbal lift—use what you love.

    Tools & Equipment You’ll Need

    • Sharp knife: To slice into the chicken without losing control.
    • Serrated spoon or small spatula: To stuff the chicken evenly.
    • Oven-safe skillet: To sear and bake in one dish.
    • Kitchen twine or toothpicks: To secure the stuffed chicken.
    • Meat thermometer: To check doneness precisely.

    Step-by-Step to Juicy Stuffed Chicken Breasts

    Step 1: Preheat your oven to 200°C (390°F).

    Step 2: Slice into the thick side of each chicken breast to create a pocket, without cutting all the way through.

    Step 3: Mix your stuffing—think spinach, sun-dried tomatoes, and feta—then stuff each breast generously.

    Step 4: Secure the opening with toothpicks or kitchen twine, so the filling stays put during cooking.

    Step 5: Heat a skillet over medium-high heat. Sear the chicken, skin-side down first, until golden, about 3-4 minutes.

    Step 6: Flip and sear the other side for another 3 minutes.

    Step 7: Transfer the skillet to the oven and bake for 15-20 minutes, until the chicken is cooked through.

    Step 8: Rest the chicken for 5 minutes before removing toothpicks and slicing.

    Cooking Checkpoints & What to Watch For

    • Chicken should reach an internal temperature of 75°C (165°F).
    • The exterior should be golden brown and slightly crisp.
    • Filling should be hot and slightly bubbling when sliced.

    Common Mistakes & How to Fix Them

    • Rushing the slicing can tear the meat.? Use a sharp knife to avoid shredding the chicken.
    • Overstuffed breasts won’t stay closed.? Don’t overstuff—leave room for the chicken to close.
    • Too hot or too cold can ruin texture.? Check oven temperature with an oven thermometer.
    • Cutting immediately causes juice loss.? Let the chicken rest before slicing.

    Stuffed Chicken Breasts with Spinach, Sun-Dried Tomatoes, and Feta

    This dish features tender chicken breasts carefully sliced to create a pocket, filled with a flavorful mixture of wilted spinach, tangy sun-dried tomatoes, and creamy feta cheese. The stuffed breasts are seared until golden and crispy on the outside, then baked to perfection, resulting in a juicy, cheesy interior with a beautifully browned crust.
    Prep Time 15 minutes
    Cook Time 30 minutes
    Total Time 45 minutes
    Servings: 4
    Course: Main Course
    Cuisine: International
    Calories: 350

    Ingredients
      

    • 4 pieces chicken breasts boneless, skinless
    • 2 cups fresh spinach roughly chopped
    • 1/2 cup sun-dried tomatoes rehydrated if dry
    • 1/2 cup feta cheese crumbled
    • 3 cloves garlic minced
    • 1 tablespoon olive oil good quality
    • 1 teaspoon lemon zest freshly grated
    • 2 tablespoons fresh herbs basil or parsley, chopped
    • to taste salt and pepper

    Equipment

    • Sharp knife
    • Serrated spoon or small spatula
    • Oven-safe skillet
    • Kitchen twine or toothpicks
    • Meat thermometer

    Method
     

    1. Preheat your oven to 200°C (390°F). Place a rack inside a baking sheet or use an oven-safe skillet.
    2. Using a sharp knife, slice into the thick side of each chicken breast to create a pocket, being careful not to cut all the way through.
    3. Heat a tablespoon of olive oil in a skillet over medium heat. Add minced garlic and cook until fragrant, about 30 seconds, until it releases a pleasant aroma.
    4. Add chopped spinach to the skillet, stirring until wilted and bright green, about 2 minutes. Remove from heat and let cool slightly.
    5. Chop sun-dried tomatoes into small pieces and mix them into the spinach along with crumbled feta, lemon zest, and chopped herbs. Season with salt and pepper to taste. Stir everything together until well combined.
    6. Using a small spoon or spatula, generously stuff each chicken pocket with the spinach mixture, pressing gently to pack the filling inside.
    7. Secure each stuffed chicken breast with kitchen twine or toothpicks to keep the filling inside during cooking.
    8. Heat the same skillet over medium-high heat and sear the stuffed chicken breasts, skin-side down if applicable, until golden brown and crispy, about 3-4 minutes. Flip and sear the other side for another 3 minutes.
    9. Transfer the skillet to the preheated oven and bake for 15-20 minutes, or until the internal temperature reaches 75°C (165°F), and the chicken is cooked through.
    10. Remove the skillet from the oven, cover loosely with foil, and let the chicken rest for 5 minutes to retain juices.
    11. Carefully remove toothpicks or twine, then slice the chicken breasts to reveal the colorful, cheesy filling. Serve hot and enjoy the juicy, flavorful bites.
    Once rested, slice and serve with a simple salad or roasted vegetables. The filling should be oozing slightly, and the chicken should be moist and tender. This dish is forgiving and flexible—swap ingredients based on what you have. The real trick is not overcooking, so keep an eye on that internal temp.

  • juicy chicken breast recipes

    juicy chicken breast recipes

    Chicken breasts often get a bad rap for being dry, but I’ve found a simple trick that makes all the difference. It’s not about fancy marinades or lengthy brines, but a straightforward technique that keeps the meat moist and flavorful. This method is perfect for busy nights or when you want reliable results without fuss.

    Why I keep coming back to this chicken method

    This technique always delivers tender, juicy results that feel like a small victory. It’s reliable, quick, and flexible—perfect for weeknights or lazy weekends. The smell of searing chicken, the crackle of the crust, and the juicy bite keep me returning to this simple process again and again.

    Breaking down the ingredients for juicy chicken

    • Chicken breasts: Lean, mild-flavored, but prone to drying out if not cooked carefully.
    • Salt and pepper: Basic seasoning that enhances natural flavors and helps retain moisture.
    • Herbs and spices: Optional but add depth—think thyme, paprika, or garlic powder.
    • Oil or fat: A small amount of oil helps achieve a golden crust and prevents sticking.
    • Lemon or citrus zest (optional): Brightens the flavor with a hint of zing, perfect for finishing.

    Tools and equipment for juicy chicken

    • Sharp knife: For trimming and slicing the chicken evenly.
    • Meat mallet or heavy pan: To pound the chicken to an even thickness, helping it cook uniformly.
    • Skillet or frying pan: To sear the chicken and develop a flavorful crust.
    • Food thermometer: To check the internal temperature and ensure doneness.
    • Tongs: To flip and handle the chicken safely during cooking.

    Step-by-step guide to perfectly juicy chicken breasts

    Step 1: Start with a sharp knife and a clean cutting board. Pat the chicken breasts dry with paper towels.

    Step 2: Use a meat mallet or the bottom of a heavy pan to gently pound the thick end of the chicken to even thickness, about 1.5 cm (0.6 inches).

    Step 3: Season both sides generously with salt, pepper, and your favorite herbs.

    Step 4: Preheat your skillet over medium-high heat until shimmering. Add a splash of oil, just enough to coat the bottom.

    Step 5: Place the chicken breasts in the pan, smooth side down. Cook for 4-5 minutes until golden brown.

    Step 6: Flip the chicken and cook for another 4-5 minutes. Reduce heat slightly if the outside browns too quickly.

    Step 7: Use a meat thermometer to check the internal temperature reaches 74°C (165°F).

    Step 8: Remove the chicken from the pan and let it rest for 5 minutes under foil.

    Step 9: Slice against the grain and serve immediately, juices still glistening.

    Cooking checkpoints and tips to keep in mind

    • Check the chicken’s color: it should be golden and slightly crisp.
    • Use a food thermometer: 74°C (165°F) is the safe internal temp.
    • Listen for a gentle crackle: it means the chicken is searing properly.
    • Rest the meat for at least 5 minutes before slicing for maximum juiciness.

    Common mistakes and how to fix them

    • Cooking without checking internal temperature.? Use a meat thermometer to avoid overcooking or undercooking.
    • Cutting into hot chicken immediately after cooking.? Let the chicken rest before slicing, or juices will escape.
    • Uneven cooking and dry edges.? Pound the thick end of the breast to even thickness.
    • Steaming the chicken instead of searing.? Don’t overcrowd the pan; cook in batches if needed.

    Juicy Pan-Seared Chicken Breasts

    This recipe features chicken breasts pounded to an even thickness and seasoned generously, then seared in a hot skillet until golden and crispy. The technique ensures moist, tender meat with a flavorful crust, finished with a brief resting period to lock in juices and enhance final texture.
    Prep Time 10 minutes
    Cook Time 15 minutes
    Total Time 25 minutes
    Servings: 4
    Course: Main Course
    Cuisine: American
    Calories: 220

    Ingredients
      

    • 4 pieces chicken breasts boneless, skinless
    • 1 teaspoon salt or to taste
    • 1/2 teaspoon black pepper freshly ground
    • 1 teaspoon herbs/spices optional, such as thyme or paprika
    • 1 tablespoon oil vegetable or olive oil
    • 1 teaspoon lemon zest optional, for brightness

    Equipment

    • Sharp knife
    • Meat mallet or heavy pan
    • Skillet or frying pan
    • Food thermometer
    • Tongs

    Method
     

    1. Pat the chicken breasts dry with paper towels to remove excess moisture.
    2. Use a meat mallet or heavy pan to gently pound the thick end of each breast to an even thickness of about 1.5 cm (0.6 inches). This helps them cook uniformly.
    3. Sprinkle salt, pepper, and your favorite herbs or spices generously over both sides of each chicken breast for flavor and moisture retention.
    4. Preheat your skillet over medium-high heat until it’s shimmering and hot. Add a tablespoon of oil and swirl to coat the bottom.
    5. Place the chicken breasts into the hot skillet, smooth side down, and hear a satisfying sizzle. Cook for 4-5 minutes until the underside is golden brown and crispy.
    6. Flip the chicken using tongs and cook for another 4-5 minutes, reducing the heat slightly if the crust browns too quickly, until the other side is golden and cooked through.
    7. Check the internal temperature with a meat thermometer; it should read 74°C (165°F). Once reached, remove the chicken from the pan.
    8. Let the chicken rest on a plate or cutting board for about 5 minutes. This allows the juices to redistribute, keeping the meat moist and tender.
    9. If desired, sprinkle with lemon zest for a bright, fresh finish, and then slice against the grain to serve.
    This method isn’t about marinating for hours or complex sauces. It’s about a simple, honest approach that yields tender, moist chicken every time. Once you’ve got the hang of pounding and pan-searing, it becomes a quick weeknight staple. Play with herbs, spices, and sauces to make it yours, but never skip the resting—it’s the secret to keeping that juice locked in. You’ll find yourself returning to this technique, especially when you crave something reliably good.

  • air fryer chicken breast recipes

    air fryer chicken breast recipes

    I’ve always found chicken breasts tricky—dry, bland, and kind of a gamble. But the air fryer changed that for me. Now, I get a juicy, well-seasoned piece in under 20 minutes without heating up the oven or dealing with messy pans. It’s a simple fix that feels like a small victory every time.

    Why I Keep Returning to This Simple Chicken

    It’s reliable, quick, and endlessly customizable. The air fryer’s magic is in how it crisps outside while keeping the inside juicy—no oven heat, no fuss. It’s become my go-to for a satisfying weeknight protein, especially when I want something healthy but flavorful with minimal effort. Plus, the leftovers reheat beautifully, making it a true kitchen staple.

    What’s in the Chicken and Why

    • Chicken breasts: Lean and tender, the star of the show, easily adaptable with different seasonings.
    • Olive oil: Helps seasonings stick and promotes a golden crust—use sparingly but don’t skip.
    • Salt and pepper: Fundamental—brings out flavor and helps the skin crisp.
    • Paprika or smoked paprika: Adds a smoky depth and beautiful color—skip if you prefer milder.
    • Garlic powder: For warmth and savory undertones—use fresh garlic for a punch, but powder works well.
    • Lemon zest or juice: Brightens the flavor and counteracts richness—don’t forget to squeeze fresh.

    Tools of the Trade for Air Fryer Chicken

    • Air fryer: To cook the chicken evenly without extra oil.
    • Paper towels: To dry the chicken, helping achieve a crispy crust.
    • Meat thermometer: To ensure the chicken reaches the safe internal temperature.
    • Tongs: To flip and handle the chicken without piercing it.

    Simple Steps for Perfect Juicy Chicken in Your Air Fryer

    Step 1: Preheat your air fryer to 200°C (390°F).

    Step 2: Pat chicken breasts dry with paper towels—moisture is the enemy of crispness.

    Step 3: Rub the breasts with olive oil, then season generously with salt, pepper, and your favorite spices.

    Step 4: Place the chicken breasts in the air fryer basket in a single layer, skin-side down if applicable.

    Step 5: Cook for 10 minutes, then flip and cook another 8-10 minutes until the internal temperature hits 75°C (165°F).

    Step 6: Check for a golden-brown crust and a firm but juicy texture. If not quite there, give it a few more minutes.

    Step 7: Rest the chicken for 5 minutes before slicing—juices rediscover their balance and stay in the meat.

    Step 8: Slice against the grain, serve with a squeeze of lemon or a fresh herb topping, and enjoy that tender bite.

    Crispy, Juicy, and Done: What to Watch For

    • Golden brown crust with a slight crackle when pressed.
    • Internal temperature reaching 75°C (165°F)—use a reliable meat thermometer.
    • Juices run clear when you slice into the thickest part of the breast.

    Avoid These Common Chicken Air Fryer Mistakes

    • Cooking too long or at too high a temperature.? If chicken is dry, don’t overcook—use a thermometer to check doneness.
    • Leaving moisture on the surface before air frying.? Pat chicken dry well, or skin won’t crisp up.
    • Skipping oil, resulting in a dull crust.? Add a little oil for extra crispness.
    • Cutting into it immediately, losing juices.? Remember to rest your chicken.

    Air Fryer Juicy Chicken Breast

    This dish features tender, juicy chicken breasts cooked in an air fryer, resulting in a crispy exterior and moist interior. The process involves seasoning, drying, and air frying to achieve a golden crust and flavorful bite with minimal effort and quick turnaround time.
    Prep Time 10 minutes
    Cook Time 20 minutes
    Total Time 30 minutes
    Servings: 4
    Course: Main Course
    Cuisine: American
    Calories: 220

    Ingredients
      

    • 4 pieces chicken breasts preferably skinless and boneless
    • 1 tablespoon olive oil helps seasonings stick and promotes crispness
    • 1 teaspoon salt
    • 1/2 teaspoon black pepper
    • 1 teaspoon paprika smoked paprika adds smoky flavor and color
    • 1/2 teaspoon garlic powder
    • 1 teaspoon lemon zest or juice for brightness

    Equipment

    • Air fryer
    • Paper towels
    • Meat thermometer
    • Tongs

    Method
     

    1. Preheat your air fryer to 200°C (390°F) and prepare your chicken breasts by patting them dry with paper towels until no moisture remains.
    2. In a small bowl, mix together salt, black pepper, paprika, garlic powder, and lemon zest to create a flavorful seasoning blend.
    3. Brush each chicken breast with a light coat of olive oil, then generously rub the spice mixture all over both sides of the chicken, ensuring an even coating.
    4. Place the seasoned chicken breasts in the air fryer basket in a single layer, making sure they are not overlapping for optimal air circulation.
    5. Cook the chicken for about 10 minutes, then flip each piece using tongs to ensure even browning on both sides.
    6. Continue cooking for another 8-10 minutes, or until a meat thermometer inserted into the thickest part reads 75°C (165°F) and the exterior is golden and crispy.
    7. Once cooked, remove the chicken breasts from the air fryer and let them rest on a cutting board for 5 minutes, allowing the juices to redistribute.
    8. Slice the chicken against the grain, then serve immediately with a squeeze of fresh lemon for added brightness and flavor.

    Notes

    For extra crispness, you can spray the chicken lightly with cooking spray before air frying. Adjust cooking time based on the thickness of the breasts and your air fryer model.
    This quick air fryer approach proves that you don’t need a grill or oven to get a satisfying, moist chicken. It’s a no-fuss method, perfect for busy weeknights or when you’re craving something straightforward but flavorful. Personalize the seasoning—paprika, garlic, chili—whatever makes your taste buds sing. Keep experimenting with cooking times to match your specific model and chicken size.

  • grilled chicken breast recipes

    grilled chicken breast recipes

    Cooking chicken breast can be tricky, especially if you want it tender and flavorful without drying out. I’ve found that a simple marinade with fresh herbs transforms this lean cut into something special. It’s about coaxing out the natural sweetness and adding a fragrant, smoky layer.

    Why I keep coming back to this grilled chicken

    It’s straightforward but endlessly adaptable. The herby aroma and smoky char make every meal feel special. Plus, it’s quick enough for weeknights and impressive enough for friends.

    Breaking down the ingredients for herb-infused grilled chicken

    • Chicken breasts:: Lean, tender, quick-cooking cut that benefits from marinade.
    • Olive oil:: Adds moisture and helps herbs stick; use good quality.
    • Lemon juice:: Brightens flavor with a zing; substitute lime if needed.
    • Garlic:: Gives a savory punch; fresh minced is best.
    • Fresh herbs:: Parsley, thyme, rosemary—go wild, fresh herbs make all the difference.
    • Salt and pepper:: Basic but essential for seasoning.
    • Optional spices:: Paprika or chili flakes can add a smoky or spicy kick.

    Tools of the trade for grilling chicken

    • Grill or barbecue: Provides direct heat and smoky flavor.
    • Meat thermometer: Ensures perfect doneness without overcooking.
    • Basting brush: Helps apply marinade or oil evenly.
    • Tongs: Handles the chicken gently on hot grill.
    • Sharp knife: Slices chicken precisely after resting.

    Step-by-step to Perfect Herb-Infused Grilled Chicken

    Step 1: Start with a clean cutting board and sharp knife. Pat chicken breasts dry with paper towels.

    Step 2: Mix a marinade of olive oil, lemon juice, minced garlic, chopped herbs, salt, and pepper.

    Step 3: Poke small holes in the chicken with a fork to help the marinade seep in. Coat evenly.

    Step 4: Let the chicken marinate for at least 30 minutes, preferably a few hours, in the fridge.

    Step 5: Preheat your grill to medium-high heat, about 200°C (390°F).

    Step 6: Oil the grill grates lightly with a paper towel dipped in oil to prevent sticking.

    Step 7: Place chicken breasts on the grill. Cook for 6-8 minutes on each side.

    Step 8: Check for grill marks and a slight char. The chicken should be firm but not hard.

    Step 9: Use a meat thermometer to check the internal temperature; aim for 74°C (165°F).

    Step 10: Remove from grill and let rest for 5 minutes to retain juices.

    Step 11: Slice and serve with a squeeze of lemon or a sprinkle of fresh herbs.

    Cooking checkpoints for juicy, flavorful chicken

    • Look for clear grill marks and a slight char on the surface.
    • Internal temp reaches 74°C (165°F) for safe, juicy chicken.
    • The meat should feel firm but give slightly when pressed.
    • A fragrant aroma of herbs and grilled meat should fill the air.

    Common grilling mistakes and how to fix them

    • Cooking blindly until juices run clear.? Use a meat thermometer to avoid overcooking.
    • Chicken sticking or tearing when flipped.? Oil the grill grates to prevent sticking.
    • Not marinating long enough, resulting in bland chicken.? Marinate longer for deeper flavor.
    • Cutting into hot chicken right off the grill.? Rest chicken for 5 minutes.

    Herb-Infused Grilled Chicken Breast

    This grilled chicken breast is marinated in a fragrant mixture of fresh herbs, lemon juice, garlic, and olive oil, then cooked over direct heat for a smoky, charred exterior. The result is tender, juicy meat with a vibrant herbal aroma and appealing grill marks, perfect for a quick weeknight dinner or a flavorful centerpiece for any meal.
    Prep Time 40 minutes
    Cook Time 15 minutes
    Total Time 55 minutes
    Servings: 4
    Course: Main Course
    Cuisine: Grilled
    Calories: 210

    Ingredients
      

    • 4 pieces chicken breasts lean and tender
    • 3 tablespoons olive oil good quality
    • 2 tablespoons lemon juice freshly squeezed
    • 3 cloves garlic minced
    • 1/4 cup chopped parsley fresh
    • 2 teaspoons chopped thyme fresh
    • 1 teaspoon chopped rosemary fresh
    • to taste salt and pepper for seasoning
    • 1/2 teaspoon paprika optional

    Equipment

    • Grill or barbecue
    • Meat thermometer
    • Basting brush
    • Tongs
    • Sharp knife

    Method
     

    1. Pat the chicken breasts dry with paper towels and place them on a clean cutting board.
    2. Mix together olive oil, lemon juice, minced garlic, chopped parsley, thyme, rosemary, salt, pepper, and paprika to create a flavorful marinade.
    3. Using a fork, poke small holes in each chicken breast to help the marinade penetrate the meat.
    4. Coat each chicken breast evenly with the marinade, ensuring all sides are covered. Cover and refrigerate for at least 30 minutes, or up to a few hours for more flavor.
    5. Preheat your grill to medium-high heat, about 200°C (390°F), until hot and ready for grilling.
    6. Lightly oil the grill grates with a paper towel dipped in oil to prevent sticking and promote nice grill marks.
    7. Place the marinated chicken breasts on the grill, pressing them gently to ensure contact with the grates.
    8. Grill for about 6-8 minutes on each side, until the chicken develops golden grill marks and a slight char.
    9. Use a meat thermometer to check the internal temperature; it should reach 74°C (165°F) for safe, juicy chicken.
    10. Remove the chicken from the grill and let it rest for 5 minutes, allowing the juices to redistribute and keep the meat moist.
    11. Slice the chicken against the grain, garnish with extra herbs or a squeeze of lemon if desired, and serve hot.

    Notes

    For extra smoky flavor, toss some wood chips onto the grill. Marinating longer enhances the herb aroma, but even a quick 30-minute soak makes a noticeable difference.
    This grilled chicken recipe is a hit because it marries simplicity with a punch of fresh herbal flavor. The marinade tenderizes and flavors the meat deeply, making every bite juicy and vibrant. Feel free to adapt the herbs to whatever’s fresh or in your fridge—rosemary, thyme, or even cilantro work well. Once you master this, it’s your go-to for backyard dinners or quick weeknight meals.

  • baked chicken breast recipes

    baked chicken breast recipes

    Baked chicken breasts are often dismissed as bland or dry. But with a few tricks, they can become a centerpiece that’s juicy and flavorful. I’ve learned that the key is gentle seasoning and proper resting—simple but often overlooked.

    Why This Baked Chicken Keeps Coming Back to My Table

    It’s reliable, quick, and endlessly customizable. When I want something nourishing but not fussy, this recipe delivers juicy bites every time. Plus, the aroma of seasoned chicken filling the house reminds me of weekends and family dinners. It’s a foundation I keep returning to, always tweaking, always satisfying.

    What Makes My Baked Chicken Special?

    • Chicken breasts: Lean and versatile, but prone to dryness. Proper technique keeps them juicy.
    • Salt & pepper: Basic but essential for flavor. Use kosher salt for better seasoning penetration.
    • Herbs & spices: Thyme, paprika, or garlic powder add depth—tweak to your taste.
    • Lemon or vinegar: Brightens the flavor and tenderizes slightly.
    • Olive oil: Helps the seasonings stick and promotes even browning.
    • Optional: butter or pan sauce: Adds richness and moisture—don’t skip the finishing touch.

    Tools & Equipment for Baking Chicken

    • Baking sheet: To hold the chicken and ensure even heat transfer.
    • Parchment paper: Prevents sticking and makes cleanup easier.
    • Meat thermometer: To check the internal temperature for perfect doneness.
    • Tongs: To handle the chicken without piercing and losing juices.

    A Step-by-Step Guide to Juicy, Flavorful Baked Chicken Breast

    Step 1: Preheat your oven to 200°C (390°F).

    Step 2: Pat the chicken breasts dry with paper towels—moisture is the enemy of browning.

    Step 3: Season generously with salt, pepper, and your favorite herbs or spices.

    Step 4: Place the chicken breasts on a baking sheet lined with parchment paper, skin-side up if applicable.

    Step 5: Bake for 20-25 minutes, until the internal temperature hits 75°C (165°F).

    Step 6: Let the chicken rest for 5 minutes before slicing. This keeps juices locked in.

    Step 7: Serve with a drizzle of lemon or a quick pan sauce for extra flavor.

    Cooking Checkpoints & Tips for Perfect Results

    • The internal temperature should reach 75°C (165°F).
    • The chicken should be opaque all the way through, with no pink in the center.
    • The juices should run clear when pierced, not pink or bloody.

    Common Mistakes & How to Fix Them

    • Overbaking or high oven heat.? If the chicken is dry, reduce baking time or cover loosely with foil to retain moisture.
    • Undercooking or not using a thermometer.? If the chicken is undercooked, return it to the oven for 5-minute intervals.
    • Cutting into hot chicken directly after baking.? If the chicken is tough, let it rest longer before slicing.
    • Insufficient seasoning.? If the seasoning is bland, add a splash of lemon juice or a sprinkle of smoked paprika before baking.

    Juicy Baked Chicken Breasts

    This baked chicken breast recipe uses gentle seasoning, proper handling, and resting to ensure juicy, tender meat with a flavorful crust. Main ingredients include lean chicken breasts, herbs, and olive oil, resulting in a plump, golden exterior and moist interior that’s perfect for any meal. The dish is quick to prepare and easily customizable with your favorite spices or fresh herbs.
    Prep Time 10 minutes
    Cook Time 25 minutes
    Total Time 35 minutes
    Servings: 4
    Course: Main Course
    Cuisine: American
    Calories: 250

    Ingredients
      

    • 4 pieces chicken breasts boneless, skinless
    • 2 tablespoons olive oil extra virgin preferred
    • 1 teaspoon kosher salt or sea salt
    • 1/2 teaspoon black pepper
    • 1 teaspoon dried thyme or your choice of herbs
    • 1 teaspoon paprika adds color and mild flavor
    • 1 tablespoon lemon juice optional for brightening

    Equipment

    • Baking sheet
    • Parchment paper
    • Meat thermometer
    • Tongs

    Method
     

    1. Preheat your oven to 200°C (390°F) and line a baking sheet with parchment paper for easy cleanup.
    2. Pat the chicken breasts dry with paper towels; this removes excess moisture and helps them brown nicely.
    3. In a small bowl, mix together salt, pepper, thyme, paprika, and lemon juice to create a flavorful seasoning blend.
    4. Rub the seasoning mixture evenly over both sides of each chicken breast, pressing gently to ensure it adheres well.
    5. Drizzle olive oil over the seasoned chicken breasts, then use tongs to gently coat each piece, promoting browning.
    6. Place the chicken breasts on the prepared baking sheet, spacing them apart for even cooking.
    7. Bake in the preheated oven for 20-25 minutes, or until the internal temperature reaches 75°C (165°F) and the chicken is opaque and firm.
    8. Remove the chicken from the oven and transfer to a plate; let it rest for 5 minutes to allow juices to redistribute.
    9. Slice the rested chicken breasts against the grain to serve, ensuring each bite remains juicy and tender.
    10. Finish with a squeeze of fresh lemon or a quick drizzle of pan sauce for added brightness and flavor.
    Baking chicken breasts might seem straightforward, but getting them just right takes a bit of patience and attention. Resting the meat is key—without it, all those flavorful juices escape, leaving you with dry bites. Whether you like them simple or dressed up with herbs, this method keeps the chicken tender and satisfying. Keep experimenting with spices and pairings; it’s a blank canvas with endless possibilities.

  • healthy chicken breast recipes

    healthy chicken breast recipes

    Chicken breasts often get a bad rap for dryness, but when handled right, they can be tender, juicy, and packed with flavor. I like to think of them as a blank slate—easy to dress up with unexpected flavors and textures. This recipe is about breaking that monotony with a punch of citrus and garlic that keeps it fresh and vibrant.

    Why I Keep Coming Back to This Recipe

    Because it’s so adaptable—change the herbs, add a splash of hot sauce, or swap lemon for lime. The process is quick, forgiving, and consistently delivers tender, flavorful chicken. It’s my go-to when I want a satisfying, healthy meal without fuss. Plus, it’s a reminder that simplicity often wins.

    Breaking Down the Key Ingredients

    • Chicken breast: Lean, mild-flavored meat that absorbs marinades well, but can dry out if overcooked.
    • Lemon juice: Brightens the flavor with a zingy, citrusy punch, balancing richness.
    • Garlic: Adds pungent depth, mellowing into sweetness when cooked.
    • Soy sauce: Salty and umami-rich, helps tenderize meat and enhances savoriness.
    • Fresh herbs: Parsley or cilantro add a fresh, grassy note that lifts the dish.
    • Olive oil: Creates a crispy exterior and helps distribute flavors evenly.
    • Salt & pepper: Fundamental seasoning that ties everything together.

    Tools & Equipment for Perfect Chicken

    • Non-stick skillet: Prevents sticking and makes cleanup easier.
    • Meat thermometer: Ensures perfect doneness without guesswork.
    • Tongs: Helps flip the chicken without piercing the meat.
    • Cutting board & sharp knife: For resting and slicing the cooked chicken.

    Step-by-Step for Juicy, Flavorful Chicken Breasts

    Step 1: Start with a boneless, skinless chicken breast. Pat it dry with paper towels to remove excess moisture.

    Step 2: Marinate the chicken in a mixture of lemon juice, garlic, and a splash of soy sauce for at least 30 minutes.

    Step 3: Heat a non-stick skillet over medium-high heat, about 200°C (390°F). Add a drizzle of olive oil.

    Step 4: Place the chicken in the hot pan. Cook for 6-7 minutes on each side, until golden and cooked through.

    Step 5: Use a meat thermometer to ensure the internal temp reaches 75°C (165°F).

    Step 6: Remove the chicken from the pan and let it rest for 5 minutes before slicing.

    Step 7: Finish with a sprinkle of fresh herbs and a squeeze of lemon for brightness.

    Cooking Checkpoints & Tips to Nail It

    • Chicken should be golden-brown on each side with a slight crust.
    • Internal temperature hits 75°C (165°F) — no guesswork needed.
    • Juices should run clear when pierced, not pink or bloody.
    • The chicken should feel firm but springy when pressed.

    Common Mistakes & How to Fix Them

    • Cooking by eye or touch alone.? UNDERCOOKED — Use a meat thermometer to check for 75°C (165°F).
    • Cooking chicken with too much marinade or liquid.? SOGGY CHICKEN — Pat chicken dry before cooking to remove excess moisture.
    • Cutting into hot chicken immediately.? DRY TEXTURE — Let the chicken rest for 5 minutes after cooking.
    • Cooking at too high a temperature.? OVER-TORCHED — Cook on medium heat, avoid high heat that burns the outside.

    Citrus Garlic Chicken Breasts

    This recipe features tender, juicy chicken breasts marinated in a bright citrus and garlic mixture, then cooked to a golden perfection. The process involves marinating, pan-searing, and resting to achieve a flavorful, crispy exterior with a moist interior. The final dish is vibrant, with a slightly crispy crust and a juicy, well-seasoned inside, perfect for a quick, healthy meal.
    Prep Time 40 minutes
    Cook Time 15 minutes
    Total Time 55 minutes
    Servings: 4
    Course: Main Course
    Cuisine: International
    Calories: 250

    Ingredients
      

    • 4 pieces boneless, skinless chicken breasts
    • 1/4 cup fresh lemon juice about 1-2 lemons
    • 3 cloves garlic minced
    • 2 tablespoons soy sauce
    • 2 tablespoons olive oil
    • Salt and pepper to taste
    • 2 tablespoons fresh herbs parsley or cilantro, chopped

    Equipment

    • Non-stick skillet
    • Meat thermometer
    • Tongs
    • Cutting board
    • Sharp knife

    Method
     

    1. Pat the chicken breasts dry with paper towels to remove excess moisture, which helps them sear better and stay juicy.
    2. In a small bowl, whisk together lemon juice, minced garlic, soy sauce, and a tablespoon of olive oil to create a flavorful marinade.
    3. Place the chicken breasts in a resealable plastic bag or shallow dish, then pour the marinade over them, making sure each piece is well coated. Marinate for at least 30 minutes in the refrigerator.
    4. Heat a non-stick skillet over medium-high heat until hot, about 2-3 minutes. Add a tablespoon of olive oil and swirl to coat the pan.
    5. Remove the chicken from the marinade, allowing excess to drip off, and carefully place it into the hot skillet. Sear for about 6-7 minutes on each side, until golden brown and cooked through, with a slight crust forming.
    6. Use a meat thermometer to check the internal temperature; it should reach 75°C (165°F) to ensure safe, perfect doneness.
    7. Once cooked, transfer the chicken to a cutting board and let it rest for 5 minutes; this helps keep all those flavorful juices inside.
    8. Slice the rested chicken breasts into thick strips or serve whole, then sprinkle with chopped fresh herbs and a squeeze of fresh lemon for extra brightness.

    Notes

    Adjust the marinade time for more flavor, or add a splash of hot sauce for extra heat. Serve with your favorite sides for a complete meal.
    Every time I make this, I’m reminded how a simple marinade can elevate chicken from bland to memorable. It’s satisfying to see the pan sear and smell that smoky, citrus aroma wafting up. Feel free to tweak the herbs or acidity — it’s your canvas for a quick, nourishing meal that keeps well in the fridge.

  • easy chicken breast recipes

    easy chicken breast recipes

    Chicken breasts often get a bad rap for being dry or boring. But with a simple brine and a hot pan, you can unlock their hidden juiciness and flavor. This approach is a bit unorthodox because it combines moistening first with a quick salt soak, then a crisp sear—no oven needed.

    What I love about this method is how forgiving it is. It’s less about timing perfectly and more about patience and attention. The result is a chicken that’s juicy, tender, and with a crispy crust—perfect for salads, wraps, or just on its own.

    Why I keep coming back to this recipe

    It’s straightforward but yields a surprisingly complex flavor and texture. The process feels honest—just heat, patience, and a good pan. I love how the aroma of searing chicken fills the kitchen, promising a satisfying bite. Plus, it’s adaptable—throw on different herbs or sauces to change it up.

    Breaking down the ingredients

    • Chicken breasts: Thick, meaty, and mild-flavored; ideal for quick cooking and absorbing flavors.
    • Salt and sugar (brine): Enhances moisture retention and balances flavor—don’t skip the brine.
    • Oil (high-smoke point, like canola or vegetable): Helps achieve that crisp, golden crust without burning.
    • Lemon or herbs (for finishing): Adds brightness and aroma—freshness makes the chicken pop.
    • Black pepper: A simple seasoning—adds just enough spice to complement the savory.
    • Optional: garlic powder, paprika: For extra flavor—use sparingly to avoid overpowering the chicken’s natural taste.

    Tools that make all the difference

    • Heavy skillet (cast iron ideally): Provides even heat and a crisp sear.
    • Meat thermometer: Ensures perfect doneness without overcooking.
    • Tongs: Helps flip the chicken without piercing and losing juices.
    • Paper towels: Thoroughly dry chicken for optimal searing.

    Step-by-step for a juicy, seared finish

    Step 1: Start with a quick brine—dissolve salt and sugar in water, then submerge chicken breasts for 15-20 minutes.

    Step 2: Pat dry thoroughly—moisture is the enemy of a good sear.

    Step 3: Heat a heavy skillet over medium-high heat until shimmering, about 2 minutes.

    Step 4: Add oil—enough to coat the bottom—and wait for it to shimmer.

    Step 5: Place chicken breasts in the pan, smooth side down. Cook undisturbed for 5-6 minutes, until golden.

    Step 6: Flip and cook another 4-5 minutes, until the internal temp hits 75°C (165°F).

    Step 7: Remove from heat, cover, and let rest for 5 minutes to keep juices in.

    Step 8: Slice and serve with a squeeze of lemon or a drizzle of pan juices.

    Cooking checkpoints & tips to get it just right

    • Chicken should be firm but not rubbery—poke to check for slight bounce.
    • The underside should be a rich, golden-brown—don’t rush the sear.
    • Internal temperature hits 75°C (165°F)—use a reliable probe.
    • Juices run clear when pierced—no pink or bloody spots.

    Common mistakes & how to fix them

    • Chicken steamed instead of seared.? Forgot to dry the chicken—pat it completely dry with paper towels.
    • Soggy, pale chicken.? Cooked at too low a heat—turn up the heat to get a proper sizzle.
    • Overcooked, dry chicken.? Left the chicken in the pan too long—use a timer and probe for 75°C.
    • Juice loss and dry bites.? Didn’t rest the meat—let it sit for 5 minutes before slicing.

    Juicy Crispy Seared Chicken Breast

    This recipe features chicken breasts that are brined, patted dry, and seared in a hot pan to achieve a crispy crust and tender, juicy interior. The process involves a quick salt soak, high-heat searing, and resting for optimal moisture retention, resulting in a flavorful, visually appealing dish perfect for salads or solo eating.
    Prep Time 20 minutes
    Cook Time 12 minutes
    Total Time 32 minutes
    Servings: 2
    Course: Main Course
    Cuisine: American
    Calories: 250

    Ingredients
      

    • 2 pieces chicken breasts preferably thick-cut
    • 1 tsp salt for brining
    • 0.5 tsp sugar for brining
    • 1 tbsp oil high smoke point, like canola or vegetable oil
    • to taste black pepper freshly ground
    • optional lemon or herbs for finishing

    Equipment

    • Heavy skillet (cast iron preferred)
    • Meat thermometer
    • Tongs
    • Paper towels

    Method
     

    1. Dissolve the salt and sugar in 1 cup of water to create a quick brine. Submerge the chicken breasts in the brine and let sit for 15-20 minutes, allowing the flavors to penetrate and moisture to be absorbed.
    2. Remove the chicken from the brine and pat dry thoroughly with paper towels. Ensuring the surface is dry helps achieve a crisp sear.
    3. Heat a heavy skillet over medium-high heat until shimmering and hot, about 2 minutes. This ensures an even, high-temperature sear.
    4. Add the oil to the pan, swirling to coat the bottom evenly. Wait until it shimmers and just begins to smoke slightly.
    5. Place the chicken breasts in the pan, smooth side down. You should hear a satisfying sizzle. Let them cook undisturbed for 5-6 minutes, until the underside turns a deep golden brown and releases easily from the pan.
    6. Flip the chicken using tongs and cook for another 4-5 minutes on the second side. Use a meat thermometer to check that the internal temperature reaches 75°C (165°F).
    7. Remove the skillet from heat, cover loosely with foil or a plate, and let the chicken rest for 5 minutes. Resting allows the juices to redistribute, keeping the meat juicy.
    8. Slice the chicken against the grain, then squeeze fresh lemon or drizzle pan juices over the top for brightness and added flavor. Serve immediately for the best crispy, juicy experience.

    Notes

    Adjust searing times based on chicken thickness. Always verify internal temperature for safety. Feel free to sprinkle herbs or spices before serving for variety.
    This method is all about patience and heat control. You end up with chicken that’s tender inside, with a beautifully crisp exterior. It’s simple enough to do on a busy weeknight but feels special enough for guests. Play around with herbs or spices to match your mood.

  • chicken breast recipes

    chicken breast recipes

    Chicken breasts can be so boring if you stick to the same old grilled or baked routine. I like to think of them as a blank canvas—an opportunity to layer in bold flavors and textures. This recipe is about pushing that boundary with a quick marinade and a hot sear that caramelizes the surface, locking in juiciness.

    Why I Keep Coming Back to This Recipe

    It’s simple enough for a weekday, yet feels special. The way the lemon and garlic meld into the smoky crust—each bite is a little burst of comfort and brightness. Plus, it’s forgiving, flexible, and always turns out juicy when I follow these steps. That moment when I slice into it and the juices glisten—nothing beats that.

    Breaking Down the Ingredients

    • Chicken breast: Lean, tender, a blank slate for flavors—choose fresh, organic if possible.
    • Lemon juice: Brightens and tenderizes—swap with lime for a different citrus punch.
    • Garlic: Adds smoky, pungent notes—roast slightly for a sweeter depth.
    • Smoked paprika: Gives a subtle smoky earthiness—use regular paprika if you’re out.
    • Olive oil: Helps sear evenly—go for good-quality extra virgin for richer flavor.
    • Salt & pepper: Fundamental seasoning—adjust to your taste, don’t skip.
    • Optional herbs (thyme, rosemary): Fresh herbs elevate the aroma—add at the marinade stage or garnish.

    Tools & Equipment for Juicy Chicken

    • Cast-iron skillet: Provides even heat and great sear, essential for that crispy crust.
    • Meat thermometer: Ensures precise doneness without overcooking.
    • Tongs: Turns the chicken gently and evenly.
    • Aluminum foil: Rest the meat and keep it warm.

    Step-by-Step Guide to Perfectly Juicy, Flavorful Chicken Breast

    Step 1: Start with a fresh, organic chicken breast; the quality makes all the difference in tenderness.

    Step 2: Marinate it in a mixture of lemon juice, garlic, and a dash of smoked paprika for at least 30 minutes.

    Step 3: Heat a cast-iron skillet over medium-high heat until it’s just starting to shimmer, about 2 minutes.

    Step 4: Sear the chicken for 4-5 minutes per side, until a deep golden crust forms and it releases easily from the pan.

    Step 5: Use a meat thermometer to check for 75°C (165°F) in the thickest part of the breast.

    Step 6: Let it rest for 5 minutes off the heat, loosely tented with foil, to lock in juices.

    Step 7: Slice against the grain and serve with a drizzle of the pan juices for maximum flavor.

    Cooking Checkpoints & Tips for Success

    • Look for a rich, golden crust forming before flipping.
    • Use a thermometer, don’t guess—75°C (165°F) is the safe, juicy zone.
    • The chicken should jiggle slightly in the center when done; avoid overcooking.
    • Rest the meat properly to keep it moist and flavorful.

    Common Mistakes & How to Fix Them

    • Cooking without checking internal temperature.? Use a meat thermometer instead of guessing; avoid rubbery or dry results.
    • Crowding causing the chicken to stew instead of sear.? Don’t overcrowd the pan; cook in batches if needed to avoid steaming.
    • Cutting into it immediately, losing juices.? Let the chicken rest for at least 5 minutes.
    • Searing at too low a temperature, resulting in pale, soggy crust.? Ensure your pan is hot before adding the chicken.

    Garlic Lemon Chicken Breast

    This recipe features chicken breasts seared to a golden crust with a quick marinade of lemon, garlic, and smoky paprika. The high heat creates a caramelized surface while locking in juicy tenderness, resulting in a flavorful, visually appealing dish with bright citrus notes and a savory crust.
    Prep Time 40 minutes
    Cook Time 10 minutes
    Total Time 50 minutes
    Servings: 4
    Course: Main Course
    Cuisine: International
    Calories: 250

    Ingredients
      

    • 4 pieces chicken breasts preferably organic and fresh
    • 1/4 cup lemon juice freshly squeezed for best flavor
    • 3 cloves garlic minced
    • 1 teaspoon smoked paprika or regular paprika
    • 2 tablespoons olive oil good quality extra virgin preferred
    • to taste salt & pepper adjust according to preference
    • optional fresh herbs (thyme, rosemary) for marinade or garnish

    Equipment

    • Cast iron skillet
    • Meat thermometer
    • Tongs
    • Aluminum foil

    Method
     

    1. Place the chicken breasts in a shallow dish and pour over the lemon juice, minced garlic, smoked paprika, and a drizzle of olive oil. Season with salt and pepper, then toss to coat evenly. Let marinate for at least 30 minutes to infuse flavor and tenderize.
    2. Heat the cast-iron skillet over medium-high heat until it shimmers and you can hear a gentle sizzle. Add a splash of olive oil and swirl to coat the pan evenly.
    3. Remove the chicken from the marinade, letting excess drip off, and carefully place it into the hot skillet. Sear for about 4-5 minutes without moving, until the surface develops a deep golden crust and releases easily from the pan.
    4. Flip the chicken using tongs and cook for another 4-5 minutes, maintaining a steady sizzle. The crust should be crispy and deep golden, with the chicken feeling firm yet slightly springy when pressed.
    5. Insert a meat thermometer into the thickest part of a breast to check for 75°C (165°F). Once reached, remove the chicken from the skillet and transfer to a plate.
    6. Tent the chicken loosely with aluminum foil and let it rest for 5 minutes. This step allows the juices to redistribute, keeping the meat moist and flavorful.
    7. Slice the chicken against the grain into thick strips or rounds, and arrange on a plate. Drizzle with any pan juices and garnish with fresh herbs if desired for a bright, aromatic finish.
    Cooking chicken breasts this way is a revelation—moist, tender, with a smoky brightness that’s hard to beat. It’s a simple process, but the results feel like a little celebration on a plate. Once you get the hang of the sear and resting, it’s easy to keep coming back for more, tweaking spices and accompaniments. Enjoy the process and make it your own—these breasts are surprisingly forgiving, and always worth the effort.